Showing posts with label Versafine Black Ink. Show all posts

Wednesday, 21 November 2018

Song of the Sea

Morning Friends and Crafters, My Dolphins are making another appearance for my project this morning. This time I have used them alongside ;The Funky Tree' from Leonie along with some other stamps to create this double scrapbook or Journal page. The Amsterdam Acrylics, brought to us by Lou are superb for creating the textured background and layers. Like she often says they go such a long way,as soon as you use them the quality is clear.

You will Need:
Funky Tree Stamp By Leonie Pujol
Leonie Pujol Typography Alphabet Dies
Rose Leaf Stamps
PaperArtsy Stencil or your chosen Design
Medium/Large Bubble Wrap
Selection of Gel Pens
Amsterdam Acrylics
Personal Photos
Extra Stamps of your Choice
Versafine Ink Pad Black
Black Fine Liner Pen
Black Card for Mounting your Photos
Yellow and Orange Brusho.
White Stamping card

Step 1: Use a selection of the Amsterdam Acrylics to create a textured background, here i have used a selection of blues and greens. Don't worry they go a long way, so you use very little. Use cross swipes to create as much texture and depth as you can overlaying the colours. Next paint the same colours onto your bubble wrap and stamp with it, either scrunch it up or mount it on a block with Tack n Peel.Stamp the first of the tree bases with Versafine Black ink.

Step 2: Create a mask for the tree base on copier paper. Stamp a couple more tree bases. Next I added a staircase which was printed onto rice paper, this was to coordinate with one of the photos I used. I then added the tops of the trees, these give a lot of texture, depth and dimension, especially hen you colour them with your gel pens. Next stamp a flurry of rose leaves around the top left of the first page, this will keep drawing your eye into the page.

Step 3: Use a block stencil around your page, this will add more depth and interest to your page, I have used a lighter colour here but you can stick to a background colour if preferred. Mount your photos onto black card, before securing them gut the centre with a basic die, the middles can then be used to mount any other photos, it saves an awful lot of card and keeps the bulk down in your journal or scrapbook.

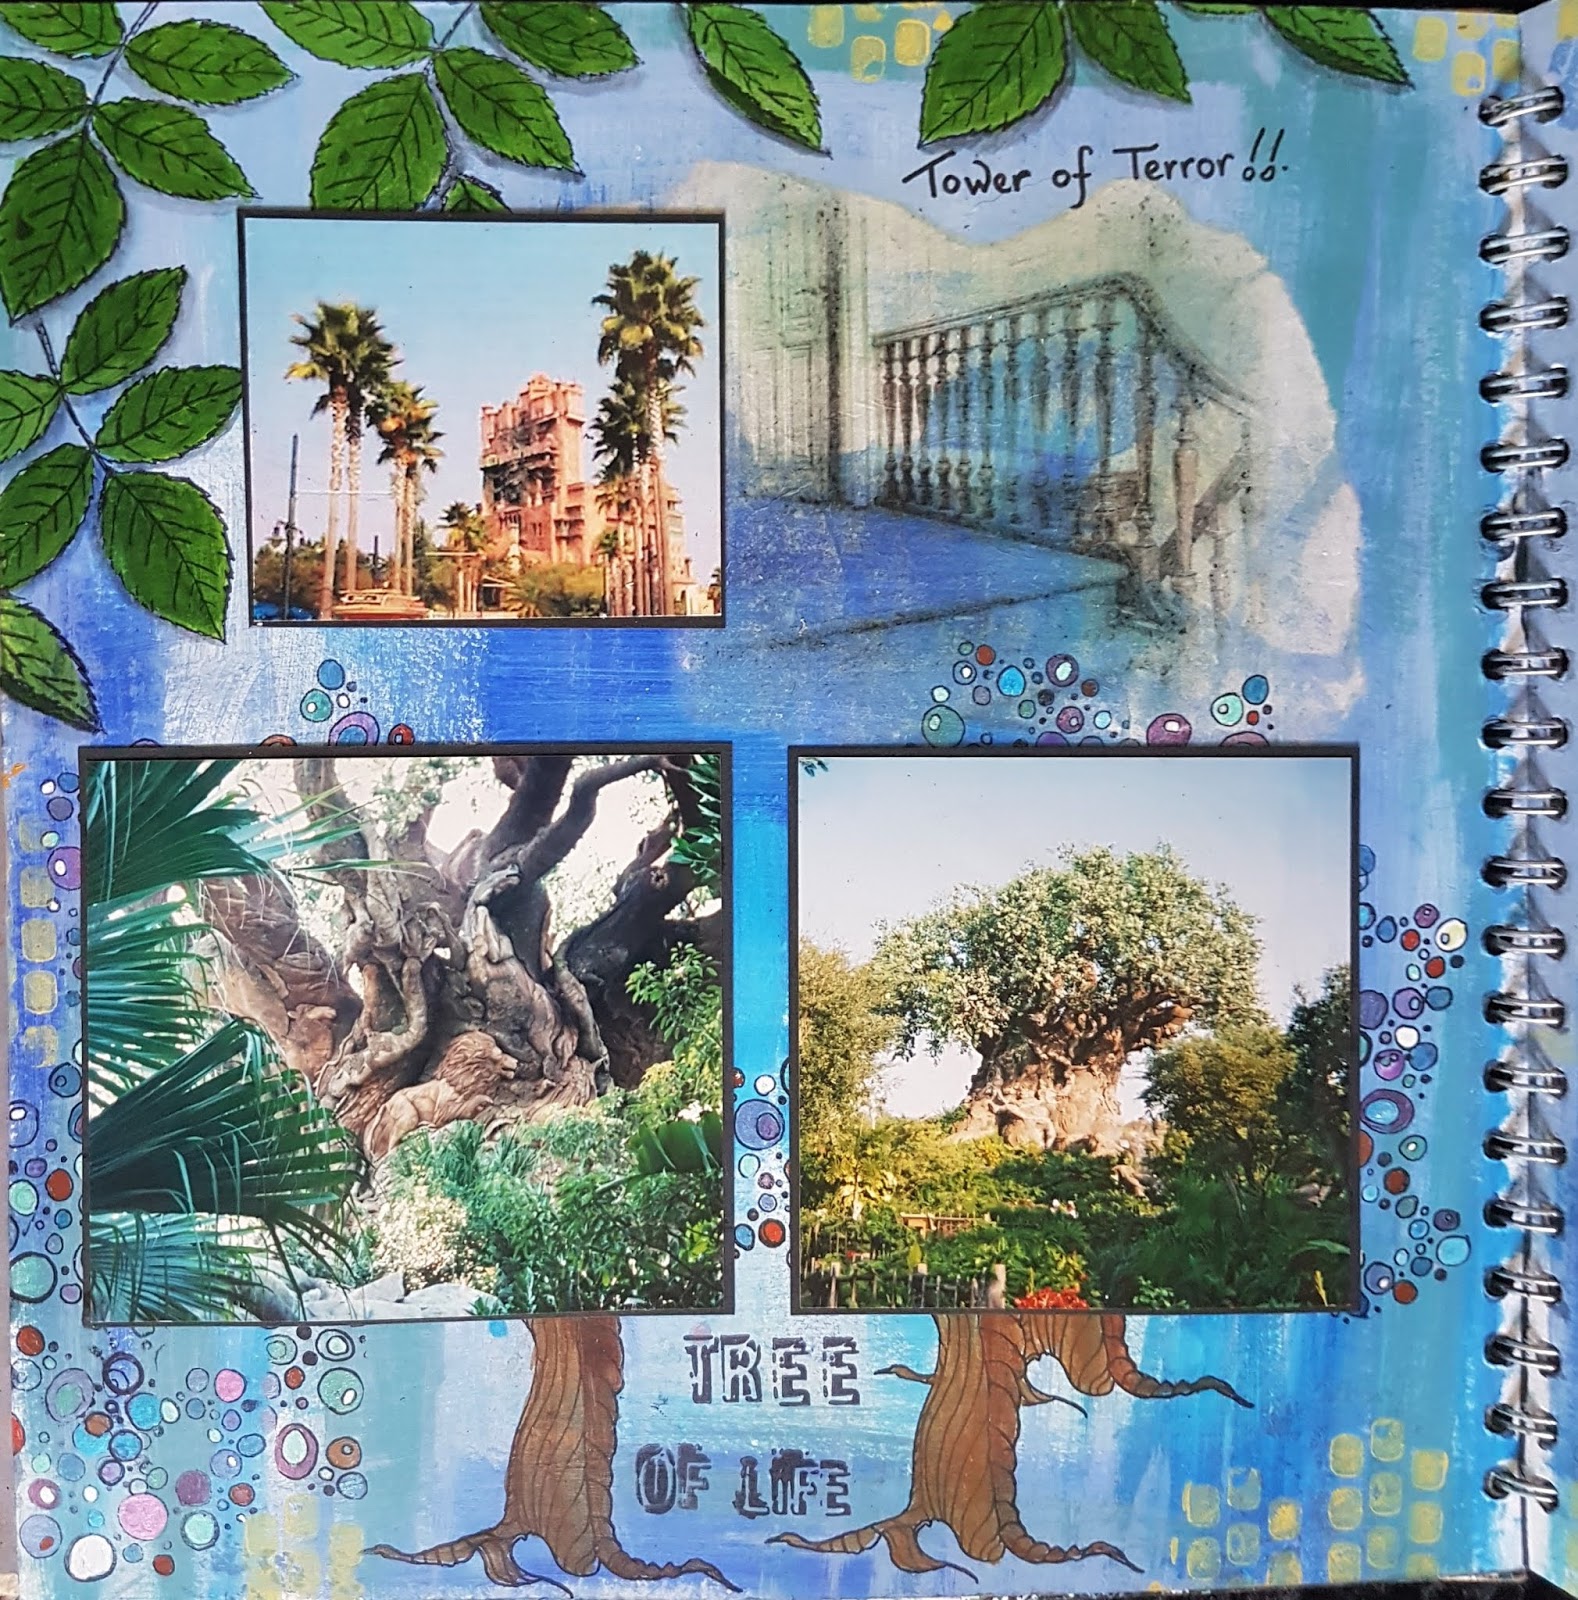
Step 4: Repeat the stenciling on the second page. Cut out the word required with the alphabet and colour with the Brusho. Stamp your Dolphins and chosen words. Use the acrylics again to colour them, Lastly mount and secure your photos. Whatever photos you decide to use, you will create a wonderful page to display your photos and so much nicer than leaving them in a box or on the phone.

Just a little extra here: If you have not shopped with Hochanda before, here is a voucher code giving you 30% off your first purchase (FEY5JBP7) it can be used for any purchase, feel free to share it.


As you know I love writing my blog and helping as much as I can, well I would really love for you to add you support by adding me as a favourite blog. All you need to do in that section is choose other and add my blog address nickinbarnsley.blogspot It would be great to get a mention even if I dont come anywhere.

Here is the link to add your support for all of the categories. 


Thank you ever so much for joining me today, I hope you have enjoyed the tutorial along with the finished project. Please stop by again to see what else I have to share with you. Take care and Happy Crafting.xx


Saturday, 10 November 2018

Dark and Scary

Morning Friends & Crafters. I switched on this morning to find that there was no blog scheduled, I dont know how that slipped through my fingers. So here is a project I have written up today. It's a journal page, a little dark but by altering the colours and the background stamps you choose it could have a totally different feel to it. How about doing a double page with both styles as a real contrast. to show different feelings. This could also make a great card, scaled down and as always a great ATC. I have said before I love to capture cards and projects I do as ATC's to keep, especially when they're for the Design Teams.

You Will Need: 
Craftascope 'Bailey' A5 Media Stencil
Craftascope 'Dolphin' Stamp Set 1
Craftascope 'Profile' Stamp Set 2
Selection of Brusho
HB Pencil
Tim Holtz Distress Crayons
12 x 12 Journal Book (Pink Pig), card or chosen media
White Gel Pen
Pebeo Drawing Gum
Black Card
White Card
3D Glue Gel
Tacky Glue

Step 1: Select the position for your stencil, Use the outside lines to trace through. Mask the face with Pebeo Drawing gum.

Step 2: Spritz your project and sprinkle with your Brusho. When dry, remove the drawing gum.

Step 3: Roughly outline the face using a black Distress Crayon. Start building up you layers of your face with the crayons.

Step 4: Use a very small amount of the black around the face and smudge away with your finger, this will really highlight the face, while giving depth to the finished piece.

Step 5: Stamp your words onto white card, then mount onto black. Next use some lighter Distress Crayons to add colour to these words.

Step 6: Use a selection of your chosen stamps to create the background and the feeling of your project.I have gone quite dark with this on using stamps by AALL&Create. But the stamps you choose to use will totally change the feeling of your project. It could just as easily be bright and cheerful, depending on how you feel on what you want to create.

Before I go there is one more thing, here is a 30% off voucher to use on your FIRST order (anything) from Hochanda, use code FEY5JBP7. 

As you know I love writing my blog and helping as much as I can, well I would really love for you to add you support by adding me as a favourite blog. All you need to do in that section is choose other and add my blog address nickinbarnsley.blogspot It would be great to get a mention even if I dont come anywhere.

Here is the link to add your support for all of the categories. 

https://www.britishcraftawards.com/

Thank you for joining me today, I hope you have enjoyed the tutorial along with the finished piece. Please pop by again to see what else I have to share with you.xx

Thursday, 8 November 2018

Face Pop Art

Hi everyone, I have a pop art journal page for you today. A little bit different for me, but it's been one of the great things to come from my collection, it has taken me in many different directions. It's been great journey and a pleasure to try so many new areas, I hope it will do the same for any of you who bought it as I have designed it to go will just about anything you can think of. I do like to think that some of you will do the same and try something very different to your normal style. You might follow a totally different path. I have had so many ideas of other things I would like to do with this collection, it's just such a shame we cant stretch time. This project has been great fun, you could use any one of these sections as a card for someone or just make a card in this style.

You Will Need:
Craftascope Art Media Stencil Collection Trent,Xander,Bailey and Brendan
Craftascope Dolphin Stamp Set 1
Spotty Washi Tape
Watercolour Paints
Pencil
Versafine Black Ink Pad
Copier Paper

Step 1: On your 12 x 12 Sheet or Journal Page, use Washi Tape to divide the page, Place each stencil in turn and draw around it with a pencil. For the top section I just flipped the stencil.

Step 2: Using watercolours, paint all of the faces. Then choose some really bright colours to use for the backgrounds. Next choose and stamp the words into each of the sections. You can really play with the faces and make them individual, Have lots of fun!!

Step 3: Use the stencils again with Versafine Black ink and a smoothie or phat foam to add back the lines and finish the pop art look.

I hope this has given you some ideas, it doesn't have to be the same project but elements or even the style, just another way to use the collection, which I hope you like.

As you know I love writing my blog and helping as much as I can, well I would really love for you to add you support by adding me as a favourite blog. All you need to do in that section is choose other and add my blog address nickinbarnsley.blogspot It would be great to get a mention even if I dont come anywhere.

Here is the link to add your support for all of the categories. 

https://www.britishcraftawards.com/


Until Tomorrow, Take care and Happy Crafting.xx


Saturday, 27 October 2018

Card Box and Notelets

Morning Friends and Crafters, I have a full project here for you today, It's a little card box and Notelets. It would make a lovely little gift for someone, or you could even make them to sell for yourself or for a special charity. For these I have used the wonderful stamps from Clarity 'A Little Bird' collection.

I have a special and very exciting post over on the Hochanda Blog today as well, if you get time it would be great if you would take a look and even better if you could leave a comment there.

You will Need:
Clarity 'A little Bird' Stamps
Acetate
Centura Pearl Box 6 x 6'' Finished Size
Amsterdam Acrylics
Versafine Black Ink Pad
Stayzon Black Ink
Basic Square Die
Tacky Glue
Red Liner Tape
 Selection of Coordinating Distress Oxides
Watercolour Card
Black Card
Centura Pearl Card Bases

For the Box:

Step 1: Start by cutting 2 x 8'' squares of Centura Pearl card. Score at 1'' on each side, use your big score and score one on the base side and one on the lid side of your board. Make sure you know which is your lid. In the lid cut an aperture approximately 4'' (just slightly bigger than the stamped image so you get a border.

Step 2: Stamp you design on Acetate, using Stayzon black ink. Then on the reverse, paint the design with the Amsterdam Acrylics.

Step 3: Cut the Acetate about 1 cm larger than the aperture.

Step 4: Secure behind the aperture using red liner tape.

For the Notelets:

Step A: On the watercolour card, make a selection of backgrounds for your notelets. Use colours that you feel work together. Add these colours to a large stamping block and spritz the block and the card, then apply. You can get some really interesting patterns like this. Leave them to dry.

Step B: Stamp your design on to each coloured background and mount onto black card. Cut a base card, leaving enough space to stamp one of the word chains on each one.

Step C: Repeat this for each one of your notelets, one for each of the colour selections you have chosen.

and here is a selection with the finished box:


Thank you, I am so pleased you have stopped by today. I do hope you have enjoyed the tutorial along with the finished project. Another thing, here is a 30% off voucher to use on your first order (anything) from Hochanda, use code FEY5JBP7.

I do have a post on the Hochanda blog today so it would be great if you could take a look and it you have time to leave a comment. For now Take care and Happy Crafting.xxx


Wednesday, 5 September 2018

Joy with the Clarity Townhouse Three Way Overlay Stamps

Morning everyone great to be sharing another card with you today. This is a card I made for the show with Barbara on Sundays show. I do hope you all enjoyed the celebration for the 25 Years of Clarity.

You will need:
Clarity Three way Overlay Townhouse Stamp Set
Clarity Moon Mask
Clarity 'Joy' Word Chain Stamps
Versamark Black Ink Pad
Metro Grey Ink Pad
Distress Ink Pads: Blueprint Sketch, Chipped Sapphire, Black Soot
Basic Rectangle Die
Copier Paper
Washi Tape
Black Fine Liner Pen
Ruler
White Stamping Card
Chipped Sapphire Core'dinations card
White Card Base

Step 1: Mask off the top edge of your outline stamp with Washi tape, Ink up your outline stamp with Versafine, remove the tape and stamp your design. Allow room at the top of your card to extend the image.

Step 2: Use the positive stamp with Metro Grey ink, I stamped twice to give a stronger colour.

Step 3: Cut a basic rectangle die into your copier paper to form a  mask in line with the stamped lines. Line up and secure to your design. Add the mask included to protect the houses, then add the moon mask in the sky.

Step 4: Using your lightest Distress ink, start building up the colour in the sky, then add more using the other 2 colours, remember less is more when it comes to Black Soot. Keep the colour lighter towards the roof tops, where the moonlight will be.

Step 5: Using the fine liner and ruler, elongate the box frame around the design. Then stamp the 'Joy' partly within the moon.

Step 6: Mount onto a piece of Chipped Sapphire card (remember to gut it with a die to use on another project). Secure this to your base card.

Here is the finished card:

Many thanks for joining me today, I do hope you have enjoyed the tutorial and the finished card I have shared. I do hope you will join me again very soon as I always have something to share with you. For now Take care and Happy Crafting.xxx