Showing posts with label acetate. Show all posts

Tuesday, 9 July 2019

Christmas Baubles

Hi Friends and Crafters, as today is the last day of Christmas on Hochanda I thought I would add something festive using the Retro Leaves from the Retro Collection along with the Triskaidecagon dies, which are unique and incredibly useful for so many projects.

You Will Need: 
Centura Pearl Silver/White card
Centura Pearl 120 gsm Silver/White paper
Construction Acetate
Snow Fall Acetate
Sentimentally Yours Silver Embossing Powder
Versamark Pad
Antistatic Bag
Mirror Card
3D Glue Gel
Tacky Glue
Red Thread

Step 1: Cut your base from Acetate. Fold in half and make sure your die slightly overlaps the fold.

Step 2: Cut 2 frames, using the first and fourth dies, you could use the 3rd if you want a thinner frame. Cut one piece of Centura using die 1 and another using die 2, trim the back of each to match the acetate.

Step 3: Cut a piece of the snowfall acetate using the second die to fit neatly inside the frames you have made. Use red liner tape and a little 3D glue gel to secure the acetate to the back frame, leave the front for a little later.

Step 4: Cut 3 of the Retro Leaves from Mirror Card, thread them with red embroidery thread. Arrange and secure them to the front of the acetate.**Make sure you line up the die with your base first to ensure it's definitely the top.

Step 5:Take the large Centura base and secure it under the acetate using 3D glue gel.

Step 6: Repeat with the smaller piece of Centura, This leaves the wonderful detail from the acetate showing and the card but also hides the glue from below.

Step 7: Secure the frame too your easel card base with the red liner tape and 3D glue gel.

Step 8 & 8a Cut the clematis  using the Centura Pearl paper, then emboss with the coordinating stamp and the silver powder. Repeat this with the 'Peace' sentiment and secure to your card.


Here is the finished card, using the Retro Leaves in a totally different way and adding a little festive cheer.

Thank you ever so much for joining me today, I really hope you have enjoyed the tutorial and that you will join me again soon. Don't forget to subscribe and watch out on my Youtube Channel as I am doing more on there including the 'Natter with Nick' and the 'Back to Basics' with Craftascope series. If there is anything you would like to see included in the Back to Basics show, please leave a comment under the video and I will try to include it in future shows.

Lastly, I have to do another reminder as I hat people to lose out. There are things in baskets on my Etsy store and there really isn't enough stock to cover the ones in baskets, if there is anything you want please check out, some of the things wont be coming back either. Take care and Happy Crafting.xx


Saturday, 27 October 2018

Card Box and Notelets

Morning Friends and Crafters, I have a full project here for you today, It's a little card box and Notelets. It would make a lovely little gift for someone, or you could even make them to sell for yourself or for a special charity. For these I have used the wonderful stamps from Clarity 'A Little Bird' collection.

I have a special and very exciting post over on the Hochanda Blog today as well, if you get time it would be great if you would take a look and even better if you could leave a comment there.

You will Need:
Clarity 'A little Bird' Stamps
Acetate
Centura Pearl Box 6 x 6'' Finished Size
Amsterdam Acrylics
Versafine Black Ink Pad
Stayzon Black Ink
Basic Square Die
Tacky Glue
Red Liner Tape
 Selection of Coordinating Distress Oxides
Watercolour Card
Black Card
Centura Pearl Card Bases

For the Box:

Step 1: Start by cutting 2 x 8'' squares of Centura Pearl card. Score at 1'' on each side, use your big score and score one on the base side and one on the lid side of your board. Make sure you know which is your lid. In the lid cut an aperture approximately 4'' (just slightly bigger than the stamped image so you get a border.

Step 2: Stamp you design on Acetate, using Stayzon black ink. Then on the reverse, paint the design with the Amsterdam Acrylics.

Step 3: Cut the Acetate about 1 cm larger than the aperture.

Step 4: Secure behind the aperture using red liner tape.

For the Notelets:

Step A: On the watercolour card, make a selection of backgrounds for your notelets. Use colours that you feel work together. Add these colours to a large stamping block and spritz the block and the card, then apply. You can get some really interesting patterns like this. Leave them to dry.

Step B: Stamp your design on to each coloured background and mount onto black card. Cut a base card, leaving enough space to stamp one of the word chains on each one.

Step C: Repeat this for each one of your notelets, one for each of the colour selections you have chosen.

and here is a selection with the finished box:


Thank you, I am so pleased you have stopped by today. I do hope you have enjoyed the tutorial along with the finished project. Another thing, here is a 30% off voucher to use on your first order (anything) from Hochanda, use code FEY5JBP7.

I do have a post on the Hochanda blog today so it would be great if you could take a look and it you have time to leave a comment. For now Take care and Happy Crafting.xxx


Saturday, 17 February 2018

Crystal Timepiece

Morning, Today I am sharing a card I made for the lunch of the Brand New Easel card die's. These are smashing dies, to enable you to create those perfect base, either plain or elaborate. Leaving you to add your own mark with decoration, let your creativity flow.

For this card you will need:
Timepiece Easel Die
Acetate
Tissue Paper
Alcohol Inks
3D Lacquer
Gloss Black card
Silver Mirri card


Step 1: Create you acetate background. Add the alcohol inks of your choice randomly over the back of your acetate, upto 4 colours give a good result. Then add 3D Lacquer all over the back of your piece, finally cover this with crinkled tissue paper. Make sure this is thoroughly stuck down to your work and leave to dry.

Step 2: Create you easel base using black gloss card. Cut a smaller shield from silver mirri and secure it to your base with all purpose glue.

Step 3: Again using your smallest shield along with the smaller of the two inserts, cut into your black card. Secure this over the mirri on your base.

Step 4: Use the large shield to cut the top part from Silver Mirri and the acetate. From a piece of the black, cut the large shield, including the two inserts.

Step 5: Cut additional cogs from the black, mirri and acetate you have left over. Also cut an additional pocket watch from black.

Step 6: Assemble all the parts you have cut using Collall all purpose glue

Step 7: Finally arrange your cogs which will form the stopper for your card.

Thank you for taking the time to stop by and see what I am sharing today. I hope you enjoyed the tutorial. I hope you will take the time to add your comments or feedback. I do like to read them. I do have a question, Would you prefer just to have a photo of the finished card on facebook rather than a tutorial. Many thanks. For now Take care and Happy Crafting.xx

Saturday, 1 October 2016

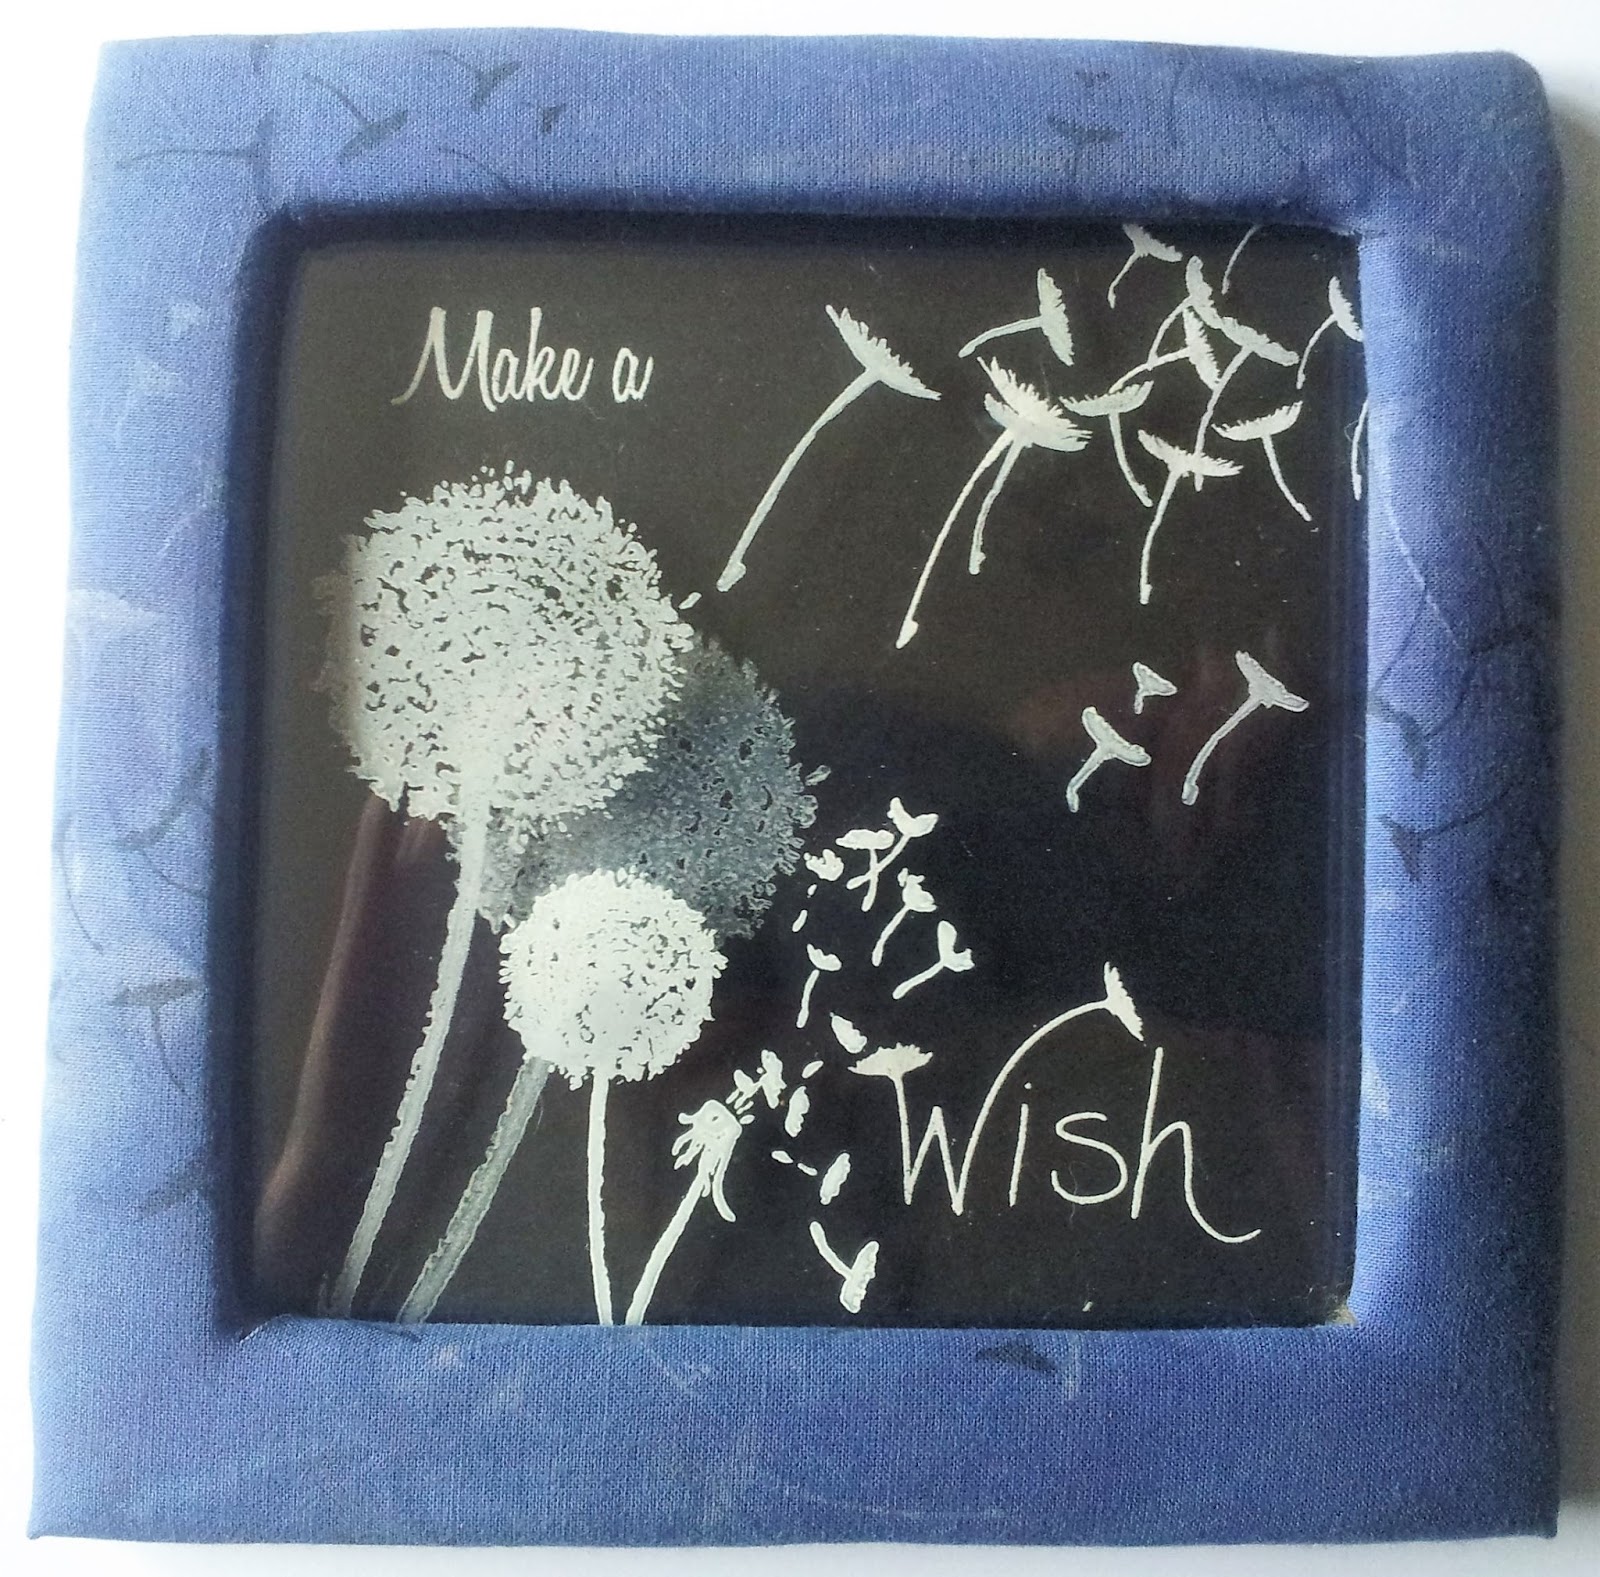
Make a Wish

Morning, This is one of the projects I made for Bev's Bee Crafty launch show on Hochanda live from Alexandra Palace. I wanted to add a frame to this large MDF piece and to create and almost 3D look with real depth, like the layered glass images you sometimes see. I used the beautiful Dandelion set for this, it's such a wonderful set of stamps with such great detail.

To start with, I took a piece of cardboard and cut it to the same size as the MDF. Then using a square die I cut an aperture that would give a large enough window for the design while still keeping enough of the frame for the support needed.

Next I cut some thick wadding to the same size as the frame I had cut from the cardboard.

I coloured the back section of my MDF with Black Soot Distress Ink, the MDF has such a super smooth finish and takes inks extremely well, without any need for an undercoat. I wanted to keep the smooth surface for this piece.

On this back section I used Versamark to stamp the Sentiment, Dandelion and Seed Heads, then embossed with White detail embossing powder, making sure that the design fitted within the frame. To add the other layers I used squares of acetate large enough to fit behind the frame. Taking the first sheet I overlaid it onto the MDF stamped image to allow me to position the next layer of stamping, for these I used white Stayzon Ink. I repeated this for my next layer. When these were both dry, I secured them in turn using foam tape to give the distance between layers.

I took a square of cream calico  and stamped the dandelion seed heads around the area where the frame would be. I stamped them in both Black Versafine Ink and Versamark to act as a resist. Then I dyed the fabric using a blue denim fabric dye.

Once dry, I cut the centre so I could cover the frame.

I stretched and secured around the inner frame using Cosmic Shimmer glue. Because of the tab at the bottom I just folded this edge and secured above the tab. The other 3 sides were secured with Wonder Tape and Cosmic Shimmer glue.

I covered the base/stand with the same fabric I had used for the frame and cut out the slit.

To finish I secured the frame to my base with Cosmic Shimmer glue.

I hope you like this project and the step by step I have shared with you today, I thoroughly enjoyed making it and sad that I had to send it for the show. Hope to see you again tomorrow, Take care and Happy Crafting.xx

Sunday, 21 August 2016

Cracker Box

Morning, Here is the Cracker Box for the cracker I made yesterday. Leonie's stamp and die collection made it so easy to create little extra's for Christmas, that all coordinated. If you missed any shows, they are still available on Catch Up via Hochanda's website.

Laid side by side the crackers I made measured approximately 6 x 7'', so the box needed to be this size when finished, I also wanted it to be 2'' deep. Therefore I took two identical pieces of white Centura Pearl card measuring 10 x 11''. Using my Big Score, I scored at 2'' on all sides, one box lid and one box base. On the base piece, I  cut the corners to form tabs, I did not score and fold at this point. I was also going to use the pearlescent side for the inside of my box.

Taking the box lid, I cut 1 1/4'' from all sides to make the lip shorter, I then cut a square aperture in the centre using a basic square die. I also cut a square of acetate that would form the window.

I calculated where the lid would sit and just below this mark I stamped one of the line sentiments on each of the four sides. I used an anti static bag, versamark and fine detailed embossing powder in silver.

I decorated the box lid and base using a selection of the snowflakes, The inks I used were the same as the other coordinating items: Shaded Lilac, Blueprint Sketch Distress inks and Summer Sky Memento.

From white Centura Pearl, I cut the Entwined Snowflake Base, twice.

I assembled the box base and lid using Cosmic Shimmer glue. I secured the acetate inside the box lid using red liner tape and then arranged the snowflakes inside using 3D glue gel.

Thank you so much for your visit today, I hope you have enjoyed this project and the step by step I have shared. Hope to see you again tomorrow. Take care and Happy Crafting xx


Saturday, 18 June 2016

Crystal Hearts and Gilded Butterflies

Follow my blog with Bloglovin

Morning, Here is a card I made with the lovely dies that Leonie Launched on Hochanda. I have had a lot more time to craft with them now and I am really enjoying coming up with some new ideas.

To make the background for the hearts and aperture of this project, I took a sheet of acetate along with a selection of alcohol inks in Blues,Purples and red. I also used some blending solution, 3D Crystal Lacquer and a sheet of tissue paper.

All over the acetate, I added a few drops of the alcohol inks, using more of the blues and purples with just a little of the red. I then added some blending solution to allow the colour to move. I sprinkled some silver mica and at the same time added a generous amount of 3D Lacquer. I then placed tissue paper over the top and manipulated the mica and colours until I was happy. I made sure all the tissue was coated and left it to dry overnight.

I made a card base measuring 8'' Square from black card and cut out the 'Folk Heart' die from Leonie's collection in the centre.


Then I cut the same heart again to give me two of the fine fame hearts.


I used the outside of the die to draw around onto the acetate to allow me enough extra to adhere it to the back of the aperture. I stuck the fine frame hearts to my acetate and trimmed away the excess with scissors.

I cut two butterflies and the word 'Love' from dies in the collection.


Then I covered these in flitter glue and used gilding flakes to cover them, then set aside.


I secured the hearts to my card using 3D glue gel to raise them up, either side of the aperture heart, 


Using a damp sea sponge, I sponged flitter glue spots around the black card and covered with gilding flakes. This was my project finished.


Thank you so much for your continued support. I am hoping that you are enjoying my blog, the things I share and the step by steps. Thanks so much for your lovely comments, I do read every one of them. Hope you will visit again very soon. More tomorrow. Take care xxx