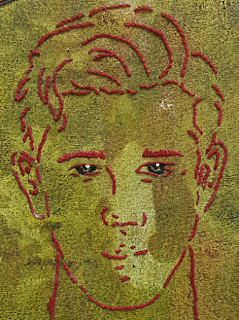
Showing posts with label Media Stencil. Show all posts

Wednesday, 28 November 2018

Mica Face

Morning Friends and Crafters, so pleased you are joining me again today. I thought I would share something easy, but really striking and effective. It would make a really fun card for a guy or any occasion really, depending on what you add or the sentiment you choose.For the background layer I have used the script stamp from Leonie, it's an amazing stamp to create backgrounds or add texture, interest or dimension to any project, it's out in my craft room constantly.

You will Need:
Selection of Mica Powders
Versamark Ink Pad
Anti Static Pad
Soft Brush
Crafters Companion 'Spray n Shine'
Black Gloss Card
Purple Centura Pearl card
White Card
Black Card Base
Collall Tacky Glue
Collall 3D Glue Gel

Step 1: Wipe over your card with the anti static bag, position your stencil and ink through with the Versamark ink pad.

Step 2: Remove the stencil and sprinkle your chosen colours of mica.

Step 3: Use a very soft brush to remove the excess powder and lightly polish the card with the brush. Spray a very light mist of the Spray n Shine to set the mice in place.

Step 4: Repeat the process, this time using the script stamp to create your next layer. Mount your design onto the script background then onto the purple layer before adding it to your card base. Don't forget to gut your card layers with a basic die to save weight and card for other projects.

Step 5:On another piece of gloss card, stamp your sentiment as before and coat with the mica. Brush away the excess and polish with the soft brush, Once again spray with the Spray n Shine. Trim each of the words and mount them onto white card with Tacky Glue.

Step 6: Use 3D Glue Gel to position and secure the words in place on your finished card.


I do hope you have enjoyed the tutorial today and the finished project. I hope to see you here very soon to see what else I have to share with you. Don't forget to visit my Etsy shop if you would like any of the items from my collection, the link is at the top of the blog page. For now Take care and Happy Crafting.xxx


Friday, 23 November 2018

Stitched Mixed Media Face

Hi Friends and Crafters. I am sharing a stitched mixed media project with you today. Something a little different to try out with my collection. This uses a simple chain stitch for the outline and a couple of French Knots for the eyes. The background has been made with Calico with the print for the background pulled from the Gel Press from Clarity. It's great fun to use and a great way of making some really interesting backgrounds for any of your crafty makes.

You will Need:
Versafine Black Ink Pad
Daler Rowney System 3 Cadmium Yellow, Cadmium Red and Ultra Marine.
Brayer
Burgundy/Red Embroidery Thread
Black Card
White Stamping Card
Calico

Step 1: Start with the background on your calico. Add and spread each colour in turn using your Brayer. Use Red, then Blue and finally the yellow. Firmly and evenly smooth the calico over the surface and lift the print. Leave to dry thoroughly.

Step 2: Using the remainder of the ink on your plate, repeat with your card. Lift the print and leave too dry.

Step 3: Position the stencil onto the calico and using either a fine liner or graphite pencil, trace around the outside lines of the whole design. Add the Calico to your hoop and stitch your design use 3 threads and use the chain stitch. This fives a really nice raised result, with dimension and texture while allowing smooth turns around the curves. Use a darker thread for the eyes and a couple of french knots to add life to the eyes. Ray the edges of your cloth to give more interest and texture.

Step 4: Choose a selection of words that appeal to you from across both stamp sets. Use Versafine black ink to stamp onto your gel printed card. Use Tacky glue to mount them onto black card, leaving a narrow border.


Step 5: Mount your fabric onto black card using Collall Tacky Glue. Then use 3D Glue gel to position and secure your words around the face.

Another thing, here is a 30% off voucher to use on your first order (anything) from Hochanda, use code FEY5JBP7.

As you know I love writing my blog and helping as much as I can, well I would really love for you to add you support by adding me as a favourite blog. All you need to do in that section is choose other and add my blog address nickinbarnsley.blogspot It would be great to get a mention even if I dont come anywhere.

Here is the link to add your support for all of the categories. 


Many thanks for joining me today. I hope you have enjoyed the tutorial along with the finished project. It would be great for you try it out especially if it's something you have not done before. This makes a great wall hanging, a page for a journal or scrapbook page and a smaller version would make a lovely stitched card. Why not try it as a partial face with a boarder around it, whatever you do have fun and enjoy what you do. For now Take care and Happy Crafting.xxx


Sunday, 18 November 2018

Rusty Face

Morning Friends and Crafters. I am so excited to share this mixed media piece with you today. It's a real favourite of mine a it was a bit of an experiment that came out just as I wanted. It was a fun project and well worth the waiting time. Once again this wouldn't have to be a journal or scrapbook page, it could easily be made smaller for a card or even par of it onto an ATC, Like I always say have fun with your crafting, try something new, and always remember, There are NO RULES.

You will need:
Kitchen Roll
Powertex Rust Powder
Vinegar & Water Mix 50/50 mix 
( if for fabric or Clothes I recommend the Rust Dye either Bright or Dark from Inventors Asylum as it's much better where the integrity and strength of fabric is important, clothes etc)
Strip of Calico (previously used for cleaning paints, inks etc)
Medical Gauze Dyed to Match
Sewing Machine
Black card and threads to match or contrast.
Collall Tacky Glue

Step 1: Fold the  sheets of kitchen roll together (still connected gives more strength) Spritz with the mix of Vinegar Water. Next position your stencil in place, sprinkle with rusty powder and spritz again. Do check after a few hours to make sure it's not dried out, If so spritz with more. Keep checking periodically, then leave overnight or longer if required. Remove the stencil and leave to dry thoroughly before dusting off any remaining powder. If using on fabric with the rust dye instead, the fabric can be washed as instructed. 

Step 2: I use calico to mop up inks and paints etc and keep the fabric for future projects. I took one of the pieces and cut off a strip to use. First I added a strip of the dyed gauze and over the top added the calico, which matched the colours beautifully. I used a ziz zag stitch to secure the pieces. I then used Versafine Black ink to add some words, Here I thought the 'Life is Tough' fitted perfectly, but thats personal choice.

Step 3: To finish stitch around the kitchen towel a few times with a messy Zig Zag stitch, I finally added it to a piece of natural Calico, stitched around once more and then frayed the edges before mounting onto black card with tacky glue.

Just a little extra here: If you have not shopped with Hochanda before, here is a voucher code giving you 30% off your first purchase (FEY5JBP7) it can be used for any purchase, feel free to share it.

As you know I love writing my blog and helping as much as I can, well I would really love for you to add you support by adding me as a favourite blog. All you need to do in that section is choose other and add my blog address nickinbarnsley.blogspot It would be great to get a mention even if I dont come anywhere.

Here is the link to add your support for all of the categories. 

https://www.britishcraftawards.com/

Thank you so much for joining me today, I do hope you have enjoyed this tutorial along with the finished piece. It's such an easy but effective result and quite special how the rust forms the complete face just from the stencil including the lips etc as they were originally drawn. I added a very small amount of white gel pen just to highlight the eyes a little. For now Take care and Happy Crafting.xx

Wednesday, 14 November 2018

ATC Book Box

Morning Friends and Crafters. It has been amazing for me over the last few days seeing so many wonderful creations made with my collection. It's impossible for me to describe what a wonderful feeling it's given me seeing how many of you are now enjoying crafting with my designs, something I never thought would be possible. Today I have a lovely little project, made using a super MDF ATC book from Louise Withers. These are such a super design and just perfect to store all of your ATC's as well as having fun putting your own mark on them, excellent quality and design.Thank you Lou.xx

You Will Need:
Indigoblu Acrylic Townhouse Teal
Indigoblu Acrylic Pantry White
Eco Paint Acrylic Pumpkin
Black Gesso
Epiphany Tool Round and Oval Including acrylic domes (can use Glossy Accents or similar)
Versafine Black Ink
Brayer
The whole collection is available as a bundle for better value (Available here).

Step 1: Prepare the surface with Black Gesso, Inside & Out. I masked the spine with masking tape or similar to keep it natural but this is optional.

Step 2: Secure a piece of narrow black ribbon to the inside bottom of your box. This will help remove the cards later without causing any damage to your little works of art. Later you can add a little bead or charm to the lose end.

Next using the Acrylics, build up layers of colour and texture until you ate happy with the result.

Step 3: To decorate use the mans profile stamp and Versafine Black ink. I used the stamps from both sets to make a couple of embellishments & added a twine bow for more interest. Before securing them to my book I used another stamp directly onto the surface. This finished the front, but have more fun, decorating the back and inside cover. On the areas that were plain black Gesso I added a little gilding wax to give an aged look to the sides.

All thats left is for you to fill the box with ATC's you have made or swapped, a wonderful little holder for all your treasured cards.
Just a little extra here: If you have not shopped with Hochanda before, here is a voucher code giving you 30% off your first purchase (FEY5JBP7) it can be used for any purchase, feel free to share it.


As you know I love writing my blog and helping as much as I can, well I would really love for you to add you support by adding me as a favourite blog. All you need to do in that section is choose other and add my blog address nickinbarnsley.blogspot It would be great to get a mention even if I dont come anywhere.

Here is the link to add your support for all of the categories. 

https://www.britishcraftawards.com/

I hope you have enjoyed the tutorial today along with the finished project. Please come by again to see what else I have to share with you. Whatever you make and Create Have fun. Take care and Happy Crafting.xxx


Saturday, 10 November 2018

Dark and Scary

Morning Friends & Crafters. I switched on this morning to find that there was no blog scheduled, I dont know how that slipped through my fingers. So here is a project I have written up today. It's a journal page, a little dark but by altering the colours and the background stamps you choose it could have a totally different feel to it. How about doing a double page with both styles as a real contrast. to show different feelings. This could also make a great card, scaled down and as always a great ATC. I have said before I love to capture cards and projects I do as ATC's to keep, especially when they're for the Design Teams.

You Will Need: 
Craftascope 'Bailey' A5 Media Stencil
Craftascope 'Dolphin' Stamp Set 1
Craftascope 'Profile' Stamp Set 2
Selection of Brusho
HB Pencil
Tim Holtz Distress Crayons
12 x 12 Journal Book (Pink Pig), card or chosen media
White Gel Pen
Pebeo Drawing Gum
Black Card
White Card
3D Glue Gel
Tacky Glue

Step 1: Select the position for your stencil, Use the outside lines to trace through. Mask the face with Pebeo Drawing gum.

Step 2: Spritz your project and sprinkle with your Brusho. When dry, remove the drawing gum.

Step 3: Roughly outline the face using a black Distress Crayon. Start building up you layers of your face with the crayons.

Step 4: Use a very small amount of the black around the face and smudge away with your finger, this will really highlight the face, while giving depth to the finished piece.

Step 5: Stamp your words onto white card, then mount onto black. Next use some lighter Distress Crayons to add colour to these words.

Step 6: Use a selection of your chosen stamps to create the background and the feeling of your project.I have gone quite dark with this on using stamps by AALL&Create. But the stamps you choose to use will totally change the feeling of your project. It could just as easily be bright and cheerful, depending on how you feel on what you want to create.

Before I go there is one more thing, here is a 30% off voucher to use on your FIRST order (anything) from Hochanda, use code FEY5JBP7. 

As you know I love writing my blog and helping as much as I can, well I would really love for you to add you support by adding me as a favourite blog. All you need to do in that section is choose other and add my blog address nickinbarnsley.blogspot It would be great to get a mention even if I dont come anywhere.

Here is the link to add your support for all of the categories. 

https://www.britishcraftawards.com/

Thank you for joining me today, I hope you have enjoyed the tutorial along with the finished piece. Please pop by again to see what else I have to share with you.xx