Showing posts with label Xander Stencil. Show all posts

Wednesday, 28 November 2018

Mica Face

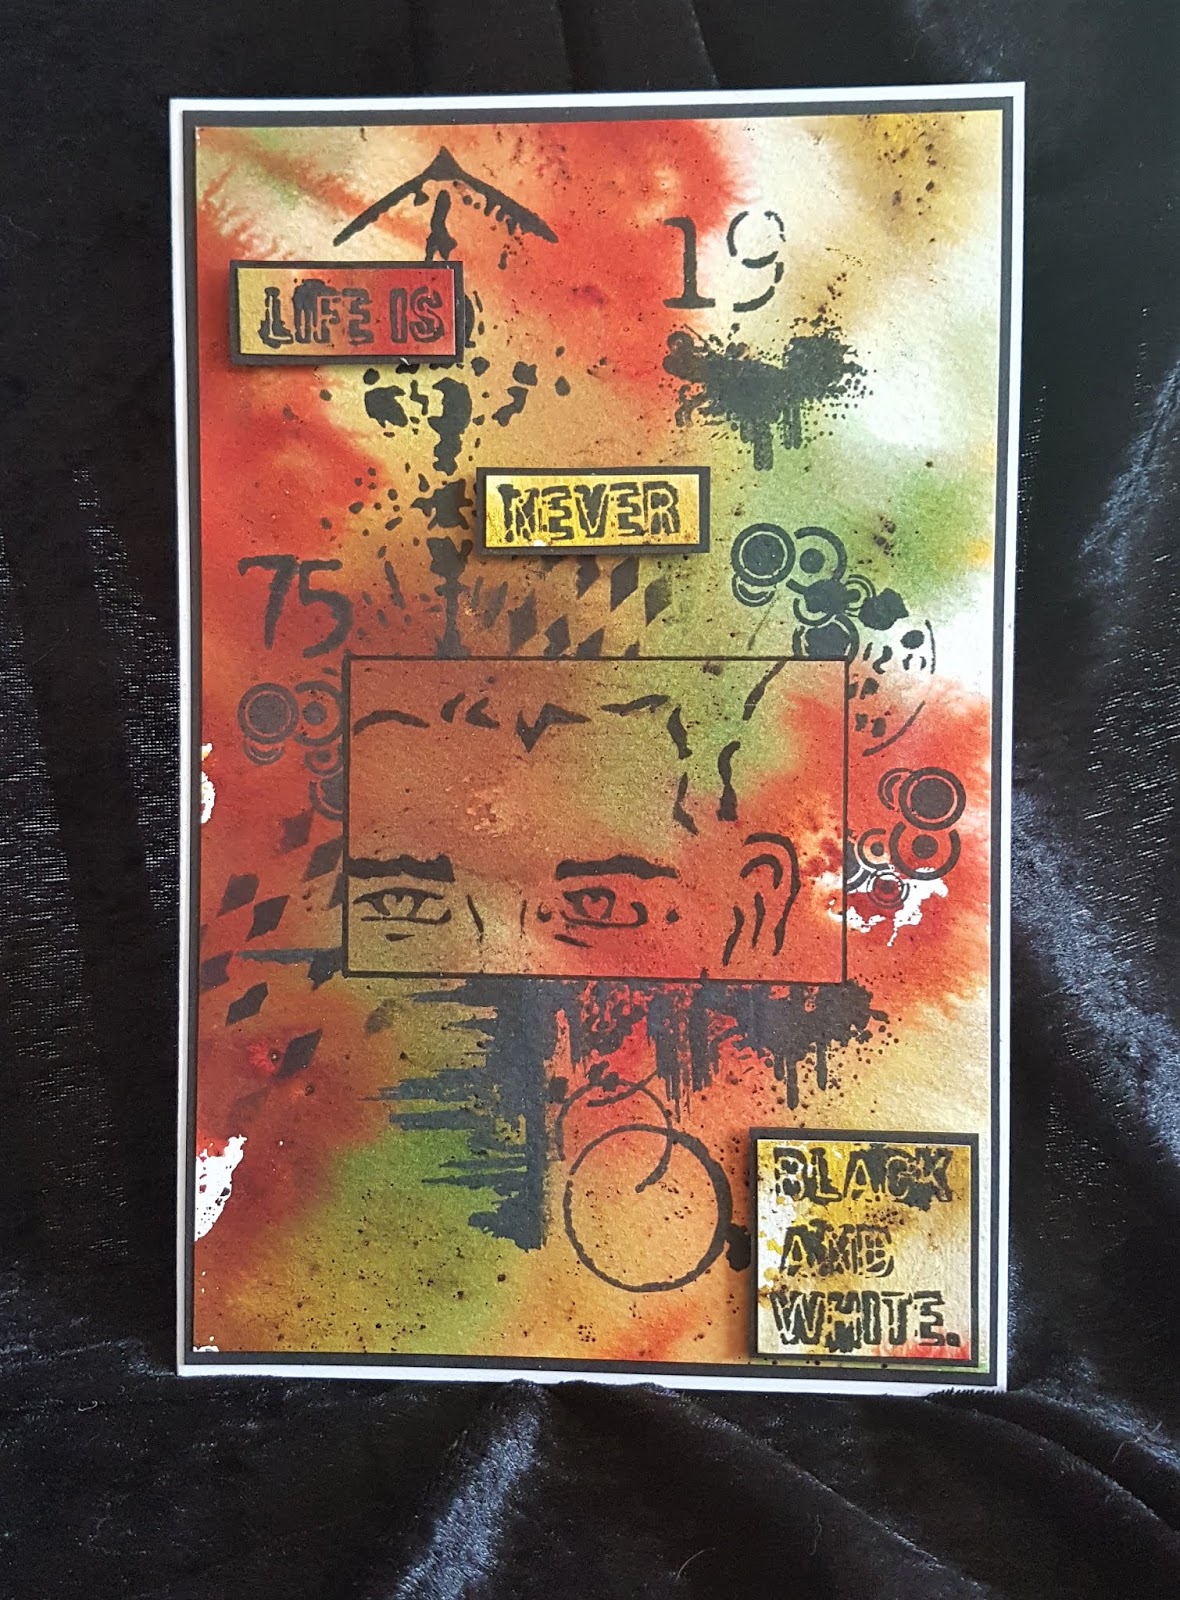
Morning Friends and Crafters, so pleased you are joining me again today. I thought I would share something easy, but really striking and effective. It would make a really fun card for a guy or any occasion really, depending on what you add or the sentiment you choose.For the background layer I have used the script stamp from Leonie, it's an amazing stamp to create backgrounds or add texture, interest or dimension to any project, it's out in my craft room constantly.

You will Need:
Selection of Mica Powders
Versamark Ink Pad
Anti Static Pad
Soft Brush
Crafters Companion 'Spray n Shine'
Black Gloss Card
Purple Centura Pearl card
White Card
Black Card Base
Collall Tacky Glue
Collall 3D Glue Gel

Step 1: Wipe over your card with the anti static bag, position your stencil and ink through with the Versamark ink pad.

Step 2: Remove the stencil and sprinkle your chosen colours of mica.

Step 3: Use a very soft brush to remove the excess powder and lightly polish the card with the brush. Spray a very light mist of the Spray n Shine to set the mice in place.

Step 4: Repeat the process, this time using the script stamp to create your next layer. Mount your design onto the script background then onto the purple layer before adding it to your card base. Don't forget to gut your card layers with a basic die to save weight and card for other projects.

Step 5:On another piece of gloss card, stamp your sentiment as before and coat with the mica. Brush away the excess and polish with the soft brush, Once again spray with the Spray n Shine. Trim each of the words and mount them onto white card with Tacky Glue.

Step 6: Use 3D Glue Gel to position and secure the words in place on your finished card.


I do hope you have enjoyed the tutorial today and the finished project. I hope to see you here very soon to see what else I have to share with you. Don't forget to visit my Etsy shop if you would like any of the items from my collection, the link is at the top of the blog page. For now Take care and Happy Crafting.xxx


Wednesday, 7 November 2018

Thats Torn It

Morning everyone, I hope you are all well. A little bit of fun with this card and a mix of styles too. It would be great for a mans card or for a teenager when you really dont know what else to give them.

You will need:
Xander Art Stencil
Profile Stamp Set  2
Dolphin Stamp Set 1
Torn Paper Stamp By Sheena
Versafine Black Ink Pad
Metro Grey Ink Pad
Colour Blend pencils
 8B Graphite Pencil
Pergamano Blending Pen
Faber Castel Eraser Pencil
Black Card
White Stamping Card

Step 1: Using Metro Grey ink from Tonic, stamp the tron paper stamp, You will also need a mask so stamp it a second time on copier paper, Cut it out and position over your image to mask.

Step 2: Position your stencil and ink through it with Versafine black ink

Step 3: Remove the stencil.

Step 4: Cut out the inside of the torn stamp.

Step 5: Using the stencil, draw around, either the inside, outside or a mixture of both. Roughly go around the lines with the graphite pencil. Add very light shading as shown on the show, using the Pergamano Blender. You really only need to concentrate on the area showing through the card, but I got carried away.

Step 6: Use coloured pencils to add color to the eyes and skin.Position the coloured image behind your torn part and secure with Tacky glue.

Step 7: Trim your piece down and layer onto black card, before mounting onto a white card base. Stamp the 'Everyone Has  A Story' straight onto your card. Then on a separate piece of white card stamp the 'Relax', mount this onto black card and secure to your card with 3D Glue gel.

Thank you so much for joining me today it's been great to share this project with you. I hope you enjoyed the tutorial along with the finished piece. Why not stop by again to see what else I have to share.

Before I go there is one more thing, here is a 30% off voucher to use on your FIRST order (anything) from Hochanda, use code FEY5JBP7. 

As you know I love writing my blog and helping as much as I can, well I would really love for you to add you support by adding me as a favourite blog. All you need to do in that section is choose other and add my blog address nickinbarnsley.blogspot It would be great to get a mention even if I dont come anywhere.

Here is the link to add your support for all of the categories. 

https://www.britishcraftawards.com/


Until Tomorrow, Take care and Happy Crafting.xx


Saturday, 3 November 2018

1975

Morning Friends and Crafters, I am back with you this morning with some more inspiration using stamps and stencils from my collection. I do hope you got to see my first show on Thursday, if not it will be available on rewind  via the Hochanda website. Today's card could be made in any colour way, to suit any occasion, As it is I think it would make a wonderful card for a man.

You will need:
Xander Media Stencil
Profile Stamp Set 2
Selection of texture stamps (Your Choice) 
Watercolour Card
Black Card
Infusions Rusty Car, Lemonchello, Emerald Isle
Versafine Black Ink
Basic Rectangle Die

Step 1: Start by making a really colourful background for this project. Spritz your card and sprinkle with the infusions. Leave this to dry naturally  as the colours remain much more vibrant. Cut a rectangle from scrap paper and keep the inner and the outer. Position over your card, select the part of the stencil you want to use and  ink through with Versafine black ink. Use a ruler to make a frame around the image.

Step 2: Use the inner part of the rectangle to make of the image. Then using your choice of stencils and stamps to build up your design. Trim  down your design and keep the trimmings.

Step 3: Now use the trimmings to stamp your sentiments with the same ink. Mount these onto black card using Tacky glue.

Step 4: Mount your design onto black card. (Don't forget to gut the card, use basic dies and use for later projects)

Step 5: To finish your card, mount it onto a white or cream base card. Then add your words using Collall 3D glue gel.

Thank you for stopping by today to see what I have to share. I hope you enjoyed the tutorial along with the finished project. I post everyday and I hope you will join me again soon.  

Before I go there is one more thing, here is a 30% off voucher to use on your FIRST order (anything) from Hochanda, use code FEY5JBP7

As you know I love writing my blog and helping as much as I can, well I would really love for you to add you support by adding me as a favourite blog. All you need to do in that section is choose other and add my blog address nickinbarnsley.blogspot It would be great to get a mention even if I dont come anywhere.

Here is the link to add your support for all of the categories. 

https://www.britishcraftawards.com/


Until Tomorrow, Take care and Happy Crafting.xx

Friday, 26 October 2018

ATC Journal with Craftacope

Morning Friends and Crafters. I am so excited to share the first Tutorial Post for a project I have made with my first collection (lot's of photos on the blog post). My new collection will be launching exclusively on Hochanda at 4 pm on 1 st November. I do hope you are as excited as I am. It would be great if you would tune in to see the whole collection along with a lot more inspiration and samples. From now and for the next week there will be lot's of inspiration shared, both on here and the Hochanda Blog. But dont worry, I have been busily adding more tutorials for after that as well for anyone who would like some more inspiration or ideas of what else can be done with my Collection. 

You will need:
Craftascope Xander Stencil
Craftascope Trent Stencil
Craftascope Profile Stamp Collection 2
Greyboard cut to sizes in photo 1
Black Card 4 x 15 1/2''
Graphic 45 or your choice of Decorative Papers
Epiphany Round Tool and Covers
Construction Tape
Red liner Tape
Black Ribbon
Brusho
Watercolour Crad
Tacky Glue
3D Glue Gel
Versamark Black Ink Pad
Dusty Concord Distress Ink Pad

Step 1: Cut and arrange your greyboard as shown.


Step 2: Use construction tape to secure the sections together, you need a gap between each piece, the width of the particular board you are using.

Step 3: Your piece should look like this.

Step 4: Create your spine. Score as shown in the photo.

Step 5: Reinforce and fold the spine as shown.

Step 6: Add red liner tape and tacky glue for extra strength to the 1 cm section and join them together. This gives you the spine and extra space to allow for your personal additions. Decorate your journal with Graphic 45 papers or paper of your choice.

Step 7: Create a nice colourful piece of watercolour card with a selection of Brusho. Once completely dry, stencil through your stencils with Versafine black ink. I used just the eye area, making sure it was slightly bigger than the size I needed. Use the Epiphany tool to create the wonderful embellishments for the inside.


Step 8 & 9: Add to your design, here I have used them as buttons for the ATC holders I have added to a couple of my inside pages.


Step 10: Stamp the sentiment on matching paper, trim to size and blend the edges with Dusty Concord Distress ink, choose another colour if you have other colour papers.

Step 11: For the front of your Journal. Stamp the profile stamp on to matching paper and again lightly distress the edges with Dusty Concorde. I have used a sentiment panel on the front as I wanted to keep the word 'STORY' on the second page, but it's entirely up to you.

Thank you ever so much for sharing my exciting news today, I really hope you have enjoyed the tutorial along with the finished project, I have shared with you. Please keep your eyes out on Facebook as there will be a chance for someone to win the whole collection in a Hochanda Giveaway. Another thing, here is a 30% off voucher to use on your first order (anything) from Hochanda, use code FEY5JBP7.
As you know I love writing my blog and helping as much as I can, well I would really love for you to add you support by adding me as a favourite blog. All you need to do in that section is choose other and add my blog address nickinbarnsley.blogspot It would be great to get a mention even if I dont come anywhere.

Here is the link to add your support for all of the categories. 

https://www.britishcraftawards.com/

I am looking forward to sharing more with you over the week ahead, there is a post on the Hochanda Blog Tomorrow. For now Take care and Happy Crafting