Showing posts with label MDF. Show all posts

Wednesday, 14 November 2018

ATC Book Box

Morning Friends and Crafters. It has been amazing for me over the last few days seeing so many wonderful creations made with my collection. It's impossible for me to describe what a wonderful feeling it's given me seeing how many of you are now enjoying crafting with my designs, something I never thought would be possible. Today I have a lovely little project, made using a super MDF ATC book from Louise Withers. These are such a super design and just perfect to store all of your ATC's as well as having fun putting your own mark on them, excellent quality and design.Thank you Lou.xx

You Will Need:
Indigoblu Acrylic Townhouse Teal
Indigoblu Acrylic Pantry White
Eco Paint Acrylic Pumpkin
Black Gesso
Epiphany Tool Round and Oval Including acrylic domes (can use Glossy Accents or similar)
Versafine Black Ink
Brayer
The whole collection is available as a bundle for better value (Available here).

Step 1: Prepare the surface with Black Gesso, Inside & Out. I masked the spine with masking tape or similar to keep it natural but this is optional.

Step 2: Secure a piece of narrow black ribbon to the inside bottom of your box. This will help remove the cards later without causing any damage to your little works of art. Later you can add a little bead or charm to the lose end.

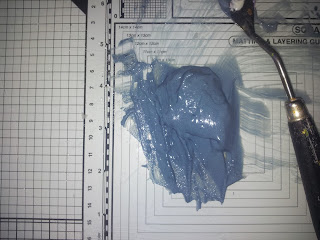
Next using the Acrylics, build up layers of colour and texture until you ate happy with the result.

Step 3: To decorate use the mans profile stamp and Versafine Black ink. I used the stamps from both sets to make a couple of embellishments & added a twine bow for more interest. Before securing them to my book I used another stamp directly onto the surface. This finished the front, but have more fun, decorating the back and inside cover. On the areas that were plain black Gesso I added a little gilding wax to give an aged look to the sides.

All thats left is for you to fill the box with ATC's you have made or swapped, a wonderful little holder for all your treasured cards.
Just a little extra here: If you have not shopped with Hochanda before, here is a voucher code giving you 30% off your first purchase (FEY5JBP7) it can be used for any purchase, feel free to share it.


As you know I love writing my blog and helping as much as I can, well I would really love for you to add you support by adding me as a favourite blog. All you need to do in that section is choose other and add my blog address nickinbarnsley.blogspot It would be great to get a mention even if I dont come anywhere.

Here is the link to add your support for all of the categories. 

https://www.britishcraftawards.com/

I hope you have enjoyed the tutorial today along with the finished project. Please come by again to see what else I have to share with you. Whatever you make and Create Have fun. Take care and Happy Crafting.xxx


Thursday, 1 February 2018

Absent Friends

Morning, For my project today I have used a couple of sets of the Classiques Dies, 'Rose Vine' and 'Parisian Mirror' from Crafters Companion. These dies were on Hochanda Yesterday along with the 3d Embossing folders. I have also used both swirls and corners from the 'Rose Buds' stamp set and poppies from Sheena.

Cut the largest frame from Kraft Card 5 times to give a really substantial frame. I wanted a very large aperture, so with the card still in the die I cut right along the die to give a crisp, clean cut. I secured 4 of these together using Collall Tacky Glue.

I did the same for the large corner dies and smallest die from the mirror set for my sentiment. I then aged my photo by scrunching and then adding Old Photo Distress Ink.

I cut out the perfect poppies from an old dictionary page that I photocopied onto card, then coloured with alcohol markers.

I aged an old postcard using Old Photo and made an envelope for it which I decorated using the 'Rose Bud' stamp set along with Gathered Twigs and Walnut Stain Distress Inks.

Taking my MDF board and base, I stamped with the same stamps and inks.

I then blended all around the Edges from dark to light using Vintage Photo, Gathered Twigs and Walnut Stain Distress Inks.

The frame and corners were then stained with Walnut stain, then highlighted with Empire Gold Gilding Wax from Pebeo.

I arranged the finished elements onto my MDF, securing them in place with Collall Tacky Glue and 3D Glue Gel.

Thank you for joining me today, I hope you will be back to see some more very soon. For now, Take care and Happy Crafting.xxx

Friday, 30 September 2016

Pop Goes The Teasel.

Morning, Another beautiful day, I always like September here in Bulgaria when the weather turns cooler, it's always so pleasant to be able to have a drink outside without cooking. Today I am sharing a project I made using the wonderful MDF set that Bev from Bee Crafty launched on Hochanda 'Live' from Alexandra Palace. I do hope you managed to get hold of them, they were so popular that they sold out twice during the show.

After coating my card with Acrylic Paint, (here I used Vanilla from Pebeo). I sprinkled purple Brusho's over the surface and dragged over the surface with a painting knife. 

I then decided to add some subtle colour down the mid section, so I sprinkled some Orange Brusho's onto the acrylic paint I had on my mat, placed the card face down onto it to transfer some of the colour.

When this was dry I stamped the 'Teasel' using Royal Purple Versafine. I then used Blue Lagoon to Stamp my sentiment and Birds.

To finish this project I secured it onto my MDF with Cosmic Shimmer glue from Creative Expressions and painted the base with Grandma's Teacup Acrylic paint from Indigo Blu and assembled.

I am so pleased that you have visited today. I hope you have enjoyed me step by step and the finished piece. I hope to see you very soon. Take care and Happy Crafting.xx

Thursday, 29 September 2016

Clock Works

Morning, I thought it best to share this with you as a separate project. I actually used it for the back of the Dandelion  clock that I shared yesterday as the working arrived damaged and wanted to make the most of the MDF surface. The MDF was launched on Hochanda by Bev from Bee Crafty, during the show from Alexandra Palace, It was so popular and sold out (twice) incredibly quickly during the show. I have to say the quality is excellent, with such a smooth surface to work on, I didn't even need to prime it for this.

To start this project I used a clock/cog stencil. I smoothed Decoart Sand Texture Paste through it and removed the mask. While it was till wet I secured an old watch part to it using Collall 3D glue gel. The I linked some wooden cogs from Indigo Blu and secured them with Cosmic Shimmer Glue.

Once this was dry, I painted it all over with acrylic paint, the one I chose was 'Sleeping Beauty' from Indigo Blu. It is a beautiful metallic colour and gives a marvellous sheen. I set this aside to dry completely.

On my glass mat I put a small amount of Townhouse Teal acrylic paint and separately another amount of Grandmas Teacup, both of these colours are from the English Cottage Acrylic paint collection from Indigo Blu. To both of these I mixed some Kroma Crackle thoroughly  before randomly applying to my project

I left this for the rest of the day and overnight to dry thoroughly and crack before applying gilding wax, I used Pebeo Silver and Empire Gold to highlight some areas. To finish, I secured it to the base.

It's such a great piece of MDF, I am almost pleased that the clockworks were damaged to allow me to decorate the back as well. Thank you for taking the time to visit today, I hope you have enjoyed the step by step I have shared and the finished piece. Would be great to have your comments. Hope to see you soon, Take care and Happy Crafting.xx

Wednesday, 28 September 2016

Dandelion Clock

This is a project I was really excited about so I am really pleased to be sharing it with you today. The base is made from the large 8' circle MDF that Bev from Bee Crafty launched at Alexandra Palace live on Hochanda. I used the dandelion set of stamps, it's a really wonderful set and I am sure I will be using them in a lot of different project, I am sure you will too.

To start with I took a sheet of tissue paper, slightly bigger than the MDF and stamped the dandelion seeds with Versamark to act as a resist. I wanted to get as many layers as possible to add interest to the finished piece.

Having spritzed the tissue thoroughly I sprinkled Brusho's over the surface, I used Emerald Green and Cobalt Blue.

I then saturated the tissue with water to blend and make pools of colour, then put it outside in the sun to dry.

I took my clock stencil and drew around it onto copier paper, cut out and set aside. I would use this later to protect the work, it makes it a lot easier.

Next I mixed some white Gesso with a coupe of teaspoons of plaster, I find this gives a much nicer surface for stamping onto than Gesso on it's own and the results are much nicer. I painted this onto the base and left to dry.

Using Black Versamark, I stamped some of the dandelions and seed heads from the collection onto the MDF base. 

I left this to dry before applying the tissue to the base using Cosmic Shimmer Matt Glue, Seal & Glaze from Creative Expressions. When this had dried overnight, I stamped more dandelions on top using Versamark and embossed with white fine detail powder to add another layer. Next I took some Decoart sand Texture Paste and coloured it using some black Brusho's

I placed my clock stencil in place and then added my copier paper to protect the other areas. Using a painting knife I spread the  Sand Texture Paste onto my project and removed the stencil and paper.

I added my sentiment using Black Versafine and added some Pebeo Gilding wax to the clock and edges.

To finish I added the clock hands and my project was finished.

Thank you for visiting today, I hope you have enjoyed this step by step and like the finished article. Hope to see you again soon. Take care and Happy Crafting.xx


Monday, 26 September 2016

Bee Crafty New Launch Samples

I am very excited this morning to be able to share some of the samples I have made for the Bee Crafty Launch with Bev on Hochanda today at 11am, 2pm and 5pm. They are Christmasy but with a the twist we can expect from Bee Crafty, who always give us something different to craft with.

I have really enjoyed using these stamps and the MDF as always.

I have tried to vary my samples to show just how versatile they are, as always I will be sharing my samples in more detail with additional photos and hope that you will visit to see them.

There are some really beautiful snowflakes, a wonderful border. They stamp beautifully as always and are so detailed.

I have always loved the sentiments from Bee Crafty, the team come up with some really different ones that can be used for all projects and these are no exception. I do hope that you manage to watch Bev today as she always gives such a lot of inspiration.

Great to have your company this morning, hopefully you like the samples that I have shared and that you will visit again tomorrow. Take care and Happy Crafting.xx

Saturday, 28 May 2016

Butterfly Wreath

Good Morning and thank you so much for stopping by again. I hope you are well and have a good Bank Holiday weekend. Well I have something completely different using stamps from Leonie to share with you today, So I am hoping that you will like it.


I have lots of grape vines here, when they are pruned, there are lots of long lengths to get shot of. A lot of them go into the stove, but I thought it would be nice to find a different use for some of them at least. I decided I would like to try and make a grape vine wreath.

After some research online, I found out that it is in fact fairly easy to do, I took three equal lengths of vine and formed them into a rough circle shape. Then brought the ends through the centre, wrapped and repeated. Before running out of length I added some more until the wreath was about the right size, any loose pieces can be tucked in or trimmed back with pruning sheers. I was really please with the finished result, at the same time cursing, thinking about the money I had spent in the past buying them in the past. I put this aside while I got everything else ready.


There are quite a lot of elements to the wreath, so It's best to go through them one by one.


I cut about 10 x 1 1/2'' strips of calico, approximately 36'' long and when bunched together I concertina folded them and tied them together with garden twine about 2/3 of the way up. I dyed one part with Slate and one part with Lavender, Quick and Easy Dyes from Forest Fibres on ebay. When they were dry I cut them in half and rolled them into roses. I will do a post on this at some point soon, to show how. There were a couple of strips left over that I tied into messy bows.


On a separate piece of calico, I stamped some of Leonie's stitched hearts from the new collection with archival waterproof ink. I stamped inside the hearts with 'Love' & 'Dreams', again with black Archival Ink. I dyed half of them in Slate and half in Lavender at the same time I dyed a square of calico in Slate to become my backing. Once they were dry, I roughly cut out the hearts and backing and stitched around leaving a gap for stuffing. I then stitched up the gap and frayed around the edges.

I took some 2'' strips of hessian, approximately 18'' long and made 3 large roses. I wrapped some garden string around paint brushes 3'' long, secured with pins at either end, covered in PVA and left to dry.


Then I made a few Paper roses, I took half a sheet each of Tim Holtz Core-dinations cardstock, Tattered Rose and Dusty Concorde from Crafters Companion. I cut various size circles, using my circle cutter, then run them through the Textures Leaf Vein embossing folder by Crafters Companion. I then sanded them back to reveal the core colour. I cut these into spirals, wound them to form roses and secured them with Cosmic Shimmer Glue.


Taking an MDF tag, I coloured it using Cornflour Blue Nuvo Embellishment Mousse by Tonic Studio's. I applied 2 coats and polished it once it was dry. Then using Indigo Blu Flitter Glue, I used a sentiment stamp from Leonie's New Stamp Collection and covered it with Gilding flake.


Finally I assembled the wreath, using a hot glue gun. I  started off by placing the MDF tag and building up around 3/4 of the wreath leaving some bare vine.


I have really enjoyed making this project and I sincerely hope you have enjoyed the step by step. I know it was a long one but I really thin it is worth taking the time to make such a nice piece. Thank you so much for your continued visits and wonderful comments, I do read everyone of them and try to answer. Thanks for your support. Take care xx