Showing posts with label Sand Texture Paste. Show all posts

Tuesday, 23 May 2017

Gilded Rose Box

Fancy making a gift box and dressing up with your 3D Embossing Folders. I can't tell you what a super impression these will give your cards and projects, they really have to be seen to be believed. The depth of design is on so many levels, the techniques and finishes you apply can really enhance them.

The size of the embossing folder is 5 x 7'', so I wanted to make my basic box with a finished size of 5 1/2 x 7 1/2 with a depth of 1''. I made my box with the Big Score, I cut two sheets of Matt Black Cardstock measuring 9 1/2 x 7 1/2. Having assembled the box, I gilded the embossed card with Empire Gold and Renaissance Gold and secured it to the lid with Tacky Glue. To add more texture and to hide the seam, I used DecoArt Sand Texture paste around the top and sides.

I used a small scrap of black card to emboss the cartouche and cut it out. With Black Dylusions ink spray, I dyed some paper roses. I then used the 'Rose' stamp from Sheena to add the sentiment.

I painted the Texture paste with Pebeo Black Gesso and then gilded the whole box and roses with the same gilding wax. I then used 3D Glue Gel to secure the roses and additional Cartouche to the lid.

Thank you for taking the time to visit today and for your lovely comments on here and Facebook, I really do appreciate them all. I hope you have enjoyed the step by step and the finished piece. Take care and Happy Crafting.xxx

Saturday, 22 April 2017

Printers Plate

Welcome back, Today I am sharing the method I used to make this Printers Plate look. It was one of the cards I made for the Typography Collection that Leonie launched on Hochanda.

To begin with, I cut a bunch of letters from white card using the dies in the collection. For this project I decided to use the two larger fonts in the set. This is a wonderful way to use up all that card you have in your scrap box. I made sure I had 5 of each letter to get a lot of depth once they were glued together. When they were dry I coloured them using Distress inks, Black Soot, Hickory Smoke and Old Photo.

I then used some basic square and rectangle dies to cut a base for the individual letters or pairs. This was all cut from scraps of black card that I had, all the letters were stuck to the bases using Collall Tacky Glue.

Around the plates and letters I added Sand Texture paste from DecoArt and set aside. Once dry I coloured over the paste with black gesso, while keeping the letters original distress colour.When these were dry I used a mixture of gilding wax, Empire Gold, Renaissance Gold and Silver, all from Pebeo. This added highlights to the letters as well as texture and age.

I took my base card which I had already treated with the sand texture paste and gesso. The letters were then carefully arranged to fit before securing to the base card. I then added the gilding waxes to ensure the pieces blended together seamlessly.

The embossing folder 'Just Be' was used for my sentiment, I ran it through my machine with versamark so I could added the burgundy embossing powder to highlight the words. Next I stamped the Typography frame and used the same powder for this. Finally I layered the piece onto burgundy/red mirror card to contrast with the main letters.

Thank you so much for joining me today, I hope you have enjoyed the step by step along with the project I have shared. I have to say a huge thank you for all of your messages and support, this is something I just would continue if I knew you weren't enjoying the things I share. Take care and Happy Crafting.xxx


Wednesday, 28 September 2016

Dandelion Clock

This is a project I was really excited about so I am really pleased to be sharing it with you today. The base is made from the large 8' circle MDF that Bev from Bee Crafty launched at Alexandra Palace live on Hochanda. I used the dandelion set of stamps, it's a really wonderful set and I am sure I will be using them in a lot of different project, I am sure you will too.

To start with I took a sheet of tissue paper, slightly bigger than the MDF and stamped the dandelion seeds with Versamark to act as a resist. I wanted to get as many layers as possible to add interest to the finished piece.

Having spritzed the tissue thoroughly I sprinkled Brusho's over the surface, I used Emerald Green and Cobalt Blue.

I then saturated the tissue with water to blend and make pools of colour, then put it outside in the sun to dry.

I took my clock stencil and drew around it onto copier paper, cut out and set aside. I would use this later to protect the work, it makes it a lot easier.

Next I mixed some white Gesso with a coupe of teaspoons of plaster, I find this gives a much nicer surface for stamping onto than Gesso on it's own and the results are much nicer. I painted this onto the base and left to dry.

Using Black Versamark, I stamped some of the dandelions and seed heads from the collection onto the MDF base. 

I left this to dry before applying the tissue to the base using Cosmic Shimmer Matt Glue, Seal & Glaze from Creative Expressions. When this had dried overnight, I stamped more dandelions on top using Versamark and embossed with white fine detail powder to add another layer. Next I took some Decoart sand Texture Paste and coloured it using some black Brusho's

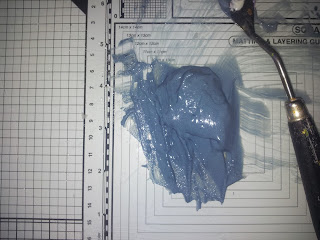
I placed my clock stencil in place and then added my copier paper to protect the other areas. Using a painting knife I spread the  Sand Texture Paste onto my project and removed the stencil and paper.

I added my sentiment using Black Versafine and added some Pebeo Gilding wax to the clock and edges.

To finish I added the clock hands and my project was finished.

Thank you for visiting today, I hope you have enjoyed this step by step and like the finished article. Hope to see you again soon. Take care and Happy Crafting.xx