Showing posts with label Collall. Show all posts

Friday, 23 November 2018

Stitched Mixed Media Face

Hi Friends and Crafters. I am sharing a stitched mixed media project with you today. Something a little different to try out with my collection. This uses a simple chain stitch for the outline and a couple of French Knots for the eyes. The background has been made with Calico with the print for the background pulled from the Gel Press from Clarity. It's great fun to use and a great way of making some really interesting backgrounds for any of your crafty makes.

You will Need:
Versafine Black Ink Pad
Daler Rowney System 3 Cadmium Yellow, Cadmium Red and Ultra Marine.
Brayer
Burgundy/Red Embroidery Thread
Black Card
White Stamping Card
Calico

Step 1: Start with the background on your calico. Add and spread each colour in turn using your Brayer. Use Red, then Blue and finally the yellow. Firmly and evenly smooth the calico over the surface and lift the print. Leave to dry thoroughly.

Step 2: Using the remainder of the ink on your plate, repeat with your card. Lift the print and leave too dry.

Step 3: Position the stencil onto the calico and using either a fine liner or graphite pencil, trace around the outside lines of the whole design. Add the Calico to your hoop and stitch your design use 3 threads and use the chain stitch. This fives a really nice raised result, with dimension and texture while allowing smooth turns around the curves. Use a darker thread for the eyes and a couple of french knots to add life to the eyes. Ray the edges of your cloth to give more interest and texture.

Step 4: Choose a selection of words that appeal to you from across both stamp sets. Use Versafine black ink to stamp onto your gel printed card. Use Tacky glue to mount them onto black card, leaving a narrow border.


Step 5: Mount your fabric onto black card using Collall Tacky Glue. Then use 3D Glue gel to position and secure your words around the face.

Another thing, here is a 30% off voucher to use on your first order (anything) from Hochanda, use code FEY5JBP7.

As you know I love writing my blog and helping as much as I can, well I would really love for you to add you support by adding me as a favourite blog. All you need to do in that section is choose other and add my blog address nickinbarnsley.blogspot It would be great to get a mention even if I dont come anywhere.

Here is the link to add your support for all of the categories. 


Many thanks for joining me today. I hope you have enjoyed the tutorial along with the finished project. It would be great for you try it out especially if it's something you have not done before. This makes a great wall hanging, a page for a journal or scrapbook page and a smaller version would make a lovely stitched card. Why not try it as a partial face with a boarder around it, whatever you do have fun and enjoy what you do. For now Take care and Happy Crafting.xxx


Sunday, 18 November 2018

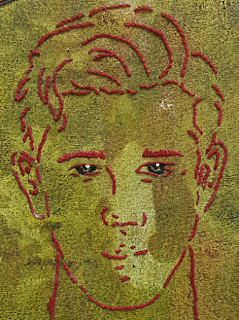
Rusty Face

Morning Friends and Crafters. I am so excited to share this mixed media piece with you today. It's a real favourite of mine a it was a bit of an experiment that came out just as I wanted. It was a fun project and well worth the waiting time. Once again this wouldn't have to be a journal or scrapbook page, it could easily be made smaller for a card or even par of it onto an ATC, Like I always say have fun with your crafting, try something new, and always remember, There are NO RULES.

You will need:
Kitchen Roll
Powertex Rust Powder
Vinegar & Water Mix 50/50 mix 
( if for fabric or Clothes I recommend the Rust Dye either Bright or Dark from Inventors Asylum as it's much better where the integrity and strength of fabric is important, clothes etc)
Strip of Calico (previously used for cleaning paints, inks etc)
Medical Gauze Dyed to Match
Sewing Machine
Black card and threads to match or contrast.
Collall Tacky Glue

Step 1: Fold the  sheets of kitchen roll together (still connected gives more strength) Spritz with the mix of Vinegar Water. Next position your stencil in place, sprinkle with rusty powder and spritz again. Do check after a few hours to make sure it's not dried out, If so spritz with more. Keep checking periodically, then leave overnight or longer if required. Remove the stencil and leave to dry thoroughly before dusting off any remaining powder. If using on fabric with the rust dye instead, the fabric can be washed as instructed. 

Step 2: I use calico to mop up inks and paints etc and keep the fabric for future projects. I took one of the pieces and cut off a strip to use. First I added a strip of the dyed gauze and over the top added the calico, which matched the colours beautifully. I used a ziz zag stitch to secure the pieces. I then used Versafine Black ink to add some words, Here I thought the 'Life is Tough' fitted perfectly, but thats personal choice.

Step 3: To finish stitch around the kitchen towel a few times with a messy Zig Zag stitch, I finally added it to a piece of natural Calico, stitched around once more and then frayed the edges before mounting onto black card with tacky glue.

Just a little extra here: If you have not shopped with Hochanda before, here is a voucher code giving you 30% off your first purchase (FEY5JBP7) it can be used for any purchase, feel free to share it.

As you know I love writing my blog and helping as much as I can, well I would really love for you to add you support by adding me as a favourite blog. All you need to do in that section is choose other and add my blog address nickinbarnsley.blogspot It would be great to get a mention even if I dont come anywhere.

Here is the link to add your support for all of the categories. 

https://www.britishcraftawards.com/

Thank you so much for joining me today, I do hope you have enjoyed this tutorial along with the finished piece. It's such an easy but effective result and quite special how the rust forms the complete face just from the stencil including the lips etc as they were originally drawn. I added a very small amount of white gel pen just to highlight the eyes a little. For now Take care and Happy Crafting.xx

Sunday, 11 November 2018

Poppy Reflection and Remembrance

Morning Friends and Crafters, this year marks 100 Years since the guns fell silent in 1918, marking the end the 'The First World War'. Today I am sure we will all take the time to remember and reflect on all those who have fought and fallen in times of conflict. Hear is my card for today, as I also remember past members of the Family who never returned.

You Will Need:
Trent Media Stencil
Dolphin Stamp Set 1
Blazing Poppies fro Indigo Blu
Distress Oxide: Salty Ocean, Peacock Feathers and Squeezed Lemonade
Amsterdam Acrylics Red & Green
Red Watercolours
Black Fine Liner
Ruler
Collall Tacky Glue
Archival Black Ink
Versafine Black Ink
Watercolour Card 6 x 9''

Step 1: Create your background using a large acrylic block or a quilting ruler, (something large). Add the Oxides in a diagonal fashion. Lightly spritz the card and the ink, then stamp and drag the block a little and lift. 

Step 2: Cut a rectangle from copier paper and place over your card. Place the stencil over the top and ink through with Versafine black ink.

Step 3: Draw a line around the face with a ruler and black fine liner.

Step 4: Use the ruler and fine liner again to draw a second frame around and colour in with a black marker.

Step 5:Use the inside of the rectangle you cut fro copier paper to mask off the face. Ink up the poppy stamp with Versafine ink, place and stamp as shown.

Step 6: Repeat below, keeping the diagonal composition as shown.

Step 7: Colour the poppies on the card and stamp using 'Reflection' & Memories' again with Versafine Ink.

Step 8: Stamp the poppies again, this time with Archival black ink, you need enough to decoupage your image. Colour these with the red watercolours.

Step 9: Slightly shape the poppies and use Collall 3D glue gel to secure giving them a little more dimension.

Step 10: Mount a black layer onto your base card.

Step 11: Mount your main piece onto your base to finish your card.

Here is the finished project:

Just a little extra here: If you have not shopped with Hochanda before, here is a voucher code giving you 30% off your first purchase (FEY5JBP7) it can be used for any purchase, feel free to share it.

As you know I love writing my blog and helping as much as I can, well I would really love for you to add you support by adding me as a favourite blog. All you need to do in that section is choose other and add my blog address nickinbarnsley.blogspot It would be great to get a mention even if I dont come anywhere.

Here is the link to add your support for all of the categories. 

https://www.britishcraftawards.com/


Until Tomorrow, Take care and Happy Crafting.xx

Saturday, 10 November 2018

Dark and Scary

Morning Friends & Crafters. I switched on this morning to find that there was no blog scheduled, I dont know how that slipped through my fingers. So here is a project I have written up today. It's a journal page, a little dark but by altering the colours and the background stamps you choose it could have a totally different feel to it. How about doing a double page with both styles as a real contrast. to show different feelings. This could also make a great card, scaled down and as always a great ATC. I have said before I love to capture cards and projects I do as ATC's to keep, especially when they're for the Design Teams.

You Will Need: 
Craftascope 'Bailey' A5 Media Stencil
Craftascope 'Dolphin' Stamp Set 1
Craftascope 'Profile' Stamp Set 2
Selection of Brusho
HB Pencil
Tim Holtz Distress Crayons
12 x 12 Journal Book (Pink Pig), card or chosen media
White Gel Pen
Pebeo Drawing Gum
Black Card
White Card
3D Glue Gel
Tacky Glue

Step 1: Select the position for your stencil, Use the outside lines to trace through. Mask the face with Pebeo Drawing gum.

Step 2: Spritz your project and sprinkle with your Brusho. When dry, remove the drawing gum.

Step 3: Roughly outline the face using a black Distress Crayon. Start building up you layers of your face with the crayons.

Step 4: Use a very small amount of the black around the face and smudge away with your finger, this will really highlight the face, while giving depth to the finished piece.

Step 5: Stamp your words onto white card, then mount onto black. Next use some lighter Distress Crayons to add colour to these words.

Step 6: Use a selection of your chosen stamps to create the background and the feeling of your project.I have gone quite dark with this on using stamps by AALL&Create. But the stamps you choose to use will totally change the feeling of your project. It could just as easily be bright and cheerful, depending on how you feel on what you want to create.

Before I go there is one more thing, here is a 30% off voucher to use on your FIRST order (anything) from Hochanda, use code FEY5JBP7. 

As you know I love writing my blog and helping as much as I can, well I would really love for you to add you support by adding me as a favourite blog. All you need to do in that section is choose other and add my blog address nickinbarnsley.blogspot It would be great to get a mention even if I dont come anywhere.

Here is the link to add your support for all of the categories. 

https://www.britishcraftawards.com/

Thank you for joining me today, I hope you have enjoyed the tutorial along with the finished piece. Please pop by again to see what else I have to share with you.xx

Tuesday, 6 November 2018

Marquetry Dolphin

Morning everyone, Thank for joining me today. This is a project I was very excited about. I have always loved the look of marquetry and I have watched Quentin on Hochanda many times, It was great to actually see the craft on TV. A very good friend gave me some wonderful veneers, so I thought I would try a small card with one of the Dolphins from my new collection. Maybe you might have a go too.

You will need:
Craftascope Dolphin Set 1
Selection of Veneers
Washi Tape
Carbon Paper or Tracedown
Copier Paper
Black Card
White Card
Black Base Card
Tacky Glue
Marquetry Craft Knife

Step 1:Collect all of your veneers together and select the pieces you will use to insert for your image.

Step 2: Choose your background veneer, this is the piece that will form the base and add the inserts to, this measures 4 1/2'' square.

Step 3: Stamp the chosen image, (here the dolphin) onto some copier paper. Tape this in place over your base piece, it will need to remain in place until the whole process is complete. Use the carbon paper in between to trace the first section.

Step 4: Use the knife to cut out this section. Place your chosen veneer behind underneath and cur the shape with your knife being careful not to move. Take your time and make very small cuts. When it is free, insert into the base and secure from behind with tacky glue, cover with tape while drying.

Step 5: Repeat the previous step with each section of you design.

Step 6: When completely dry, lightly sand the surface. I then finished mine with a light polish with teak oil

Step 7: To complete the card mount it onto black card and then white, finally add it to a black base card.

Another thing, here is a 30% off voucher to use on your first order (anything) from Hochanda, use code FEY5JBP7.

As you know I love writing my blog and helping as much as I can, well I would really love for you to add you support by adding me as a favourite blog. All you need to do in that section is choose other and add my blog address nickinbarnsley.blogspot It would be great to get a mention even if I dont come anywhere.

Here is the link to add your support for all of the categories. 

https://www.britishcraftawards.com/


Until Tomorrow, Take care and Happy Crafting.xx

Thursday, 18 October 2018

Postcards at Christmas

Morning Friends and Crafters, Christmas Is such a busy time for us all. A lot of us just don't always have time to make our card's throughout the year, I started off with good intentions, but as always life takes over. Having an embossing folder, that can do all the work for you, is fantastic. This 3D Embossing folder is they answer to all of our prayers, it's perfect for batch card making, so here are 3 very fast cards.

You will Need:
Dear Santa Embossing Folder
Black Card
Tim Holtz Black Kraft Core'Dinations 
Aged Mahogany Core'Dinations Card
Pebeo Gilding Wax (selection of colours)
Matt and Layers
Adhesives

Step 1: Cut your card to size, 5 x 7'' and emboss with the design.

Step 2: Just look at the wonderful detail this folder gives you.

Step 3: To this card, add gilding wax to add even more detail and bring out the depth and dimension. Red and Gold so so well together.

Step 4: Add a ribbon and some Mistletoe to finish the look and add your mat and layers.


Step 5: Here is the Kraft Core'Dinations, just sanded back and polished with the polishing cloth.

Step 6: Here is the black card, simply finished off with the gilding wax again to really show of the details.

Here are the finished cards just waiting for a little embellishment.


Thank you for popping by today. I hope you have enjoyed these little time savers, they are especially great for people you have forgotten. Another thing, here is a 30% off voucher to use on your first order (anything) from Hochanda, use code FEY5JBP7.

I hope to see you again very soon, For now Take care and Happy Crafting.xxx

Wednesday, 17 October 2018

Spring Harebells 'Treescapes' from Clarity

Morning Friends and Crafters, The lovely Maria is on our screens later today with some super stamps and stencils. The first show is 12 noon, with a second show at 4 pm. I hope you tune in for some excellent demos and lots of inspiration.

You will Need:
Clarity 'Treescape' Stamp
Clarity 'Spring' Stamp
Memento Black Ink
Clarity Club Stencil No 35
Black Fine Liner Water and Copic Proof
Brusho: Lemon, Yellow, Green,
Blue and Green alcohol markers
Drawing Gum
Watercolour Card
Black Soot Distress Oxide
Tacky Glue
Basic Oval Die

Step 1: Secure the stencil to your card and draw round it with a black fine liner.

Step 2: Place the oval over the card and draw around the inside (see photo). Roughly trim out the centre, trim around the flowers, abut 5 mm past the drawn line. The die will cut it out perfectly. Position the die so the flowers are not under the cut line, Run through the machine.

Step 3:Fill in the stencil lines with drawing gum and leave to dry.

Step 4: Spritz the card with water and sprinkle with the Brusho

Step 5: Once dry stamp the spring and remove the Drawing Gum.

Step 6: Take a second piece of card, spritz and colour with the Brusho.

Step 7: When dry stamp the Treescape with the Black Soot Distress Oxide.

Step 8: Trim and mount onto black card with Tacky Glue.

Step 9: Layer a piece of black card onto your base card, after measuring for the right size for your piece.

Step 10: Slide your topper into place underneath one of the flowers, as shown in the photo, you might need to trim along the flower a little more, secure in place with Tacky Glue.

Step 11: Layer the piece onto the base card with Tacky Glue.

Here is the finished card:

Just a little extra here: If you have not shopped with Hochanda before, here is a voucher code giving you 30% off your first purchase (FEY5JBP7) it can be used for any purchase, feel free to share it.

I do hope you have enjoyed the tutorial today along with the finished card. I hope you will join me again very soon to see what else I have to share with you. For now Take care and Happy Crafting.xxx