Showing posts with label Jungle Dreams Collection. Show all posts

Thursday, 22 March 2018

Elephant March

Hi there, Im a little late today, well very late actually. 1001 Things to sort and never enough hours in the day. I was up very early this morning but I have still managed to fall behind with the things I wanted to do. Today, I am sharing a card I made using the 'Jungle Dreams' Collection from Michelle at MJM Studios.

You will need:

Jungle Dreams Collection
Sheena Stamping Card
Distress Inks Peeled Paint, Forest Moss, Faded Jeans, Gathered Twigs and Spiced Marmalade.
Alcohol Markers
Pebeo Drawing Gum
Clarity Moon Masks
Collall Tacky Glue
Collall 3D Glue Gel

Step 1: Take the elephant and size it to the largest , then build up the heard using the same animal adjusting the size each time. Cover them with Pebeo Drawing Gum.

Step 2: Use some ripped copier paper to create a path for them. Here I have used a mix of Gathered Twigs and Spiced Marmalade to make an orangey brown. Use it deeper in some places to give a bumpy textured look to the path.

Step 3: Build up your landscape next using a mix of the green Distress Inks.

Step 4: Add the moon mask and add blue, again unevenly to give the illusion of clouds and mist from the heat of the day.

Step 5: Remove the moon mask and add a little yellow, not too much. The use some stamps to add branches, grasses and rock. Remove the Drawing gum.

Step 6: Colour the elephants with alcohol markers, dont give to smooth a blend as you do want some texture to their skin and shadows, It makes their skin look a little more rough.
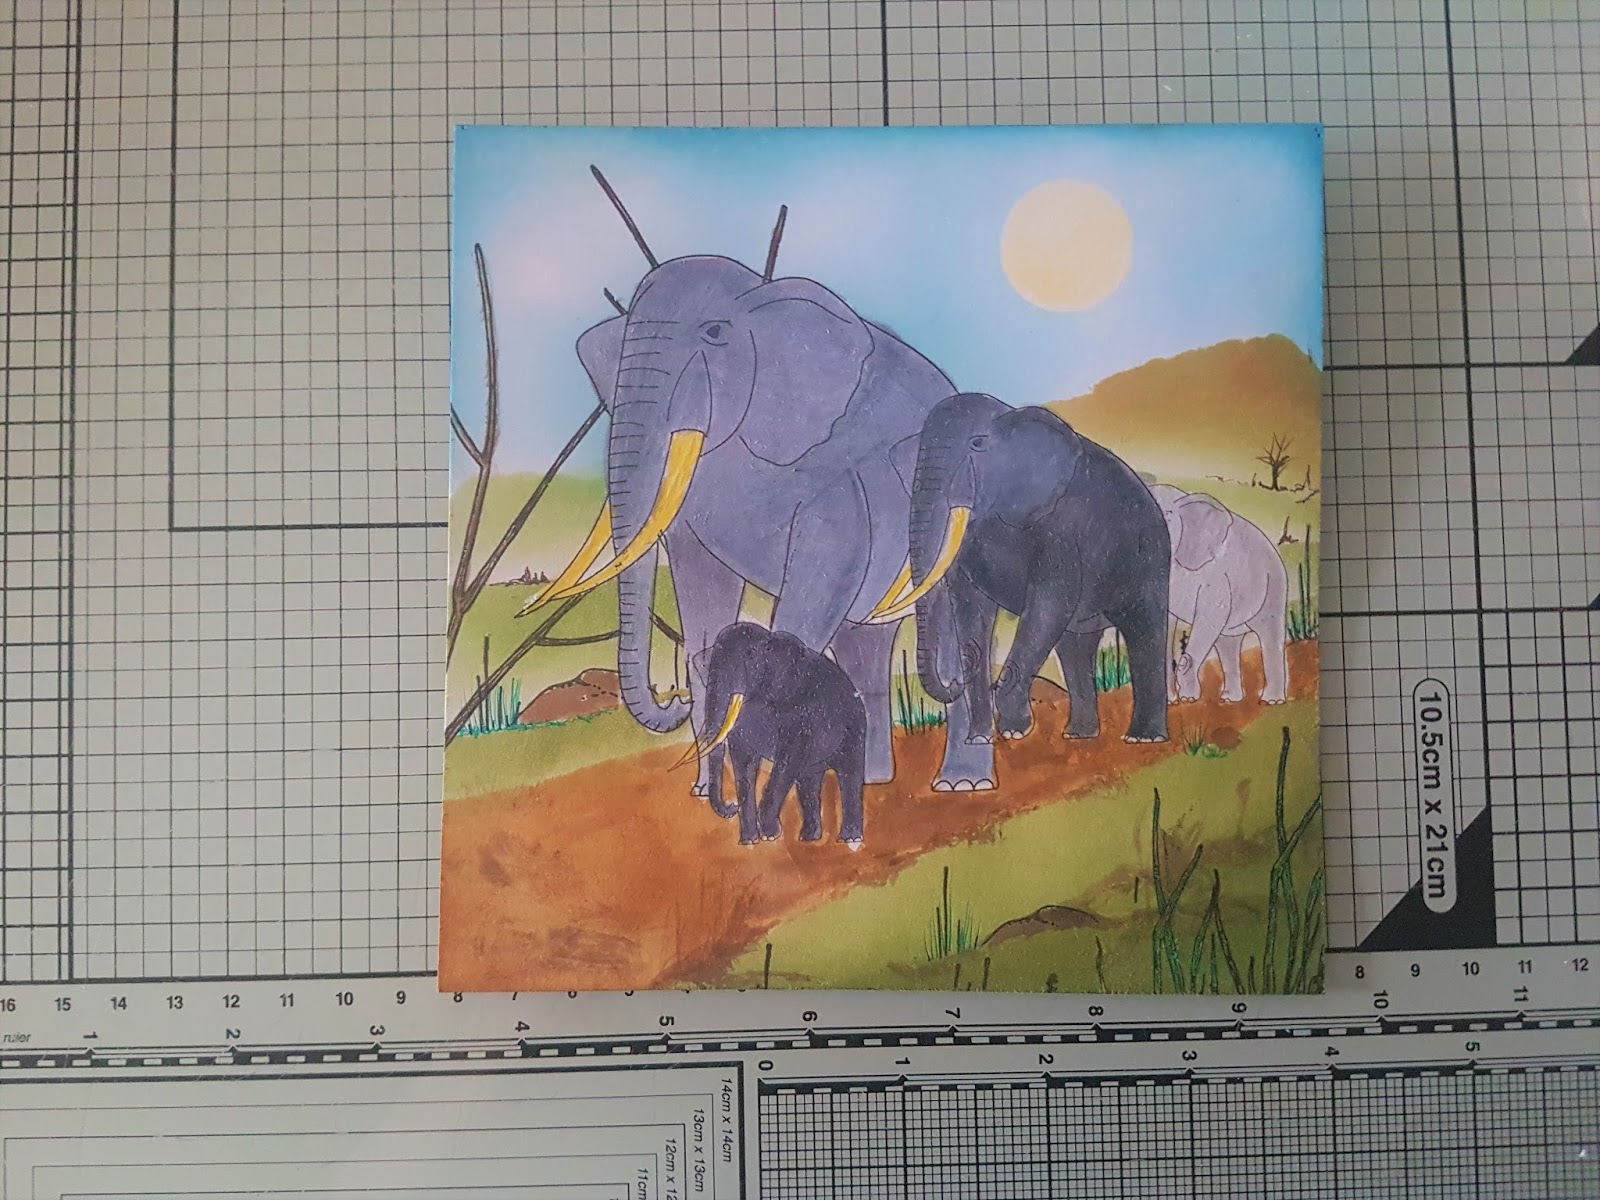
Step 7: Layer the piece onto white card. Then mount onto a larger piece of black before layering it onto a white Centura Pearl Base card. print one of the sentiments, here I have cut it individually and mounted each piece onto white Centura Pearl.

Thank you for popping by today, I hope you like the finished card along with the tutorial I have shared. I hope you will join me again soon. It has started to snow again heavily here, I am hopeful that it wont be as bad as they forecast and I will be able to post tomorrow. Take care and Happy Crafting.xx


Tuesday, 20 March 2018

Peacock Parade

Oh No!!!! More Snow :-( Like everyone else, I a really fed up with it. They have given out Amber Warnings and are forecasting a major snowstorm on Thursday and Friday here. Maybe 30 odd years ago it would have been exciting, but not now. Anyway, I do hope you are all warm and wherever you are the snow is melting away. Today, I am sharing a card I made with Jungle Dreams from Michelle at MJM Studios. It's a wonderful image to use.

You will need:
Jungle Dreams Collection
Matt Black Card
Watercolour Card
Smooth Card
3D Glue Gel
Tacky Glue
Scissors 

Step 1: Select the image from the disk. Print it out onto smooth card. This one is one of the coloured toppers. Also print and extra peacock and cut out, this will be for the decoupage. I have just done one layer but you could do more.

Step 2: Print out a background, this particular background is a wonderful Brusho background, which particularly suits watercolour card. It really coordinates well with the topper.

Step 3: Mount this onto your black card base. The size will really depend on what size topper you have chosen to print.

Step 4: Cut out your topper and layer it onto black card stock using Collall tacky glue. Layering it onto the same card ties the whole piece together.

Step 5: Secure your mounted topper to the background using Collall 3D glue gel or foam tape for extra dimension.

Step 6: Add some shape to the peacock and layer up with Collall 3D glue gel.

Thank you for popping by today, I hope you have enjoyed the tutorial along with the card I have shared. Would be lovely to see some comments or your feedback. If you have the collection maybe share your experiences or tell us what you have done. Take care and Happy Crafting.xx

Monday, 19 March 2018

Parchment Jungle

Morning. Are you all keeping warm, I do hope so. A bit of a shock, when your expecting spring like weather. It's freezing here today, no snow, but ice storms instead, with thunder and lightning last night. Today I am sharing a parchment project, made using the wonderful images from Jungle Dreams brought to us by Michelle from MJM Studios.

For this project you will need:
7'' x 7'' Parchment (to allow for scoring and attaching)
Parchment Scissors (your preferred)
Twin Needle Tool
Perga Ink White
Embossing Tools
Clarity Moon and Landscape Masks or Copier Paper
Sheena Stamping Card 6'' x 6''
Red Liner Tape
Distress Inks: Faded Jeans, Blueprint Sketch, Chipped Sapphire

Step 1: Create and print your design for the parchment onto paper or card.

Step 2: Trace your design to the parchment, using a mapping pen and white ink.

Step 3: Emboss your design from the back of the parchment using your small ball tool. Then add shading and whitework to add more depth, movement and texture. Always rest your work between sessions of whitework.

Step 4: From the back of your parchment, colour your design in colours of your choice.

Step 5: Take your card and create your landscape, building up the hills and mountains using the distress inks, always leaving a very pale section where they meet. When the land is complete and you are happy, add the moon mask.

Step 6: Continue with your background, building up the sky colour, always creating a deeper shade around the edges, fading out towards the moon. Remove the moon mask when finished and very lightly swipe from one side to add the smallest amount of colour, this looks like clouds or mist. You could add trees etc, but I chose not to on this piece

Step 7: Using a twin needle tool, prick all around your design. I dropped my tool and damaged one of the tips, so it's not very tidy. (another is on order).

Step 8: Using your snips, cut around your design (as shown)

Step 9: Score your parchment at 1/4 and 1/2 inch. Do this very gently and fold.

Step 10: Using red liner tape on the outer tab, secure to the reverse of your background. Sit back and enjoy your project.

Thank you so much for joining me today, I hope you have enjoyed the tutorial and the finished piece. Hope you will join me again. Take care and Happy Crafting.xx


Friday, 16 March 2018

Stitched Hummingbird

Morning, I hope you are all well, I hear you are bracing yourselves, ready for a cold snap from the return of 'The Beast from The East 2' I do hope it's not as bad as last time, so stay warm and safe. Today I am sharing a little embroidered piece, using the images from the Jungle Dreams Collection from Michelle. If you're going to the NEC this weekend, I hope you have a great time.

For this project you will need:
10'' Square of Calico
7'' or 8'' hoop
Clarity Light Wave or similar
Embroidery Threads
Needle
Pencil
Coloured Card and Matching Ribbon

Step 1: Choose the designs you would like to use and print them off, Choose a selection of threads.

Step 2: Mark the edge of of your hoop by finger pressing or placing in the hoop. Remove and transfer your design using the light panel or holding up against a window.

Step 3: Stitch your design, here I have used a lot french knots to add more texture, but the choice is yours.

Step 4: Trim a little fabric from around the edges, then roughly stitch the excess at the back. Make sure your design is pulled tight in the frame.

Step 5: Secure the ribbon hanger at the back to form a loop for hanging. Run glue all around the back of the frame and secure your card, coloured facing outwards. Place under a heavy book to ensure even adhesion. Once dry trim around the frame.

Here is the finished piece:

Thank you for taking the time to pop by today, I do hope you have enjoyed the tutorial and the finished project. If you do have time it would be lovely to see some comments, I really do love to read them. Take care and Happy Crafting.xx