Friday 30 September 2016

Pop Goes The Teasel.

Morning, Another beautiful day, I always like September here in Bulgaria when the weather turns cooler, it's always so pleasant to be able to have a drink outside without cooking. Today I am sharing a project I made using the wonderful MDF set that Bev from Bee Crafty launched on Hochanda 'Live' from Alexandra Palace. I do hope you managed to get hold of them, they were so popular that they sold out twice during the show.

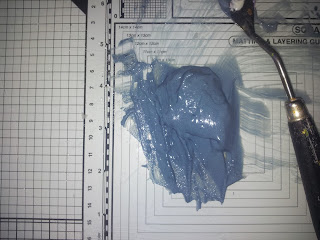
After coating my card with Acrylic Paint, (here I used Vanilla from Pebeo). I sprinkled purple Brusho's over the surface and dragged over the surface with a painting knife. 

I then decided to add some subtle colour down the mid section, so I sprinkled some Orange Brusho's onto the acrylic paint I had on my mat, placed the card face down onto it to transfer some of the colour.

When this was dry I stamped the 'Teasel' using Royal Purple Versafine. I then used Blue Lagoon to Stamp my sentiment and Birds.

To finish this project I secured it onto my MDF with Cosmic Shimmer glue from Creative Expressions and painted the base with Grandma's Teacup Acrylic paint from Indigo Blu and assembled.

I am so pleased that you have visited today. I hope you have enjoyed me step by step and the finished piece. I hope to see you very soon. Take care and Happy Crafting.xx

Thursday 29 September 2016

Clock Works

Morning, I thought it best to share this with you as a separate project. I actually used it for the back of the Dandelion  clock that I shared yesterday as the working arrived damaged and wanted to make the most of the MDF surface. The MDF was launched on Hochanda by Bev from Bee Crafty, during the show from Alexandra Palace, It was so popular and sold out (twice) incredibly quickly during the show. I have to say the quality is excellent, with such a smooth surface to work on, I didn't even need to prime it for this.

To start this project I used a clock/cog stencil. I smoothed Decoart Sand Texture Paste through it and removed the mask. While it was till wet I secured an old watch part to it using Collall 3D glue gel. The I linked some wooden cogs from Indigo Blu and secured them with Cosmic Shimmer Glue.

Once this was dry, I painted it all over with acrylic paint, the one I chose was 'Sleeping Beauty' from Indigo Blu. It is a beautiful metallic colour and gives a marvellous sheen. I set this aside to dry completely.

On my glass mat I put a small amount of Townhouse Teal acrylic paint and separately another amount of Grandmas Teacup, both of these colours are from the English Cottage Acrylic paint collection from Indigo Blu. To both of these I mixed some Kroma Crackle thoroughly  before randomly applying to my project

I left this for the rest of the day and overnight to dry thoroughly and crack before applying gilding wax, I used Pebeo Silver and Empire Gold to highlight some areas. To finish, I secured it to the base.

It's such a great piece of MDF, I am almost pleased that the clockworks were damaged to allow me to decorate the back as well. Thank you for taking the time to visit today, I hope you have enjoyed the step by step I have shared and the finished piece. Would be great to have your comments. Hope to see you soon, Take care and Happy Crafting.xx

Wednesday 28 September 2016

Dandelion Clock

This is a project I was really excited about so I am really pleased to be sharing it with you today. The base is made from the large 8' circle MDF that Bev from Bee Crafty launched at Alexandra Palace live on Hochanda. I used the dandelion set of stamps, it's a really wonderful set and I am sure I will be using them in a lot of different project, I am sure you will too.

To start with I took a sheet of tissue paper, slightly bigger than the MDF and stamped the dandelion seeds with Versamark to act as a resist. I wanted to get as many layers as possible to add interest to the finished piece.

Having spritzed the tissue thoroughly I sprinkled Brusho's over the surface, I used Emerald Green and Cobalt Blue.

I then saturated the tissue with water to blend and make pools of colour, then put it outside in the sun to dry.

I took my clock stencil and drew around it onto copier paper, cut out and set aside. I would use this later to protect the work, it makes it a lot easier.

Next I mixed some white Gesso with a coupe of teaspoons of plaster, I find this gives a much nicer surface for stamping onto than Gesso on it's own and the results are much nicer. I painted this onto the base and left to dry.

Using Black Versamark, I stamped some of the dandelions and seed heads from the collection onto the MDF base. 

I left this to dry before applying the tissue to the base using Cosmic Shimmer Matt Glue, Seal & Glaze from Creative Expressions. When this had dried overnight, I stamped more dandelions on top using Versamark and embossed with white fine detail powder to add another layer. Next I took some Decoart sand Texture Paste and coloured it using some black Brusho's

I placed my clock stencil in place and then added my copier paper to protect the other areas. Using a painting knife I spread the  Sand Texture Paste onto my project and removed the stencil and paper.

I added my sentiment using Black Versafine and added some Pebeo Gilding wax to the clock and edges.

To finish I added the clock hands and my project was finished.

Thank you for visiting today, I hope you have enjoyed this step by step and like the finished article. Hope to see you again soon. Take care and Happy Crafting.xx


Tuesday 27 September 2016

Exciting New Launch from Michelle Jackson-Mogford

Hi everyone, I am back again with a second post for today which I am very excited about. Many of you will know Michelle (MJM Design Studio) as the master of DSA & Craft Artist. Well, How exciting is this, Michelle has today launched her very own collection of Digikits. They are now available from Daisytrail for all of us to Craft with to our hearts content. I was so fortunate to be asked to play with with these, I have to say they are amazing.

The content is stunning, there is such a huge variety across the collections to suit a wide selection of crafty project and for all occasions. I have spent hours looking through them. The content is fresh and incredibly usable. I have to be truthful, I got so carried away that so far I have only managed a couple of projects, a scrapbook page and a card. I wanted to do some hybrid crafting with them as well to demonstrate how versatile they are. I have created the scrapbook page using the Lilies and Light Collection and the card from the Sunflowers and Stars. The other two collections are Bizarre & Fantastic and La Senora Mexicana. I would like to add that although they are separate collections they will all mix and match very well indeed.


I know I will be sharing more from these kits in the coming weeks. For anyone who hasn't tried digital crafting I would urge you to try. You can even get a free compact copy of Craft Artist from Daisytrail, if you dont already have the full version.


I had great intention of sharing more but as I said earlier, they are so crammed full that I got carried away. I would highly recommend these as there really is something for everyone. I do hope you will share what you make with these collections. Take care and Happy Crafting.xx 

A Single Rose

Hi, Barbara Gray from Clarity Stamp launched the most beautiful collection of Groovi plates recently on Hochanda. It was a floral collection made with the stunning work from Jayne Nestorenko. I was so pleased when mine arrived, so I couldn't wait to use them in a project. Today I am sharing a design I came up with using them along with other plates from the Groovi range. Roses have always been my most favourite of all flowers and so I had to use these first. I found a wonderful saying which was to become the focal point of this design.

To start with I planned the positioning of the words, I felt this phrase was so heartfelt and would match so well with the images I was going to use. I wrote the phrase onto copier paper first for reference  as adding large amounts of text can be tricky otherwise. I then used the inner frame to surround the words. Underneath but within the frame I added one of the rose swags.

Next I added the rose head from one plate, added a longer stem appearing from underneath.. I added the larger frame from the set, allowing the rose to hang outside this for a little extra interest.

I filled the space between the frames with the overlapping lattice, completed all of my whitework on the lattice, rose and leaves. I coloured the roses and leaves using polychromos. To add some more depth to the lattice I added some black using Polychromo pencil to give a more 3D look. To finish the piece I mounted it onto some Cerise Silk Art card using a corner punch.

I am entering this into Septembers Clarity Blog Challenge. Thank you so much for taking a look today, I do hope you like the design I have shared. Take care and Happy Crafting.xx

Monday 26 September 2016

Bee Crafty New Launch Samples

I am very excited this morning to be able to share some of the samples I have made for the Bee Crafty Launch with Bev on Hochanda today at 11am, 2pm and 5pm. They are Christmasy but with a the twist we can expect from Bee Crafty, who always give us something different to craft with.

I have really enjoyed using these stamps and the MDF as always.

I have tried to vary my samples to show just how versatile they are, as always I will be sharing my samples in more detail with additional photos and hope that you will visit to see them.

There are some really beautiful snowflakes, a wonderful border. They stamp beautifully as always and are so detailed.

I have always loved the sentiments from Bee Crafty, the team come up with some really different ones that can be used for all projects and these are no exception. I do hope that you manage to watch Bev today as she always gives such a lot of inspiration.

Great to have your company this morning, hopefully you like the samples that I have shared and that you will visit again tomorrow. Take care and Happy Crafting.xx

Sunday 25 September 2016

Weeds are Flowers Too!

Morning, At last some cooler weather has arrived after a few days of very welcome rain. Now the temperature is around 25-30c rather than in the 40's, so it's much more comfortable. Today I am sharing a card I made for the Bee Crafty show at 'Alexandra Palace' shown on Hochanda recently.

To make the card and background, I used the Gelli Plate. I also used a selection of English Cottage Acrylic paints by Indigo Blu. The colours I used were Townhouse Teal, Banana Custard and Emerald City which is a metallic colour giving a beautiful sheen to the finished piece. Using my Speedball Brayer, I layered the colours onto the plate. Then taking the Ground Elder, I stamped onto the plate to remove the paint before I took my print.

For the background I wanted a contrasting colour which would still compliment the piece so I used Pumpkin 'Eco Acrylic Paint'. I Brayered the colour onto my plate and taking the leaf stamp removed the paint and took my print.

To finish, I layered both prints onto Ivory Centura Pearl card from Crafters Companion. Then using foam tape onto my centre panel I secured it to the background. Finally I layered it onto a sage green pearl base card.

I hope you have enjoyed the step by step I have shared today along with the finished piece. I hope you will join me again tomorrow. Take care and Happy Crafting.xx


Saturday 24 September 2016

Family Sparkle

Morning, Today I am sharing a DL card I made using the stunning BEAUtanicals that Bev from Bee Crafty shared on Hochanda 'Live' from Alexandra Palace. All of the stamping and background has been created using the Wonderful Glitter Brush pens from Leonie.

I haven't got a clue where the photos went for this project so I must apologise.

To start with I created the background using Leonie's Glitter Brush pens. I used Cobalt from the 'Frosty Christmas' set then Iris and Lavender from the 'Wrapped Up' set. After spritzing the watercolour card I started at the top applying the darker colour and blending down to the bottom using the lighter colours. They blend so well and give a great effect.

For the stamping I used the Ground Elder set from Bee Crafty. The're beautiful stamps and work so well with the Glitter Pens, Having the brush nib they are so easy to apply to your stamps, I have to admit that although they work with rubber stamps, I find they are even better with the clear stamps.

I used the same colours I used for the background to bring the whole project together. For the plants in the foreground I used Cobalt and for the ones further back I used Lavender. Finally I added the sentiment & birds using the beautifully rich Cobalt.

Thank you for stopping by today. Once again I am so sorry for the delay in my post this morning. Hopefully you will stop by soon and see what else I have to share. Take care and Happy Crafting.xx

Friday 23 September 2016

Hammered Silver Platter

Hi, Something very different today, Made from cardboard that might otherwise have been thrown away. I also used some Silk Clay from Creative Company, along with the Wonder Crystals and Wonder Tape that Justin & Gordon from Be Creative bring to Hochanda.

Years ago I found a battered silver plated try, which had been hammered, so I wanted to make something similar to that with the Wonder Embossing Crystals and add an emblem in the centre. I started by cutting out a 12' circle from an old cardboard box.

I then cut another identical and this time cut a smaller circle within it. This would form the rim of the tray. I stuck this to the base using Cosmic Shimmer Glue from Creative Expressions.

So there wasn't a step between, I used silk clay to form a slope between the rim and the base.

I covered the whole project using Wonder Tape, then covered it with 'Lodolite Quartz' and 'Picture Jasper' Wonder Embossing Crystals. I made it thicker in some areas to give it an uneven surface. Where it is thinner, the surface is pitted giving it the hammered look.

For the centre emblem, I covered a piece of card with a Wonder Sheet and drew a 6' circle. I then added my design inside the circle and cut out all of the sections.

I then peeled off the backing sheet from each section, using the Wonder Crystals I embossed each piece. The colours I used are:


To finish, I secured the design onto the base of the tray using Cosmic Shimmer Glue.

Thank you so much for taking the time to visit today. I hope you liked the finished project along with the step by step that I have shared. Hope to see you again very soon. Take care and Happy Crafting.xx