Showing posts with label Brayer. Show all posts

Thursday, 29 November 2018

Tough Tag

Morning Friends and Crafters. I had such a wonderful time at Hochanda. It was such a great show, Matt made me feel as relaxed as possible. The whole team at Hochanda made me feel right at home, very welcome and did everything they could to make it perfect. The set was staged to perfection, I met 'Magic Hands' in real life, I didn't even know they were attached to a person,lol Today, I thought I would share a tutorial for one of the show demos.

You will Need: 
Craftascope 'Trent' A5 Media Stencil
Craftascope 'Profile' A5 Media Stamp Collection 2
Eco Green Acrylic Paint Mulch and Clamshell or Similar  (Cream and Beige)
Brayer
Glass Mat or Gel Printing Plate 8 x 10''
8 x 4'' Tag
Crafters Companion Spray n Shine
Basic Rectangle Die (Approx 4 x 3'')
Mermaid Lagoon Distress Ink
Versafine Black Ink
Black Fine Liner
White Gel or Posca Pen
Black Card

Step 1: Create the background. Use a Brayer to spread a little of one colour onto your matt or plate. Scrunch up some copier paper and remove some of the colour to create a pattern. The add your tag face down and smooth the back, peel away to lift the print. Do this with your second colour, you really dont need much paint for this at all, leave to dry. Cut your rectangle from copier paper, keep both parts. Spray with a little Stick n Spray and position onto your tag.

Step 2: Use a smoothie or similar to add the Distress Ink  all over the tag. The colour will highlight the texture from the acrylic resist. Rub over with a clean cloth or kitchen roll to remove any excess ink.

Step 3: Carefully position the outer rectangle and remove the inner. Next position the stencil and ink through with the black ink. Leave this to dry for 10 to 15 minutes to avoid any smudges.

Step 4: Remove the stencil to reveal.

Step 5: Remove the outer rectangle, make sure its dry, then remove any excess adhesive with a kitchen roll or similar.
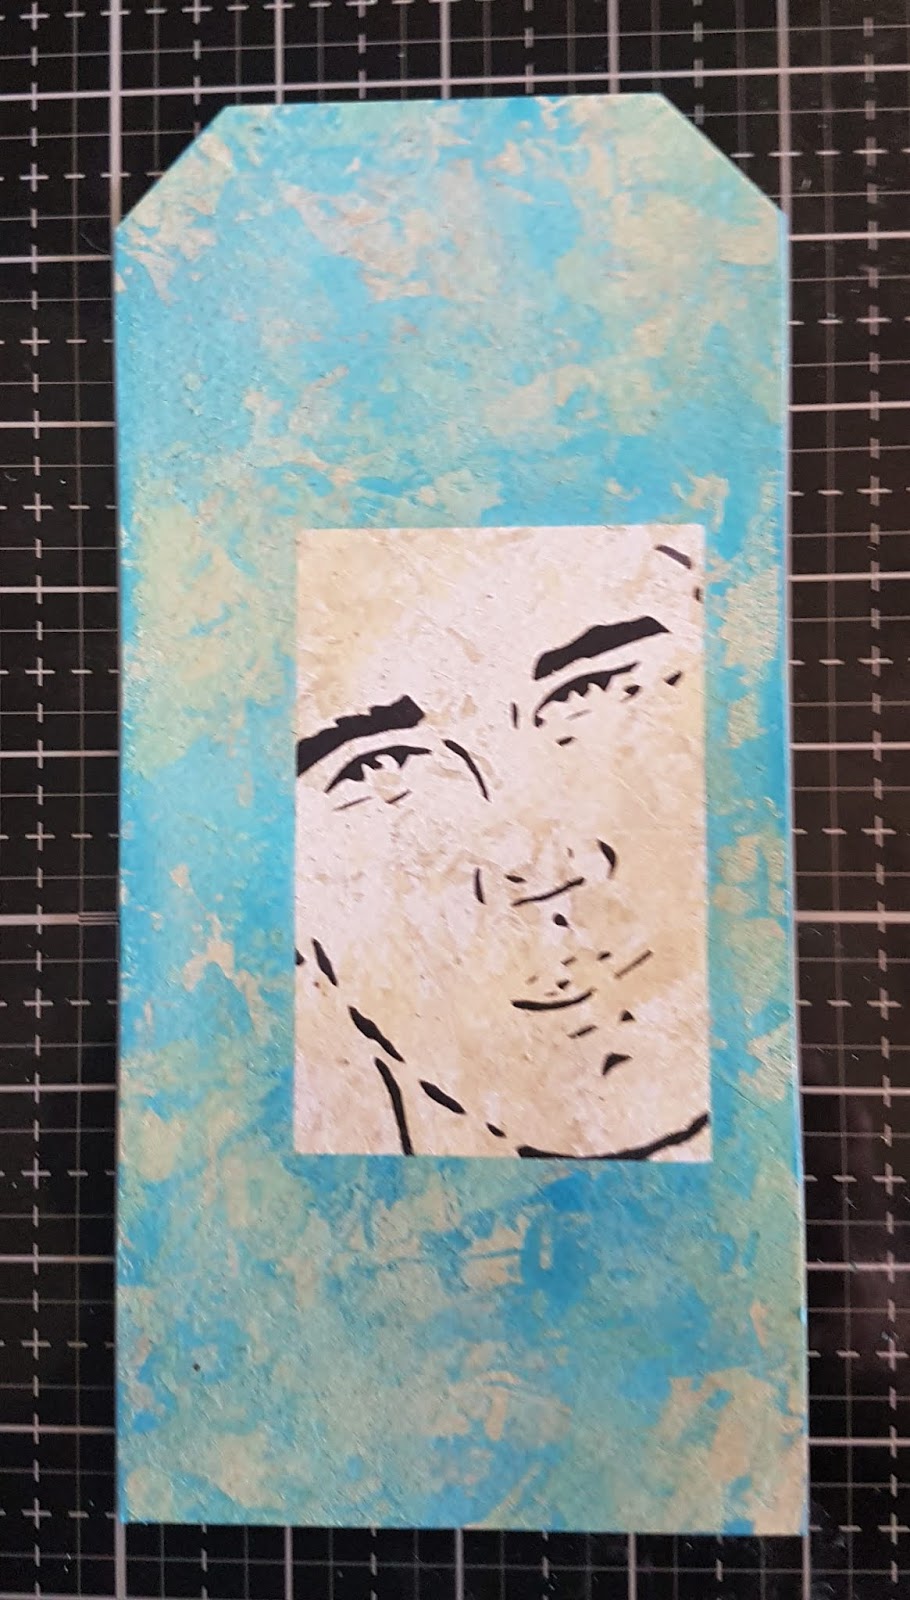
Step 6: Use your black fine liner to add a deckled edge around the rectangle, highlighting the image.

Step 7: Mount your tag onto Black card, Stamp your words onto white card and cut them out individually. Rather than mount these, take your black and white pens and add some detail around them. The tag is now complete, it's great on it's own but would also look great added to a card or other project.

If you would like to get your hands of the last few of my collection they are only available at Hochanda or via my Etsy site, a link is at the top of my blog (CRAFTSCOPE ETSY SHOP).

Just a little extra here: If you have not shopped with Hochanda before, here is a voucher code giving you 30% off your first purchase (FEY5JBP7) it can be used for any purchase, feel free to share it.

Thank you ever so much for joining me today. I do hope you have enjoyed the tutorial along with the finished project I have shared. I hope you will join me again very soon to see what else I have to share. For now Take care and Happy Crafting.xxx


Tuesday, 13 November 2018

Let your Spirit Soar

Morning Friends & Crafters, lovely to have your company again. Today I am sharing a card I made with just one set of my stamps along with the Funky Wave stamp from Leonie. As most of you will know my favourite colour, so this was just perfect for me. A wonderful card which could be made to suit anyone and for any occasion.

You Will Need:
Dolphin Stamp Set 1
Funky Wave Stamp from Leonie
Blue Acrylics
White Acrylic or Gesso
Shrink Plastic
Colourblend Pencils
Salty Ocean Distress Oxide
Stayzon Black Ink
Brayer
Black Card
White Card Base
Heat Gun.

Step 1: Start by creating a nice layered background, using a coupe of blue acrylics, Brayer the darkest first and then layer up, adding the white after and build up the layers and texture until you are happy. This gives such a lovely texture for your background.

Step 2: Make copier paper masks for your dolphins and waves. Stamp the waves first, then mask them off. Then arrange your dolphins, remembering to mask off each time, always check the masks as they can slip. Next add your sentiment, when dry use the heat tool to shrink and mount onto black card.

Step 3: From the background piece you have made cut your layers, For the top layer you need a 4'' square, use the 'Love' & 'Compassion' to complete this background. I have used Salty Ocean to stamp the words. Mount this onto black card, leaving a narrow border.

Step 4: Take the next piece of background, this time 5 1/2'' square. Layer this onto a black mat with a narrow border.

Step 5: Layer your project onto a white/silver Centura Pearl base card.

Just a little extra here: If you have not shopped with Hochanda before, here is a voucher code giving you 30% off your first purchase (FEY5JBP7) it can be used for any purchase, feel free to share it.

As you know I love writing my blog and helping as much as I can, well I would really love for you to add you support by adding me as a favourite blog. All you need to do in that section is choose other and add my blog address nickinbarnsley.blogspot It would be great to get a mention even if I dont come anywhere.

Here is the link to add your support for all of the categories. 

https://www.britishcraftawards.com/


Until Tomorrow, Take care and Happy Crafting.xx

Wednesday, 24 October 2018

Winter Baubles With Treescape from Clarity

Morning Friends and Crafters, great to have you joining me again today. I am sharing a card I made using the Clarity Treescape stamp. I hope you like the tutorial along with the finished card.

You will need:
Clarity Treescape Stamp
Clarity Winter Stamp
Clarity Santa & Star Corners Stamp Set
Brayer
Bubble Wrap
Distress Oxides: Blueprint Sketch, Faded Jeans, Mermaid Lagoon
Basic Circle Dies
Stamping Card
Alcohol Markers
Black Card
White Card Base

Step 1: Create  a background with a mix of the Distress Oxides, Use a Brayer to build up thee layers and then add texture with some bubble wrap.

Step 2: Trim the background piece to 9 x 6'', cut out circles from the centre of the background 2 x 3'', 2 x 2'' and 1 1/4'', make sure you leave enough room around the edge so you can use it as a layer.

Step 3: Stamp selectively, within the circles. In one of the medium sized circles add an oval mask before stamping the trees, so you can add the 'Winter'.

Step 4: Cut a 7 x 4 1/2'' white centre panel, stamp the decorative corners, layer onto black then mount onto the background

Step 5: Colour the corners with alcohol markers, add a black mat behind the background and layer onto your base card.

Step 6: Add the circles to your card with tacky glue.

Step 7: Lastly line up your sentiment circle and add to the card with 3D glue gel for added dimension.

Here is the finished card:

Just a little extra here: If you have not shopped with Hochanda before, here is a voucher code giving you 30% off your first purchase (FEY5JBP7) it can be used for any purchase, feel free to share it.

I do hope you have enjoyed the tutorial today along with the finished card. I hope you will join me again very soon to see what else I have to share with you. Tomorrow I have a very exciting post for you and for me, I can't wait and I really hope you will join me. For now Take care and Happy Crafting.xxx

Saturday, 20 October 2018

Spring 'A Little Bird Told Me'

Morning Friends and Crafters, As most of you know, I don't normally post at the weekends. But today I thought I would add a very simple, but effective card that I made for the Clarity One Day Special launch. It's a fairly short post.

You will Need:
Clarity 'A Little Bird' Stencil
Clarity 'Spring' Stamp
Watercolour Card
Indigo Blu Townhouse Teal
Indigo Blu Pantry White
Indigo Blue Banana Custard
Distress Oxide Blueprint Sketch
Distress Oxide Peacock Feathers
Distress Oxide Mowed Lawn.
Brayer
Sheena Stamping Card
Clear Embossing Powder
Heat Gun
Versamark Black Ink
Yellow Alcohol Marker

Step 1: Start by creating your background using the Indigo Blu Acrylics. Apply layers with your Brayer. It gives a great textured effect. When you come to use this for your layer, it really is a good idea to use a basic die in the centre, so you can use it for another project.

Step 2: On the reverse of your stencil, apply the Distress Oxides. Place this face down on your watercolour card and run through to emboss. Next coat this with clear embossing powder and heat. With Versafine Black ink, stamp the 'Spring'. Add an extra splash of spring colour by colouring the spring with the yellow alcohol marker.

Step 3: To finish your card layer onto your background and then mount on to a black card base.

Thank you for joining me today, I hope you have enjoyed this short tutorial along with the finished card. It would be great for you to join me again very soon to see what I am sharing. The next couple of weeks are going to be very exciting. For now Take care and Happy Crafting.xxx

Friday, 12 October 2018

Spring Leaves

Morning Friends and Crafters, I am sharing a card today that I made for the launch of the Clarity 'A Little Bird' collection of wonderful Stamps and Stencils. I have had great fun with these & enjoyed some different techniques with them too, especially making different backgrounds etc for them.

You will Need:
Clarity 'A Little Bird' Stamp
Clarity 'Spring' Stamp
Brayer
Gelli Plate
White Stamping Card
Black Card
Leaf from the Garden
Indigo Blu 'Townhouse Teal Acrylic Paint
Indigo Blu 'Pantry White' Acrylic Paint
Indigo Blu 'Banana Custard'
Eco Paint 'Stormy'
Eco Paint 'Clamshell'
Alcohol Marker Toner or very light Grey

Step 1: Start by creating a background to stamp onto, Use the Indigo Blu Acrylics for this with a Brayer. Build up the layers of colour for texture and interest.

Step 2: Next on your Gelli plate create your main background using the Eco Paints. Remove some of the paint with your leaf and take a print.

Step 3: Stamp your little Bird stamp and 'Spring' onto your first background. Trim to size and mount onto black card, also cut a black layer for your background and create a base card from Centura Pearl.

Step 4: Position and secure your topper and sentiment, using Tacky glue. If you would prefer more dimension you could use 3D Glue gel.

Here is the finished card:

Thank you for joining me today, I really hope you have enjoyed the tutorial along with the finished card. Another thing, here is a 30% off voucher to use on your first order (anything) from Hochanda, use code FEY5JBP7.

As always I really hope you will come by again to see what I am sharing next time. For now Take Care and Happy Crafting.xxx

Monday, 3 September 2018

Beauty with the Clarity Three Way Overlay Stamps

Morning Friends and Crafters, I do hope you are enjoying the ongoing Celebrations for 25 Years of Clarity. Today there is still the fabulous One Day Special with Paul & Linda at 9 am, 1 pm and the Final Call at 5 pm. Today I am sharing a card along with a full tutorial of one of the samples I made for the show.

You will need:
Clarity Three Way Overlay Townhouse Stamp Set.
Stamping Card
Black Card
White Card Base
Word Chain Stamps
Brayer
Indigo Blu Town House Teal Acrylic Paint
Indigo Blu Pantry White Acrylic Paint
PaperArtsy Fresco Finish Tango Acrylic Paint
Black Fine Liner
Ruler
Versamark Black Ink
Hickory Smoke Distress Oxide

Step 1: Create a textured background using the acrylic paint selection, Add each layer separately, leave to dry and add more layers until you are happy with the texture, depth and effect. This will give you lots of texture and interest.

Step 2: Stamp your outline stamp, using Black Versafine ink.

Step 3: Add the positive layer stamp, using Hickory Smoke Distress Oxide, layer this until you are happy with the depth of colour.

Step 4: Trim to size and mount onto a black mat.

Step 5: Create a background piece in the same way as before, here i have used an A4 piece, which will give me some for a future project.

Step 6: Trim to size, Use a fine liner pen to add a frame around the piece. Mount onto a black base before adding to your base card.

Step 7: Use 'Beauty' from the Clarity Word Chain Stamps, stamp with the black ink onto a matching piece of background.

Step 8: Using the fine liner and ruler, create a frame around this also. Mount this onto black card.

Step 9: To finish your card, add the topper you have created and add the sentiment to your project.

Here is the finished piece:

Thank you ever so much for joining me today, I do hope you have enjoyed my tutorial along with thee finished card I have shared with you. Enjoy the last day of the Clarity Celebrations with Paul and Linda and here's to another 25 plus years. For now Take care and Happy Crafting.xxx

Saturday, 8 October 2016

Magic Of Christmas

Morning, I wanted to share this incredibly simple card made with the 'Baubelicious' Embossing Folder that Leonie launched on Hochanda. It shows just how simply folders can help you create quite a striking look, especially useful for batch making at Christmas.

Taking a Black Versafine Ink pad and a Brayer, I thoroughly inked up the embossing folder being careful to ensure the ink was evenly distributed across the surface. I then took my card, approximately 5 1/4 x 7 1/4' and passed it through my machine. I cut a base in Grey 8 x 6''  and stamped the corners using one of the lovely sentiments.

I edged the Grey card with Cosmic Shimmer Glue and covered with 'Ice Diamonds' I wrapped a red satin ribbon around the edge of the embossed card before securing to my base card using foam for a lift. Finally I added a matching bow to finish the card.

I hope you have enjoyed the step by step today and the finished card. I hope you will come back again soon.

Thank you for your lovely comments both here and on Facebook, I really do appreciate hearing from you. Take care and Happy Crafting.xx 


Sunday, 25 September 2016

Weeds are Flowers Too!

Morning, At last some cooler weather has arrived after a few days of very welcome rain. Now the temperature is around 25-30c rather than in the 40's, so it's much more comfortable. Today I am sharing a card I made for the Bee Crafty show at 'Alexandra Palace' shown on Hochanda recently.

To make the card and background, I used the Gelli Plate. I also used a selection of English Cottage Acrylic paints by Indigo Blu. The colours I used were Townhouse Teal, Banana Custard and Emerald City which is a metallic colour giving a beautiful sheen to the finished piece. Using my Speedball Brayer, I layered the colours onto the plate. Then taking the Ground Elder, I stamped onto the plate to remove the paint before I took my print.

For the background I wanted a contrasting colour which would still compliment the piece so I used Pumpkin 'Eco Acrylic Paint'. I Brayered the colour onto my plate and taking the leaf stamp removed the paint and took my print.

To finish, I layered both prints onto Ivory Centura Pearl card from Crafters Companion. Then using foam tape onto my centre panel I secured it to the background. Finally I layered it onto a sage green pearl base card.

I hope you have enjoyed the step by step I have shared today along with the finished piece. I hope you will join me again tomorrow. Take care and Happy Crafting.xx