Showing posts with label Gel Printing Plate. Show all posts

Thursday, 29 November 2018

Tough Tag

Morning Friends and Crafters. I had such a wonderful time at Hochanda. It was such a great show, Matt made me feel as relaxed as possible. The whole team at Hochanda made me feel right at home, very welcome and did everything they could to make it perfect. The set was staged to perfection, I met 'Magic Hands' in real life, I didn't even know they were attached to a person,lol Today, I thought I would share a tutorial for one of the show demos.

You will Need: 
Craftascope 'Trent' A5 Media Stencil
Craftascope 'Profile' A5 Media Stamp Collection 2
Eco Green Acrylic Paint Mulch and Clamshell or Similar  (Cream and Beige)
Brayer
Glass Mat or Gel Printing Plate 8 x 10''
8 x 4'' Tag
Crafters Companion Spray n Shine
Basic Rectangle Die (Approx 4 x 3'')
Mermaid Lagoon Distress Ink
Versafine Black Ink
Black Fine Liner
White Gel or Posca Pen
Black Card

Step 1: Create the background. Use a Brayer to spread a little of one colour onto your matt or plate. Scrunch up some copier paper and remove some of the colour to create a pattern. The add your tag face down and smooth the back, peel away to lift the print. Do this with your second colour, you really dont need much paint for this at all, leave to dry. Cut your rectangle from copier paper, keep both parts. Spray with a little Stick n Spray and position onto your tag.

Step 2: Use a smoothie or similar to add the Distress Ink  all over the tag. The colour will highlight the texture from the acrylic resist. Rub over with a clean cloth or kitchen roll to remove any excess ink.

Step 3: Carefully position the outer rectangle and remove the inner. Next position the stencil and ink through with the black ink. Leave this to dry for 10 to 15 minutes to avoid any smudges.

Step 4: Remove the stencil to reveal.

Step 5: Remove the outer rectangle, make sure its dry, then remove any excess adhesive with a kitchen roll or similar.
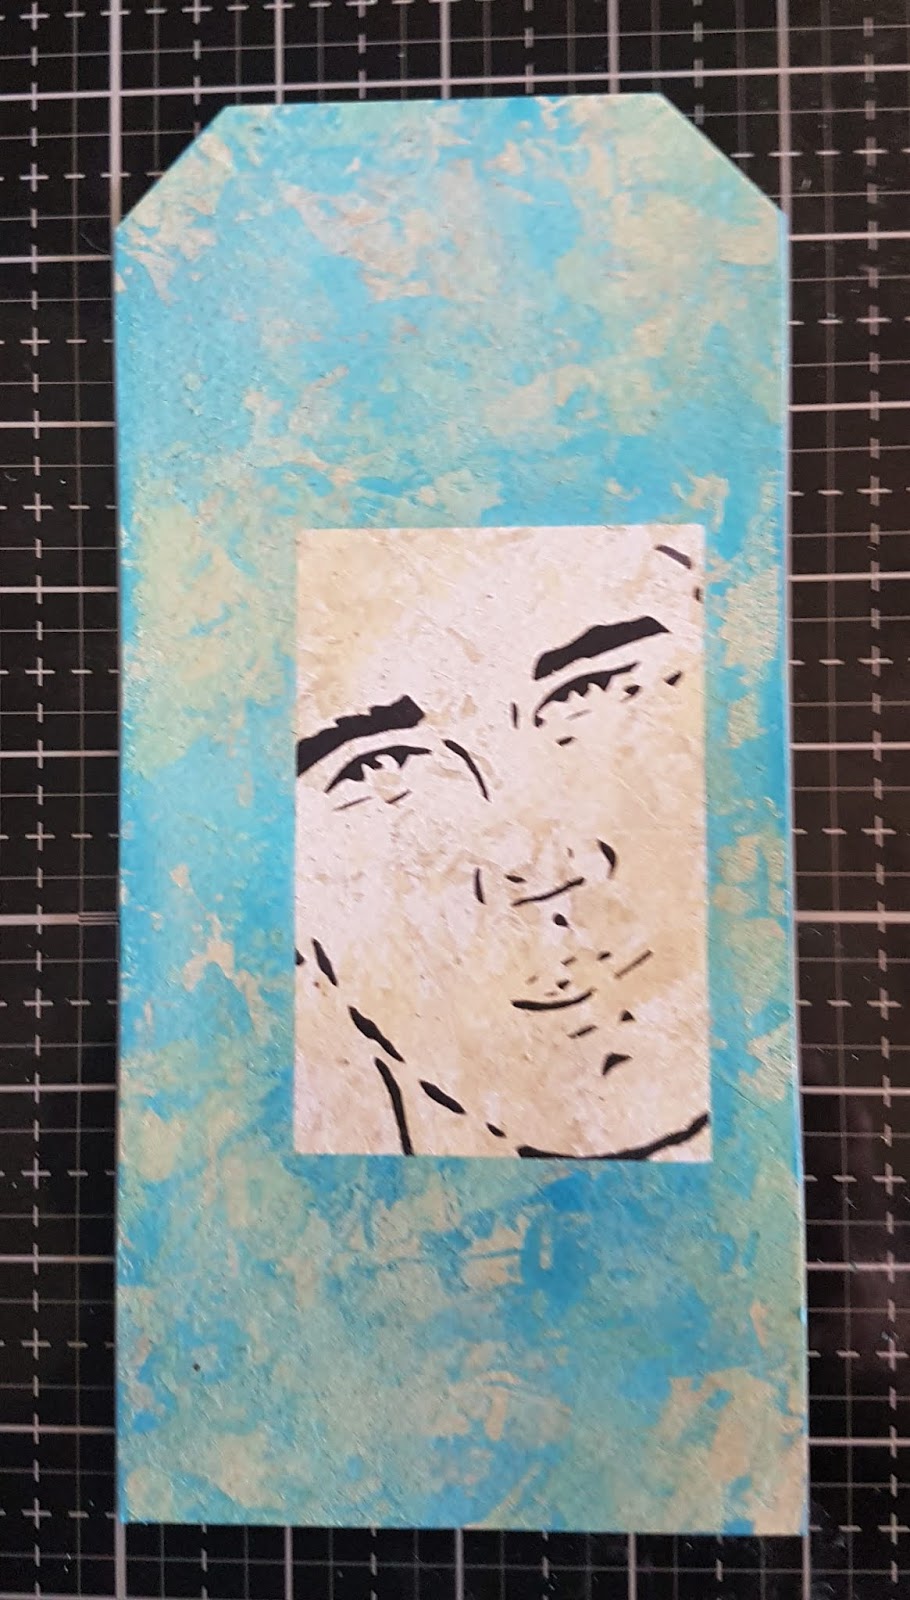
Step 6: Use your black fine liner to add a deckled edge around the rectangle, highlighting the image.

Step 7: Mount your tag onto Black card, Stamp your words onto white card and cut them out individually. Rather than mount these, take your black and white pens and add some detail around them. The tag is now complete, it's great on it's own but would also look great added to a card or other project.

If you would like to get your hands of the last few of my collection they are only available at Hochanda or via my Etsy site, a link is at the top of my blog (CRAFTSCOPE ETSY SHOP).

Just a little extra here: If you have not shopped with Hochanda before, here is a voucher code giving you 30% off your first purchase (FEY5JBP7) it can be used for any purchase, feel free to share it.

Thank you ever so much for joining me today. I do hope you have enjoyed the tutorial along with the finished project I have shared. I hope you will join me again very soon to see what else I have to share. For now Take care and Happy Crafting.xxx


Friday, 23 November 2018

Stitched Mixed Media Face

Hi Friends and Crafters. I am sharing a stitched mixed media project with you today. Something a little different to try out with my collection. This uses a simple chain stitch for the outline and a couple of French Knots for the eyes. The background has been made with Calico with the print for the background pulled from the Gel Press from Clarity. It's great fun to use and a great way of making some really interesting backgrounds for any of your crafty makes.

You will Need:
Versafine Black Ink Pad
Daler Rowney System 3 Cadmium Yellow, Cadmium Red and Ultra Marine.
Brayer
Burgundy/Red Embroidery Thread
Black Card
White Stamping Card
Calico

Step 1: Start with the background on your calico. Add and spread each colour in turn using your Brayer. Use Red, then Blue and finally the yellow. Firmly and evenly smooth the calico over the surface and lift the print. Leave to dry thoroughly.

Step 2: Using the remainder of the ink on your plate, repeat with your card. Lift the print and leave too dry.

Step 3: Position the stencil onto the calico and using either a fine liner or graphite pencil, trace around the outside lines of the whole design. Add the Calico to your hoop and stitch your design use 3 threads and use the chain stitch. This fives a really nice raised result, with dimension and texture while allowing smooth turns around the curves. Use a darker thread for the eyes and a couple of french knots to add life to the eyes. Ray the edges of your cloth to give more interest and texture.

Step 4: Choose a selection of words that appeal to you from across both stamp sets. Use Versafine black ink to stamp onto your gel printed card. Use Tacky glue to mount them onto black card, leaving a narrow border.


Step 5: Mount your fabric onto black card using Collall Tacky Glue. Then use 3D Glue gel to position and secure your words around the face.

Another thing, here is a 30% off voucher to use on your first order (anything) from Hochanda, use code FEY5JBP7.

As you know I love writing my blog and helping as much as I can, well I would really love for you to add you support by adding me as a favourite blog. All you need to do in that section is choose other and add my blog address nickinbarnsley.blogspot It would be great to get a mention even if I dont come anywhere.

Here is the link to add your support for all of the categories. 


Many thanks for joining me today. I hope you have enjoyed the tutorial along with the finished project. It would be great for you try it out especially if it's something you have not done before. This makes a great wall hanging, a page for a journal or scrapbook page and a smaller version would make a lovely stitched card. Why not try it as a partial face with a boarder around it, whatever you do have fun and enjoy what you do. For now Take care and Happy Crafting.xxx