Showing posts with label Leonie Launch. Show all posts

Friday, 21 October 2016

I love to Laugh

I apologise in advance for anyone who gets this song stuck in their heads, Like I have even as I write this I can hear it in my head. lol I had just watched Mary Poppins before I was using the 'Laugh' Mask. I have also used the stamps that Leonie Launched on Hochanda on Thursday along with some from her previous launch.

I positioned 'Laugh' using Stick n Spray from Crafters Companion. I also secured some copier paper that I had torn to mask off and give me a centre strip to add my colour.

Using Distress Inks to add my colour, I used Squeezed Lemonade, then Spiced Marmalade and blended to remove any joins, the third colour was Candied Apple. For the opposite side of the strip I used Salty Ocean, which also gave me the green I wanted, then Blueprint Sketch and finally Chipped Sapphire. I then removed the copier paper when I was happy with the blending.

To add the 'Love' I used the stamp from Leonie's last collection, I cut this up so I could stagger the letters and place the back to front 'E'. I then masked off the 'L' so that I could use just the empty box and add the letter 'I' and 'To' Below the colour strip I used the 'HO HO HO' stamp and changed it to read 'HA HA HA' I coloured the piece in using a selection of Spectrum Noir Aqua Markers.

I built up my design, making sure to keep it balanced, I also used some stamps behind a couple of the letter boxes.

I hope you like this fun card and the step by step I have shared today. Thank you for stopping by and I hope that you will visit again very soon. Take care and Happy Crafting.xxx


Wednesday, 12 October 2016

Merry Little Christmas

This was a really fun card to make with the stamps Leonie launched recently on Hochanda. I have created a little fantasy village for the wee magic folk. Before I start my step by step for this one, I want to let out a little secret. Leonie will be launching her Brand New and Exciting collection on Hochanda tomorrow night as  a One Day Special, I hope you will join her at 8 pm. I will be sharing some of my samples tomorrow night at launch.

Back to today's card, To start with, I stamped the Angel wings and part of the 'Build a Tree Stamps onto copier paper and cut out to use as masks. I then took a piece of Sheena Stamping card from Crafters Companion and created the fantasy flowers using the wings, I also stamped the tree section which would become a new roof.

Next I masked off the tree section and lined up the stamp of the house I had chosen to use, it really is great to change the look especially if you want to create a project with a lot of the houses and want them to look completely different. I then stamped the little row of houses further back and off to the right, adding some distance. For the stalks, I used a strip stamp from Leonie's previous collection and added some leaves at the same time.

To mask off the images, I used the Pebeo Drawing gum to allow me to create the background. I just had to use Leonie's Glitter Pens to give a magical background to this. I used Lavender and Lilac blended from top to bottom. I also used the smallest amount of Iris to the very top and blended to give a colour fading from dark to light. I then removed the drawing gum and coloured the piece with a selection of my alcohol markers.

I stamped my sentiments onto some card and blended the same colours across them, I layered this onto some purple Centura Pearl cardstock from the Brights collection and then onto a lilac base leaving a 5 mm border on each. I then secured them with 3D glue gel which finished my card.

Thank you for joining me today, I hope you like the finished piece along with the step by step I have shared today. I hope you will stop by again tomorrow. Take care and Happy Crafting.xx

Sunday, 9 October 2016

Hope, Joy and Love

I wanted to make something different with the stamps Leonie launched recently on Hochanda. For this project I decided to use the lovely Angel to make a lavender bag. I have used the Spectrum Noir Aqua markers from Crafters Companion for the colouring as they work really nicely on fabric, but please bear in mind that they wont be colourfast. For this project they were perfect as it wouldn't be necessary to wash a lavender bag.

To start with I cut to identical rectangles from cream calico, using a basic die. I also stamped the Angel onto copier paper and cut out. I needed to use this as a mask to add the wings, once I had stamped the Angel onto the Calico using black Versafine Ink, I then Ironed with a hot iron on the reverse.

I coloured the Angel in using a selection of my Aqua Markers, then put the calico in a hoop. I then embellished it with some stitching and French knots using gold metallic thread.

For the reverse of the bag, I stamped Love, Joy and the Hope stamps from the collection and then pressed with a hot iron.

This was also coloured with the Spectrum Noir Aqua Markers from Crafters Companion.

The two rectangles were then placed right sides together with a piece of ribbon sandwiched between them to act as the hanger. I then stitched all around leaving a small gap for filling.

I then turned these the right way and pressed again.

To complete the design I decided to use a couple of the accent stamps to surround the design around the edges.

Finally I stuffed the bags and ladder stitched the hole left for the filling.

Thank you so much for joining me today, I really enjoyed making these and hope you have enjoyed my step by step along with the finished items. Take care and Happy Crafting.xx


Friday, 7 October 2016

Heart of Christmas

Great to have your company for the first of my Step by Steps using Leonie's new release. This wonderful collection was launched on Hochanda on Wednesday evening, I hope you got to see some of the inspirational shows and managed to get hold of the collection.

For this card I took two pieces of Sheena Stamping Card, both the same size, approximately 5 1/2 x 7 1/2''. I then took a bauble die, positioned and cut from the card 3 times.

Next I took the 'Entwined Frame' Embossing folder to emboss the frame around the design.

I placed this over my base card and lightly marked through in pencil where the apertures would be. Then took three of the stamps from the collection and using Versafine Black, I stamped the images, then masked with Pebeo Drawing Gum from Crafters Companion.

Taking Shaded Lilac and Blueprint Sketch Distress Ink, I blended around the Baubles, Edges and the embossed areas from Dark to light drawing the eye into the images.

I used Leonie's Glitter pens to add the background colour around the images, blending from Cobalt through to Arctic and Ice Drop all from the Frosty Christmas set.

Next I stamped some of the Holly and Berries from the stamp set along with the sentiment I had chosen onto a banner. I coloured the holly and berries again with Leonie's Glitter pens. I then used Shaded Lilac and Blueprint Sketch around the banner to coordinate.

To finish I layered the front onto the base using foam tape to raise it from the card. Then I mounted this onto a Piece of Blue Centura Pearl card by Crafters Companion from the brights collection. I secured the Holly, Berries and Banner using Collall 3D glue gel.

Thank you for taking the time to visit today, I hope you have enjoyed the step by step and the finished card I have shared. Take care and Happy Crafting.xx

Sunday, 28 August 2016

Snow Deer

Morning, The day as arrived when Leonie will be launching something very special on Hochanda. Please don't miss the One Day Special, starting tonight at 8 pm. I will be posting my sample previews as normal from launch. For today I am sharing a card I made using the 'Nature Trail' Stamp Set from Hobby Art, brought to Hochanda by Jenny recently.

When the card was finished I wanted a white border around my design. So to start with I cut a rectangle frame from copier paper and secured it to mt card with Stick n Spray, a repositionable adhesive by Crafters Companion.

Next using the set of stamps I planned and stamped my design with Versamark Ink. I used the smaller stamps towards the back to give a feeling of distance. I stamped the largest Deer in front and masked it using Pebeo Drawing gum, when this was dry I added a smaller deer behind. Each time I stamped an image I masked it with the gum.


I coloured the landscape using shaded Lilac and Faded Jeans Distress Ink, using ripped copier paper for the land making sure these matched any lines that where on the stamps. For the sky I used Blueprint Sketch, Chipped Sapphire and Black soot, I wanted the sky very dark to make the foreground seem lighter. I then removed all of the Drawing Gum.

To add the watercolour to the images, I used a selection of Spectrum Aqua Markers and applied them with a brush and water.

I removed the copier paper and removed any excess marks from underneath.

Lastly I trimmed down the border slightly and backed the piece onto a black background.


Thank you for stopping by today, I hope you have enjoyed the step by step and the finished card. I will be posting some of my launch samples later, so I hope you will visit. Thanks again and Happy Crafting.xx

Friday, 26 August 2016

Leonie's New Launch on Hochanda

Morning, Another day without the use of my hand, so I have another opportunity to share a taste of whats to come from Leonie's New Launch on Hochanda. Please dont miss these shows, what she has in store for us on Sunday (28 August), is for absolutely everyone.

All I can say for now is they are absolutely wonderful and have been a pleasure to use. I dont want to spoil anything for you so I can only post a teaser, but I will be sharing on Launch night as usual. Take care and Happy Crafting.xx

Thursday, 25 August 2016

Exciting New Launch from Leonie

Morning all. I am really sorry to say that I cant do a full post today, but I thought I could treat you to a sneak peak of whats on the way. Somehow I have sprained my wrist, so I couldn't manage to make a card for today. I really hope that it will be better in the next day or so. Leonie, has a brand new launch on Hochanda this Sunday (28th) at 8 pm. Leonie will be bringing something very exciting that can be used will just about everything crafty. I have plenty of posts ready to go for this launch, so please dont miss it.


Take care and Happy Crafting.xxx


Friday, 19 August 2016

Christmas Pillow Box

Morning, Thank you for visiting today. I do hope you got to see Leonie's One Day Special on Hochanda. This collection of dies have been great to craft with. Here is have used the stamps to decorate some Christmas Pillow Boxes. As I mentioned in an earlier post, I have made some coordinating Christmas Fripperies and this is one of the set, these stamps are brilliant for this.

I die cut my pillow boxes using 300gsm Super Smooth card. If you dont have a die, they are very easy to make from scratch. I dusted the die cuts with an anti static bag, stamped the beautiful background with versamark and then embossed with ultra fine silver embossing powder.

On half of them I had die cut an oval from copier paper and used this as a mask, I secured this in place with Stick n Spray (temporary adhesive) before stamping the background. I then used a fine liner to add faux stitching around the oval, then stamped 'Joy' from one of the stamps sets.

Using Shaded Lilac and a small amount of Blueprint Sketch, I blended the colour from the inside out. For the ones I stamped I replaced the oval before adding the colour to leave the cartouche white.

I do hope you have enjoyed the step by step and the finished boxes. I have more to come and hope you will join me again. Thank you for your messages, I really do appreciate them  and read them all. Take care and Happy Crafting.xx


Wednesday, 10 August 2016

Samples for Leonie's Launch Show Part 1

Hi Everyone. Great that you have come to have a peek at the samples I have made for the launch of Leonie's New Collection. She has just launched the brand new selection on Hochanda as a One Day Special. They are really beautiful, so dont miss out.

It's a wonderful collection of Entwining Dies, They are Christmas themed, but saying that they are definitely not just for Christmas. They can be easily used to create looks for the whole year. Later in the month I will try and show some other ways of using them.

There are 3 collections of dies in this collection: Entwined Christmas Tree, consisting of Base, Baubles and Frost. Entwined Snowflake which consists of Snowflake Base, Winter and Snow. Last but not least is Entwined Cross, this collection consists of Cross Base, Circle Heart and Swirls.


There are also 6 sets of beautiful coordinating stamps, wonderful sentiment, background and embellishments etc. Really lovely and so useful to use on any project or to use independently.

Thank you for popping by to see part one of my launch samples, as always I will be sharing more tomorrow morning, hope to see you then. In the meantime please take the time to visit the other members of the design team, they also have some great samples to share with you.

Wednesday, 3 August 2016

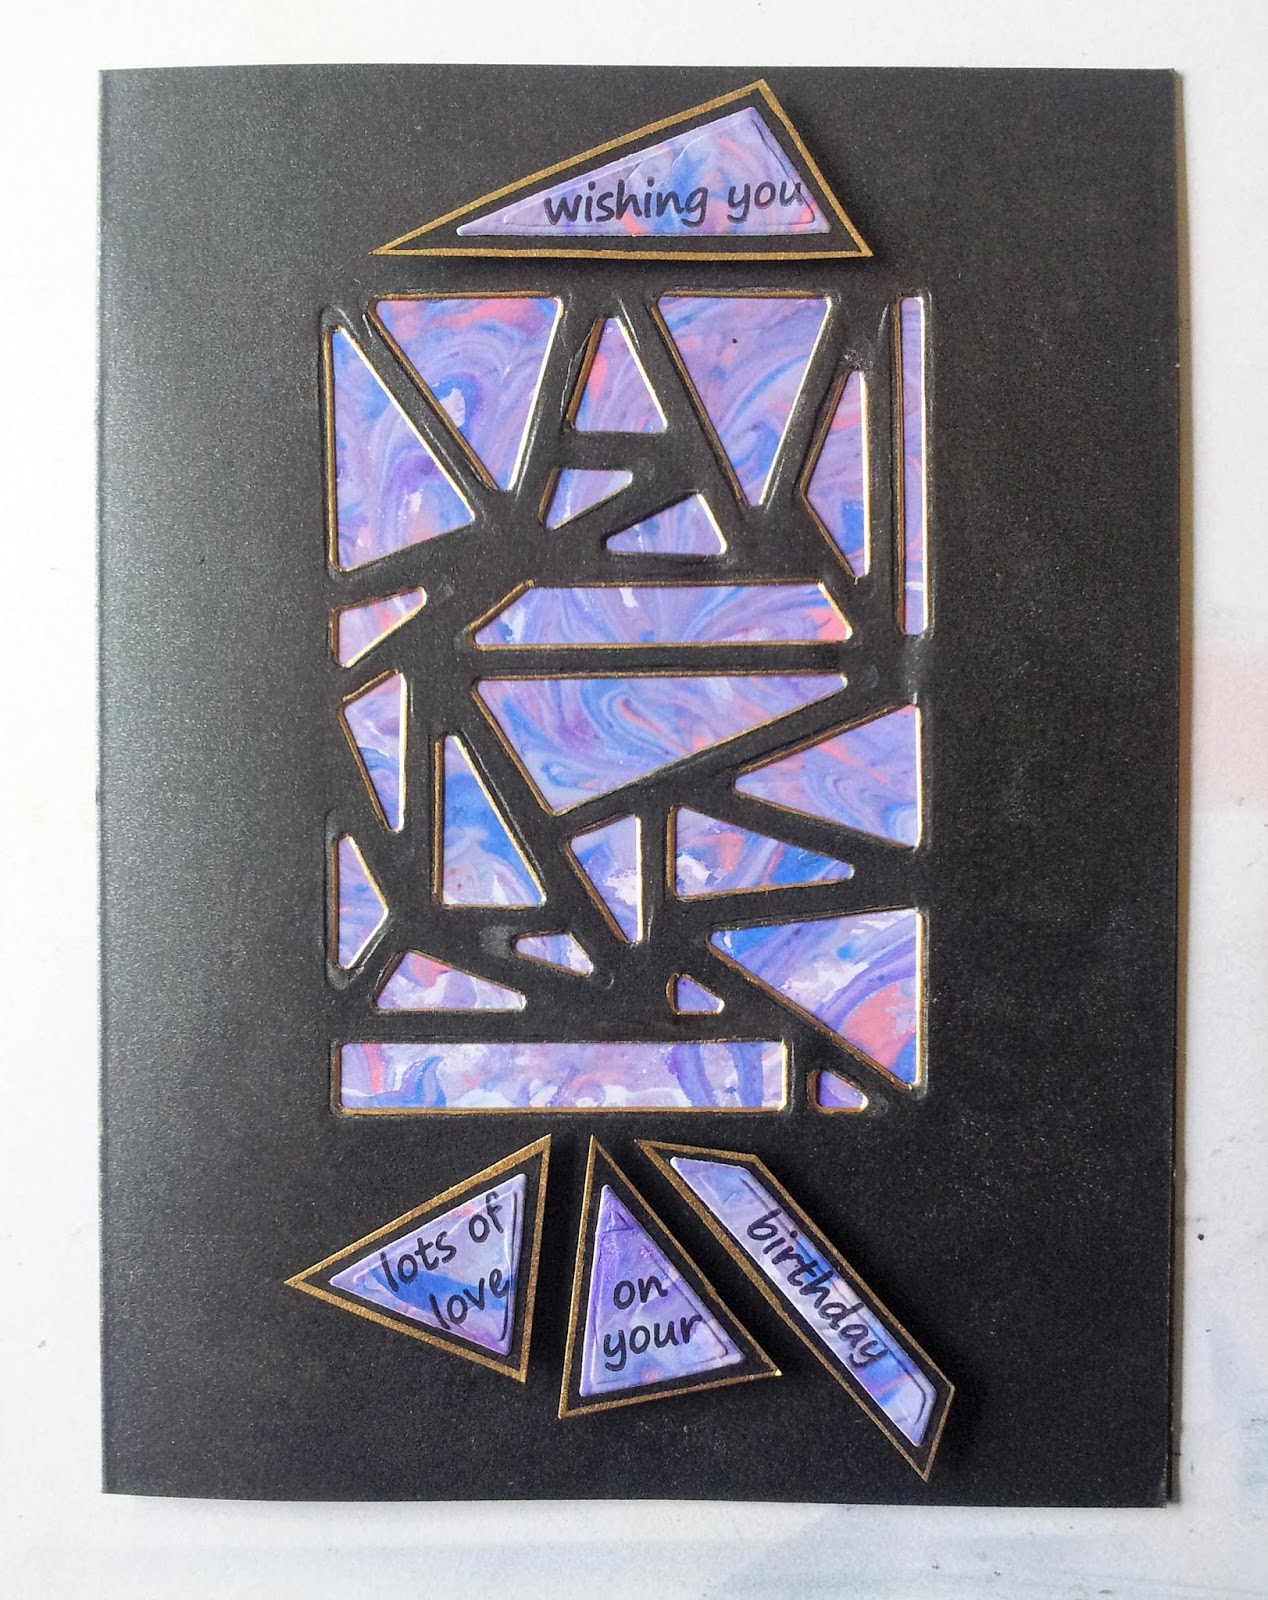
Birthday Triangles

Morning and welcome to another step by step using the wonderful dies that Leonie launched on Hochanda. Don't forget, if you missed any of the shows or want some more inspiration the shows are available on the Hochanda website via the Television Schedule. Today's card is fairly simple but also quite different, here i have made it as a birthday card but it could be made for any occasion, it would be a great card for a man as well.

I started by taking an A4 sheet of black pearlescent double sided card. I marked where my score line was going to be to enable me to position and cut the dies. Here I used the 'Mosaic' Die in full but without the outside cutting edge to leave it in the card.

I then took a sheet of white glossy cardstock and created a marbled background. The colours I used were: Midnight Blue, Purple Violet Cosmic Shimmer Mists along with Cherry and Midnight inks.

I then took the outer die from the 'Mosaic' set and cut the background where it would be best for this project.

Next I used a Gold Krylon pen to edge the die cuts and make them more pronounced.

I chose the words I wanted to use and stamped them in black onto the remainder of my marbled background, choosing lighter areas to allow the words to be seen clearly. I cut them out using the dies and layered them onto black card using Cosmic Shimmer glue. I went around the edges with the gold Krylon pen to make them stand out from the background card.

I secured the words shapes to the card using 3D glue gel and secured the backing paper behind the apertures.

Thank you so much for your visit today, I hope you have enjoyed this step by step and the card I have shared. I am so pleased to have your comments and really enjoy reading them.Thank you and take care xxx