Showing posts with label gilding polish. Show all posts

Saturday, 21 May 2016

Watercolour Words

Hello and thank you for stopping by to take a look at the projects I have been creating using Leonie Pujol's New Collection of Stamps. I hope you have been enjoying the step by steps I have been sharing.


On a piece of 8 1/4'' square of watercolour card, I stamped the sentiment from Leonie, in the top left hand corner, about 1 cm from the edge of the card. Directly opposite, I stamped the Kaleidoscope of flying butterfly scribbles. I then chose 3 words from across the collection that fitted in with the theme.

Very lightly with a pencil and ruler I drew a double box around the sentiment and all of the words. Also I drew a box at about 5 mm and 1 cm in from the edge of the card to create a double frame. I then went around all of these with a Black fine liner creating a deckled edge.

Before masking off with Pebeo drawing gum, I joined the boxes I had created to a dot that I had made in the centre of the card. The gum was put all around the edge of the card, all the boxes and drawn lines.

When dry, I wet the card with water and a brush around the centre and added yellow ink. I let it spread out, also blew it around the card and left to dry. 


I repeated with green Brushos and again left to dry. Finally I sprayed the remaining white card with water and sprinkled Crimson, Blue and Violet Brushos using a dry brush.

I coloured the cubes and lines in 2 shades of grey. The very outer edge of the card I coloured with a black alcohol marker and the same for the frames around the words. I set this aside before mounting to allow it to dry thoroughly and for the card to flatten.

Later, I decided I didn't like it and tore it in half, I think I was a tad stressed at the time. I made an alternative card, which I will share another day. Anyway as the day went on I decided that I really liked this one, so I tried to fix it. Not too badly either, I think so I mounted it on white card which I had coloured using Mediterranean Blue Cosmic Shimmer Gilding Polish. 


Hopefully you have enjoyed this share along with the step by step. Thank you so much for visiting and for your support. It means a lot to me and without you I wouldn't have continued with my blog. Take care and hope to see you soon.


Friday, 20 May 2016

Butterfly Mixed Media

Morning. I hope you liked the share yesterday. Today I thought I would share a Mixed Media project that I made with Leonie's new Stamp collection. I chose the butterflies again from the Flight To Freedom Set. I have really enjoyed using Mixed Media and loved making this canvas, so I hope you like it.

I took a piece of canvas board, approximately A4 in size. To begin with I stamped branches and trees over the project as a guideline for building the illusion of a view within a forest. To achieve this I decided on a mixture of garden string for the thicker stems and embroidery cotton for the smaller branches.

Then I took the other elements that I had chosen, some torn corrugated cardboard, ripped and embossed card, a tube I made using garden string wrapped round a paintbrush and coated PVA glue. I also used some hexagonal die cuts that I snipped into along with some ribbon roses I made and some simple paper roses.

When I had arranged all of elements, I painted my project with black gesso and left to dry. When the first coat was dry I felt it needed something else so I destroyed some polystyrene to make some balls and corner element.


Then painted these black also. It's very strange before painting the whole project it started to look too busy, but when it's painted it is less than you think.When the black gesso was dry I stippled around the majority of the board to add more textured with Dyna Acrylic 356 (Violet Blue) The around the paper roses and ribbon roses I added Dyna Acrylic 354 (Red Blue).

Around the edges of the board to about 3 inches in I used Mediterranean Blue gilding polish and then around the edge added Teal Gilding polish both from Creative Expressions. I used the Rich Red gilding polish on the ribbon roses and then built up layers of all the colours throughout the canvas to add more depth.

To finish the colouring of the background and to highlight the trees and branches, I applied Pebeo Gilding wax in both Silver and Renaissance gold. 

I stamped out a selection of butterflies from Leonie's Collection, coloured them with my alcohol markers and sprayed with Crafters Companion Silver Spray and Sparkle. I secured them in place with 3D glue gel.

Thank you so much for visiting today, I hope you have enjoyed this step by step of how this project came about. I hope you will be back again very soon.Take care xx


Monday, 9 May 2016

Time Collides Mixed Media Project

Morning,This is another project that I am very excited to share. Mixed Media is something that I have always wanted to try, but didn't quite have the confidence to do. It was only after watching Let Leonie Loose on Hochanda, that I finally made the decision to have a go.


Well, that was way back in March, Since then I have been collecting and making things to use and include. So here goes, My first try along with a step by step of how I went about it.

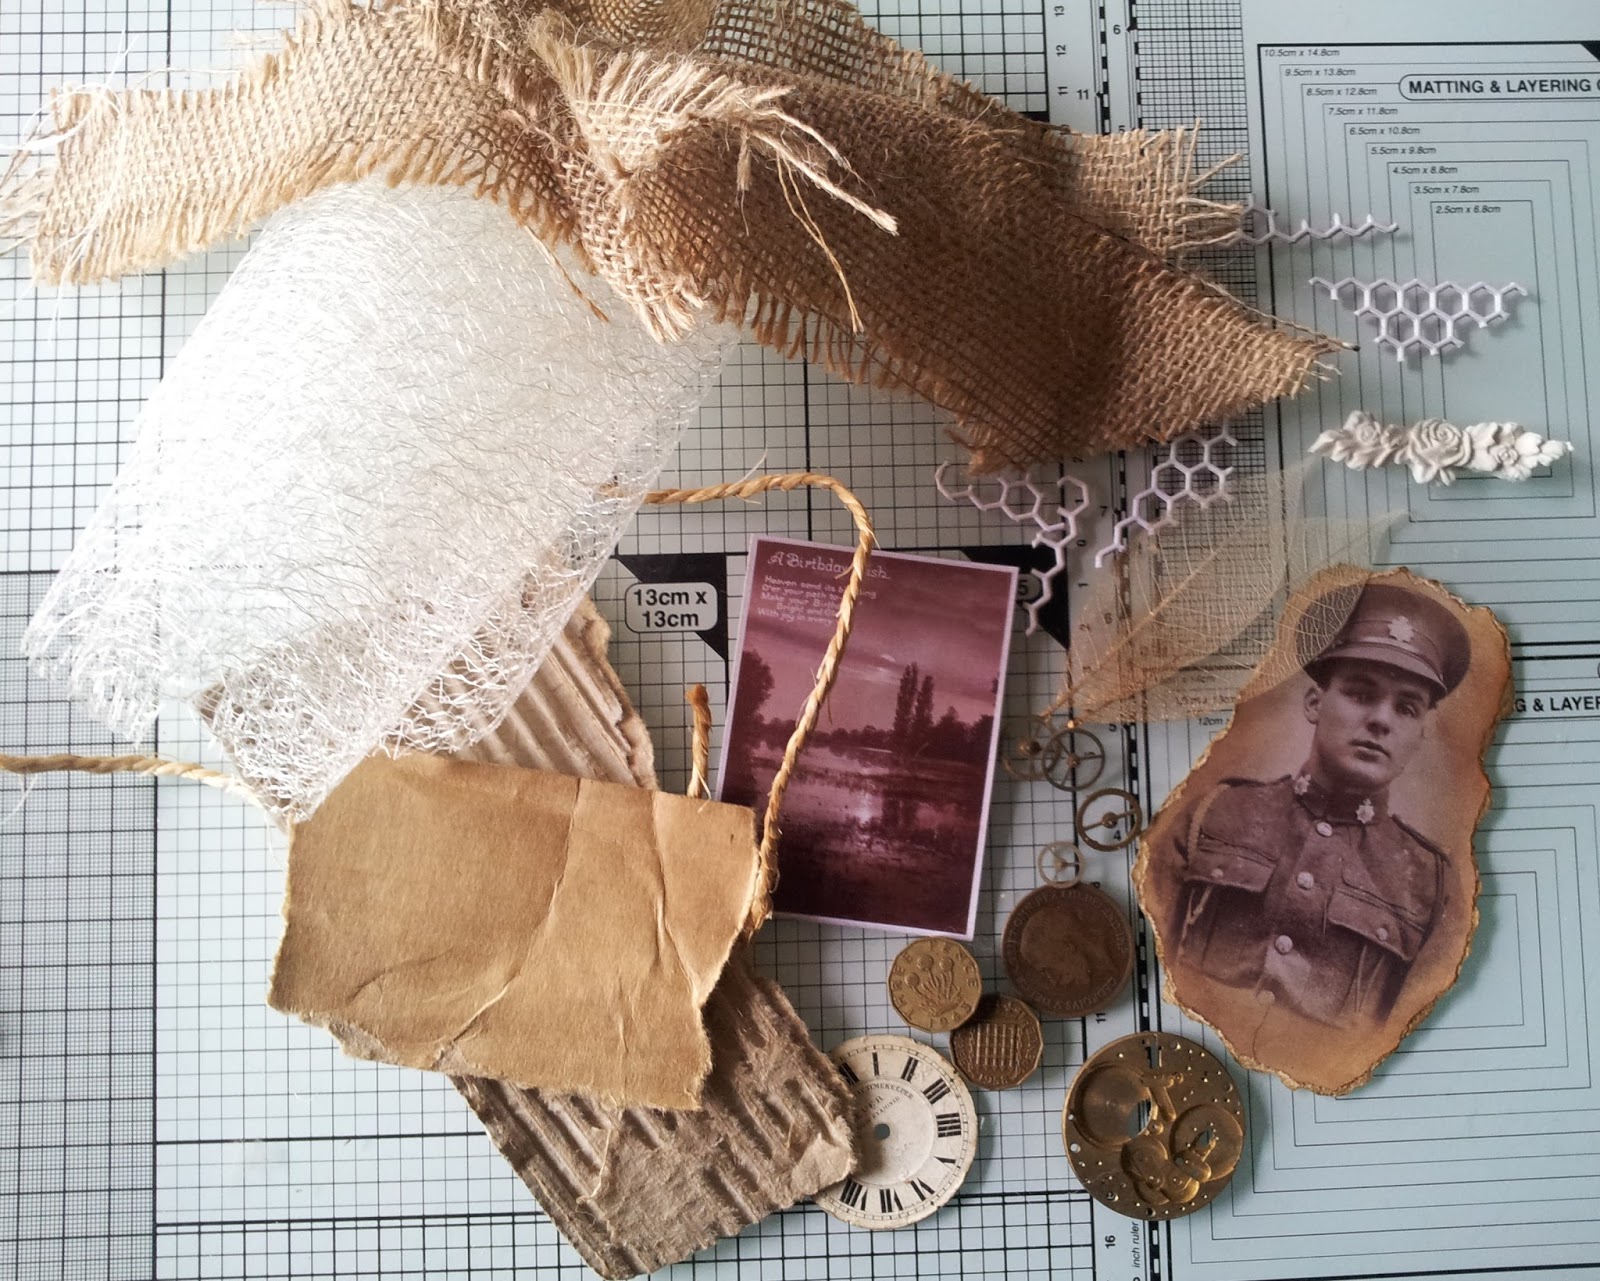
I started by getting all of the items together along with my board.


Taking a Clarity Stamp 7x7 stencil and some white texture paste (I coloured it so it's easier for you to see on screen). I spread this through the stencil and left it to completely dry.

Then I positioned the items. This is the bit that takes quite a lot of time and thought, working out what you want and you would like your finished project to look.. I would definitely suggest taking a photo when you are happy with your arrangement to refer to when securing them to your board.

Here are close up photos of a couple of areas on my project.


Using mainly Cosmic Shimmer Glue but a little 3D glue gel I assembled my piece. When this was dry I painted the whole project with Black Gesso, I had to make it different. When this was dry, I added a second coat of Gesso. It was quite surprising to see what I had missed. Leave this to dry overnight.

The rose, photo and stencils were to be my main focus, so I decided to leave the rest of the background black. I used Red Bauble Iridescent watercolour paint by Creative Expressions for the roses. For the Hessian,cardboard and surrounding area I used Purple Mist and Mediterranean Blue Gilding Polish, again by Creative Expressions.

Lastly I added highlights throughout my project with Pebeo Gilding wax in 3 colours: Silver, Empire Gold and Renaissance Gold from Crafters Companion. When this was dry, I polished the wax to a shine.

I thoroughly enjoyed making my first mixed media project, I will definitely be making more in the future. Thank you so much for stopping by, I really hope you are liking the projects I share. I really appreciate your comments, they mean a lot to me and keep me going too. Take care xx 

 I am going to enter this into the Country View Crafts monthly Challenge, this month it's 'Use a Stencil'