Showing posts with label die. Show all posts

Saturday, 12 December 2020

Regal Rose & Splinters In Time- 2 Unbeatable offers and Day 12 Advent Calendar Offers

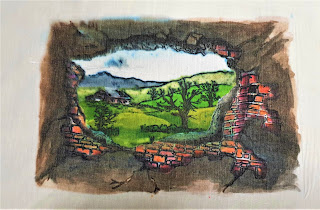
Morning My Friends. I mentioned in a quick post last night about the offer on The 'Regal Rose' collection. There's also a similar offer on the Splinters in Time collection. In the Regal Rose Collection, there are 3 large Stamp Sheets,  Everything you could want to create a variety of floral cards. The stamps were chosen to give the best value and include elements for instant cards or a variety of smaller stamps to create your own beautiful designs. The Splinters In Time Collection, is another, very different collection, a  large main stamp to use as a platform for the included stamps, Scenes in Time and Lush Landscapes, they work perfectly together and were designed to be used together or as stand alone stamps.

I realise that not everyone will want the collection and might prefer to purchase single items, I have discounted the Collection as much as possible to encourage people to use the set together as it gives the most variety. The main Splinters in Time set is perfect to use with absolutely anything, I cant think of any image that wouldn't be completely at home surrounded by it, giving a frame for whatever you decide to use with it.

The 'Scenes in Time' was the first in a series of stamp sets that will work perfectly within the 'Wall' or as independent stamped images. There are a variety of scenes in the set, which can all be used for all seasons, depending on your colour choice. They look great using any colouring medium, especially watercolour. A simple stamped image water coloured can be used as a card topper or as a framed piece of art, whatever your decision they make super cards and projects. Do visit the Youtube Channel for inspiration, for all of the collections and individual items.


Today on the store there are a lot of offers, I have left the offers from the last few days in the store so you have some ore choice. Today I have added the Extension Rose Petal Dies, these are wonderful coupled with the Rose Petal dies, to make the most beautiful roses, in whatever size you would like. The larger sizes do give a lot more scope and are not just for roses either, they make lovely Peony's. Setting flowers aside though, they make great Junk Journals, regular journals, shaped cards, and apertures to name a few uses. They are certainly not a 'One Trick Pony' so will earn their place in your craft stash. Here are a couple made with the rose Petals and the Extension rose petal dies, on offer today with 50% off, be quick if you want them. I have video on my YouTube Channel with a link at the top of the blog.

Don't forget to join in with the Craftascope December Giveaway, There are 3 prizes, each for 100 Pounds to spend at the Craftascope Store and all you have to do is share any project made with Craftascope goodies. Full details are on this poster, it would be great to see your creations.

Also when your in the store, keep a look out for the Daily Hidden Prize, Simple add a note to your order form and the item will be added to your order. Good luck.

Thank you ever so much for your support, every single sale will help. I really do want to continue with Craftascope, If you've not read my last few blog posts, please take a look. Your support could really make the difference. Craftascope and all of my Customers have really been a lifeline for me and kept me going. If I do keep going I am sure you will love what I have to bring in the future.x


Tuesday, 2 July 2019

The Craftascope Floral Stamp and Die Collection Launch show

Hi Friends and Crafters, Just a quick post to keep you in the loop so to speak. I've been away for a little while resting but I am well on the mend now so I am catching up with all the things I have neglected and hope to be back with you very soon with some more inspiration. I have just finished uploading the Launch show of the Floral Stamp and Die Collection with Kathryn for you so I hope you will enjoy it. It was such a busy show, Had great Fun.


More news, You might have seen that I have putout a Design Team Call to, so I can expand the great team I have already. I am looking forward to welcoming the new members, Full details are on my Facebook page. 

I have a lot of messages saying that they like to be able to watch the shows once they are no longer on Catch up to watch back the demos. I think one day I will have the courage to watch one back. As you all know I love to share and Hochanda is such a great place to visit and it gives me the opportunity to share even more with you. It's also given me a little more confidence, so I am doing a lot more on my Youtube channel.Here's the show link.

I'm over the moon that my New 'Regal Rose' collection has proved to be so popular, If you haven't seen it yet, they are on my Etsy Site, I know there are very few left now and only 1 of the full collection, so do be quick. Also another bit of news, I have been able to restock the Retro Banner Stamp Set at long last after it sold out in less that 24 hours, so again please be quick if you would like it, such a great set and so versatile. I also have a chat about the new collection on my Natter with Nick, below.

I have been toying with the idea of moving more towards video tutorials than the blog and I really would like to hear your views on it, if you have any or if you have a preference to one or the other. I have heard from quite a lot of crafty friends that they are shutting down blogs as visitors seem to prefer a photo on Social media rather than a tutorial. I have to say I feel it will be a shame to lose some of the blogs that are out there but I can understand when  it takes a huge amount of time to keep up a blog if people prefer a quick photo. Anyway I have asked before, so I thought I would ask again. See you very soon, for now Take care and Happy Crafting.xx

Tuesday, 18 June 2019

Beauty in Everything

Hi Friends and Crafters. Well here I am with the first tutorial using the New 'Retro' Collection launched on Hochanda a couple of weeks ago. I have to thank you all so much for embracing the  unique collection. I was so touched  that so many of you have now joined the Craftascope Family. It's also been a real treat for me to see all of the beautiful Creations being shared. It really does show me, how much fun you are having and for me thats the best part of bringing you my designs.

Before I start with my tutorial today, I want to mention the 'Graceful Striplet' Die I have added to my Etsy store. If you dont know abut it I have added the video here for you. At the moment there are more of you have it in your baskets than I have stock, so sadly people are going to be disappointed. If you really want this die, then I urge you to check out. They are not safe in your basket and if someone buys it will be lost. I hate to go on, but I had so many messages from people who missed out on the Retro Stamps and Rose Petals that I don't want the same thing happening.

You will need:
8 x 8 Card Base
Basic Round Die (Approx 6 1/2'')
Distress Inks: Fossilized Amber, Wild Honey & Aged Mahogany 
Versafine Black Ink
Waste Plastic Packaging
EVA or Funky Foam
Yellow and Orange Card (Here Tim Holtz Distress Pad)

Step 1: Trim your Card blank to 7 1/2 x 7 1/2, you will use the remainder at another time. Cut a piece of copier paper that same size and cut a circle into it. Use temporary adhesive spray to secure to your card.

Step 2: Using the Distress inks blend from Light at the top to Dark at the base to create a really rich background.

Step 3: Cut your chosen leaves from EVA foam, I like the EVA foam more than the Funky Foam as it hold the ink better, especially good if you are going to use them again. Spray the back with Stick n Stay then secure to the waste plastic packaging. This will allow you to use them again and again.

Step 4: Remove the mask from your card and replace the inner circle over your design, again with temporary adhesive. Take the stencil and the 2 lighter ink pads and create some interest around the center focal point.

Step 5: Use Temporary adhesive to your stamps and position them into your design using the black ink.

Step 6: Stamp your sentiment onto white card, edge with the black ink and layer it onto Orange and Yellow card. Mount your artwork onto the same yellow and orange card to match, making sure you have gutted it as always.To finish off mount it onto your base card and secure the sentiment with either foam pads or 3D glue gel.

If you prefer not to add matting and layering to your card, then I would suggest working directly onto the Clarity Card Base, as I say on all my videos and tutorials it takes the inks and colour really beautifully and well worth it.

Before I go just to let you know abut the offer I have on the Blooming Marvelous Collection (pictured above) on my Esty Store, There are only 4 left at the amazing price of 58.95. The collection includes the Beautiful Dolphin Die, 3 A5 stencils and 2 A5 plus stamp sheets, not far off A4 really so a it's a great time to add it to your Craftascope Library. See the Etsy listing for more inspirational photos.


I hope you will join me tomorrow at 7 PM for the next episode of ''Natter with Nick'' to see what I will be sharing and for the new Natter with Nick offer. For now Take care and Happy Crafting.xx


Friday, 24 May 2019

Dare to Be Different One Day Special with Craftascope

Morning Friends and Crafters, Well at last I have got to the end of the preparation for my very first One Day Special on Hochanda. I do hope you will join me and add your support. This is a very different collection, absolutely fantastic for Mixed Media projects, but a lot more besides.

The stamps, dies and stencils will allow you to create a wide range of unique crafting projects. Today I have included a few Sneek Peeks for you. to give you a taste of whats to come.

I really am sure the shows are going to be a lot of fun and maybe a few surprises along the way. You never know.There has been an awful lot of prep, which has taken a lot more time than I expected so please forgive me for my absence, I do hope you think it's been worth the wait.

Please do join me on Monday evening at 6pm with Hayley and then 8pm with our Leonie. I will be back again for more shows on Tuesday at 9am, 1pm and for Final Call at 5pm. I really look forward to sharing this collection with you and hope you will add your support. Will you 'Dare to be Different ?' 

For now Take care and Happy Crafting.xxx

Monday, 10 September 2018

Have a Merry Christmas

Morning Friends and Crafters, Today I am sharing a card with one of my favourite of the Signature Collections from Sara. I love all of the collections, so I suppose it's very hard to choose really. I loved using the Foils and Foil Transfers, it's the first time I have used them and I was very impressed. They look amazing, give a really professional look but are also so easy to use.

You will Need:
Festive Wishes Die and Stamp Set
Winter Wonderland Foils
Winter Wonderland Foil Transfers
Fluttering Snowflakes Embossing Folder
A4 Luxury Matt Mirror Card Teal
Sheena Wow Clear Embossing Powder 
Versafine Deep Lagoon
Sheena Stamping Card
Centura Pearl White/Silver 6 x 6'', 7 x 7'', 
Centura Pearl Card Base 8 x 8''
Collall Tacky Glue
3D Glue Gel

Step 1: Take your 6 x 6'' card. Cut 'Merry' from the Matt Mirror Card, then position but dont stick it down yet.

Step 2: Wipe your card with Anti Static, stamp ''Have a'' and 'Christmas' with Versafine, coat with embossing powder & heat.


Step 3: Select some snowflake transfers & rub o the foil. Next mat this on to mirror card, leaving a narrow border

Step 4: Emboss your 7 x 7'' card and mount onto the mirror card, Just look at thee fabulous details in the emboss, it's beautiful.

Step 5: Wrap a length of matching ribbon around the front of the card and secure at the back with tape.

Step 6: Mount onto your base card, then add the topper section with Foam tape for extra dimension, this finishes your card.

Thank you so much for taking the time to visit today. I do hope you have enjoyed the tutorial and the finished card I have shared. Please stop by again soon to see hat I will be sharing with you. For now Take care and Happy Crafting.xx


Monday, 22 May 2017

Another Full Sneak Peek

Morning everyone, Hope you all had a great weekend. Time for another Sneak Peek of a card I have made for the brand new Create a Card dies being launched on Hochanda by Crafters Companion. Counting down the days now until the big day on Friday 26th May. I am sure the show will be full of inspiration, so I hope you will be tuning in.

I will be sharing step by steps for the cards I have been making with these great dies, so I hope you will join me after the launch for these. Take care and Happy Crafting.xx

Sunday, 17 April 2016

Topper and Die Birthday Card

A whole week of Blog Updates. I am so pleased and to celebrate I am sharing another post later today.


For this card I used:Tattered Lace Westminster Die Collection.HunkyDory Die TopperDouble Satin Ribbon 1'' wideSilk Smooth Glitter & Coordinating CardTonic Swirls DieRose LeavesCream ribbon for making ribbon roses.


I love this card, I think the Westminster Die collection really suits this style. On the front layer of the card I cut the largest part of the die, leaving it in the card. Also on the front I used an edger die, again leaving it in the card. Behind this I used an adhesive sheet (Single Sided) and applied glitter polish through the die cut areas.


On the second layer, I cut the next die in the collection. This time using coordinating card behind the die cut. The topper was then cut to fit inside the inner circle.


For the base of the easel, I cut some leafy swirls using a tonic die and some emerald green silk art card. I made some silk ribbon roses using some cream ribbon to use as decoration and also to act as the stopper for the easel.