Showing posts with label Clarity Moon. Show all posts

Monday, 15 October 2018

Holly Frame

Hi Everyone, Thank you for popping by today, it's always great to have some company. Writing Blog posts can sometimes feel like your chatting away to yourself. Today's card is using one of the wonderful embossing folders from Crafters Companion. This is a particularly useful folder to use as a frame for any of your festive projects. Here I have used is with a stamp from the 'A Little Bit Festive' Collection by Sheena.

You will Need:
Decorative Holly Embossing Folder
Sheena 'A Little Bit Festive' Stamp
Watercolours
Alcohol Markers
Red & Black Card
Sheena Stamping Card
Centura Pearl Card Base
Tartan Ribbon
Clarity Moon Mask
Collall Tacky Glue

Step 1: Stamp the Sheena Stamp onto your Stamping Card.

Step 2: Colour your image with a selection of Alcohol Markers. Add a Clarity Moon Mask to the sky before blending with your Distress Ink.

Step 3: Emboss your 3D Folder.

Step 4: Pick out the holly and Berries, then colour with your choice of watercolours or markers.

Step 5: Layer your finished onto red and then black card before mounting it onto your base card.

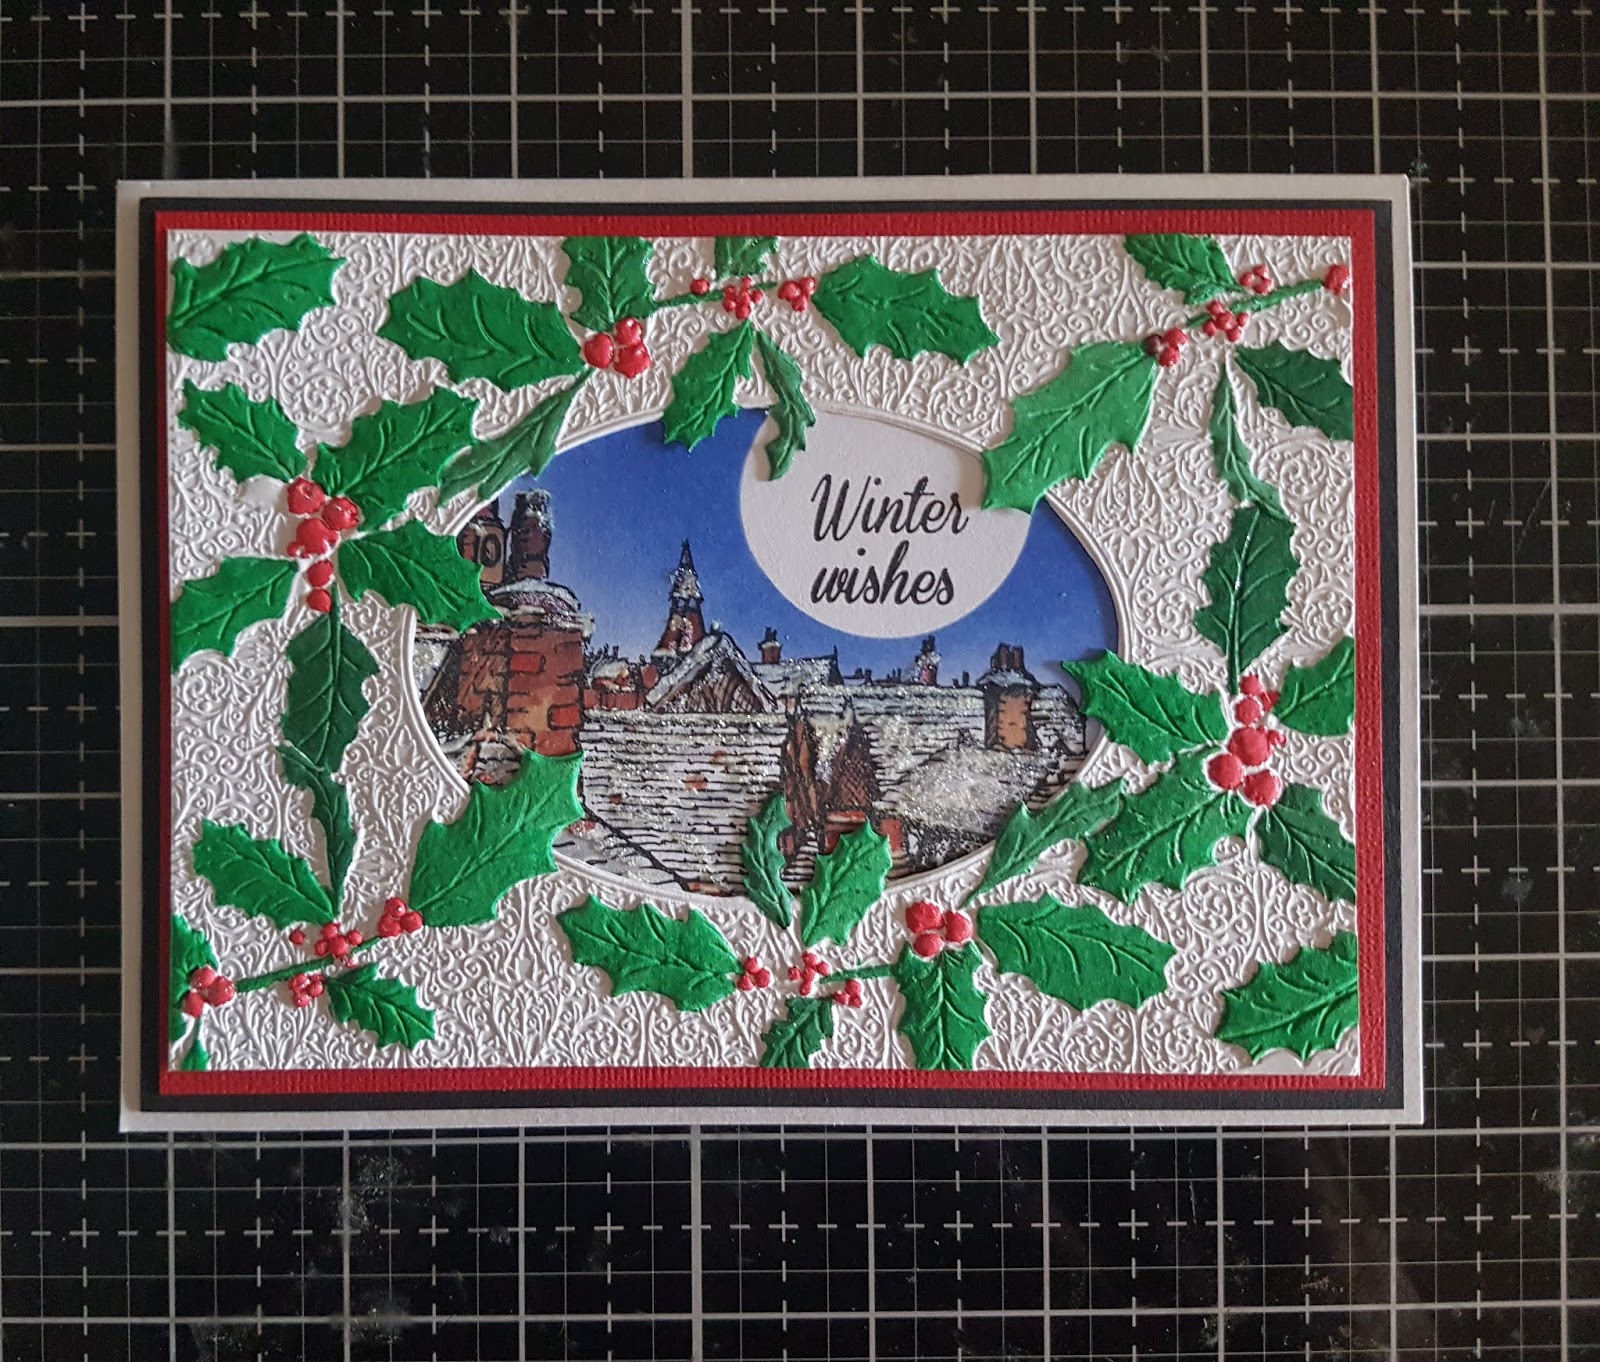
Step 6: Add a matching Tartan bow to finish your card.

Thank you so much for stopping by today. I do hope you have enjoyed the tutorial along with the finished card. Another thing, here is a 30% off voucher to use on your first order (anything) from Hochanda, use code FEY5JBP7.

Would be lovely to see you here again soon, Please dont forget to add your comments if you have time. For now Take care and Happy Crafting.xxx

Wednesday, 3 October 2018

Red Planet

Morning Friends and Crafters, You all know by now, I hate to just stick to what something is made for or how it is supposed to be used, well the Spectrum Noir Markers were no exception. I decided to experiment and try something different and here are the results, In my Red Planet.

You Will Need:
Spectrum Noir Metallic Markers 'Antique Elements'
Toadstool Home Stamp Set
Sparkle Garden Stamp Set
Clarity Masks & The Moon Negative Mask
Black Card
Blending Sponge

Step 1: Take your black card and using the Clarity hills and mountain masks, form the landscape. Here I added the ink to the mask rather than the blending sponge, Then gently dragged the colour from the mask onto the black card. I used Vintage Satin.

Step 2: Mask the top of the mountains and position the moon negative. Fill the moon with the same colour.

Step 3: Remove all of the masks.

Step 4: Stamp the toadstools, one with the Antique Pearl and the other with the Vintage Satin. Stamp the fairy in black and leave to dry. Mask the top part of the fairy off and re stamp with Vintage Satin. This gives the fairy a good profile against the moon and the hills.

Step 5: Add some birds in the sky with the fine end of your pen, also add a couple in front of the moon in black. Add a sentiment using the Rose Gold Metallic Marker.

Step 6: Use the Vintage Satin to edge another piece of black card, this will be used to mount your piece onto.

Step 7: To finish your card, layer up and secure to your base card.

Thank you ever so much for joining me again today, It's always good to have some company. Another thing, here is a 30% off voucher to use on your first order (anything) from Hochanda, use code FEY5JBP7.

If you have the time, it would be great if you could leave a comment. I sometimes wonder if the age of blogging is passing. Whether people now prefer to see the pictures only on Social Media. Things seem to change so fast nowadays. Anyway for now Take care and Happy Crafting.xx