Friday, 24 June 2016

Fabric Moth Wall Hanging

Morning. This project is a wall hanging made using Leonie Pujols Dies and Stamps launched on Hochanda earlier this month. I had quite a few questions asking is the dies would cut fabric, so I have been experimenting. Obviously some of the dies are just to intricate to cut fabric, but it's always worth a try if it's something you would really like to use.


I started with the background, I took a piece of Coredinations cardstock, it was a grey/silver sheet from the Ebony and Ivory range, this one had the black core colour. I used the Texture embossing folder from Crafters Companion 'Distress'. I then sanded it back using the sanding gadget to reveal the core colour.

To add stability to the hanging, I secured the embossed card to canvas board with Cosmic Shimmer Glue by Creative Expressions.In between the two sections I secured cord to enable the piece to by hung.

I cut some calico using the 'Folk Heart Base' Die from Leonie's Entwined Collection. I cut 4 pieces to form the wings. Then I used  Lime Green and Violet Brusho's to colour the pieces. I stamped the flowers from Leonie's collection onto the wings using Black Archival ink.


To make the body, I wound wool and glue to stick it to itself as I wound and left to dry. To make the antenna I used some wire and twisted it round a skewer and attached them to the body along with the wings.


I stamped the circle sentiment stamp from the collection onto Super Smooth Card and die cut it using a circle die leaving a slight border. Then with a dipper pen I wrote the word Moth, then used 3D glue gel to secure it to my work.

Thank you so much for taking the time to visit today. I hope you like the wall hanging and the step by step I have shared.


The countdown is now on for the next beautiful release from Leonie. I cant wait to share all the new goodies that she is bringing us. Watch this space and Take care xxx


Thursday, 23 June 2016

Abstract Wooden Wall Hanging

Morning, Today's project is using the New Stamp Collection from Leonie, That was launched on Hochanda on June 8th. They are wonderful stamps and suit so many styles. They also mix really well with all of the other goodies from Leonie's range as well as others. 


I created this with a piece of reclaimed timber, It had some lovely markings on it, as well as some really wonderful blue tones which was just what I wanted. It had to be sanded quite a lot to smooth all the edges and enhance the shape. It still retained some of the blue which would look rather like sky. I added some white gesso to the areas where the flower and stem would be to help the stamp show through.

I stamped the large flower onto tissue paper and then manipulated one of the word strips to form the stem and stamped onto the paper. Then stuck this to the wood using Matt Gel Medium.

Whilst this was drying, I tore some paper and a page from an old dictionary and stamped these using some other border stamps from the collection and the distressed sentiment circle stamp. I then adhered these to my project using the Matt Gel Medium.

On a small square of glass, I scribbled where I wanted the colour to be with a Pebeo Paint pen and glued into position over the flower.


This is a very different project and I hope you have enjoyed seeing it. It's such a shame that the picture doesn't do it justice. It would look lovely on a chain hung in a hallway. Thank you so much for taking the time to visit today, I hope you will pop by again very soon. Take care xxx

Wednesday, 22 June 2016

Men's Gilded Birthday Card

Morning, I really hope you liked the card I shared yesterday, I loved using the stamps and I was really pleased with it. Today I am sharing a card I made for a friends birthday. It's quite a simple card, where the dies do most of the work, but I think it;s very effective. The friend loves gardening so I have added flowers, but I think by keeping it simple and using the gilding wax make it suitable.

I cut out the ''Falling Leaves' Die from Sue Wilson, these dies really are amazing and make your project look really special without even trying. I used the second die in the set without any cutting edge. Ii wanted the design to remain in the card and to have the area in the centre for my sentiment. My black card base was A4 scored in half to give an equal border around the edge.

On some matching black cardstock from my bit box, I cut out the alphabet to create 'Happy Birthday' and a corner die to embellish.

I used the Pebeo Gilding Wax to colour the words.embellishment and the die cut area in my base card. Firstly I used the silver, covering quite a lot of the surface, then gradually built up the effect with dabs of Empire and Renaissance gold.

I used Cosmic Shimmer Glue to adhere my sentiment and embellishment, then lifted ares within the die to give dimension. Behind the die cut aperture, I cut down a piece of Blue Centura Pearl  from the 'Brights' selection from Crafters Companion.


Thank you so much for stopping by today, I hope you like the finished card and the step by step I have shared with you. Many thanks and hope to see you all soon. xx

Tuesday, 21 June 2016

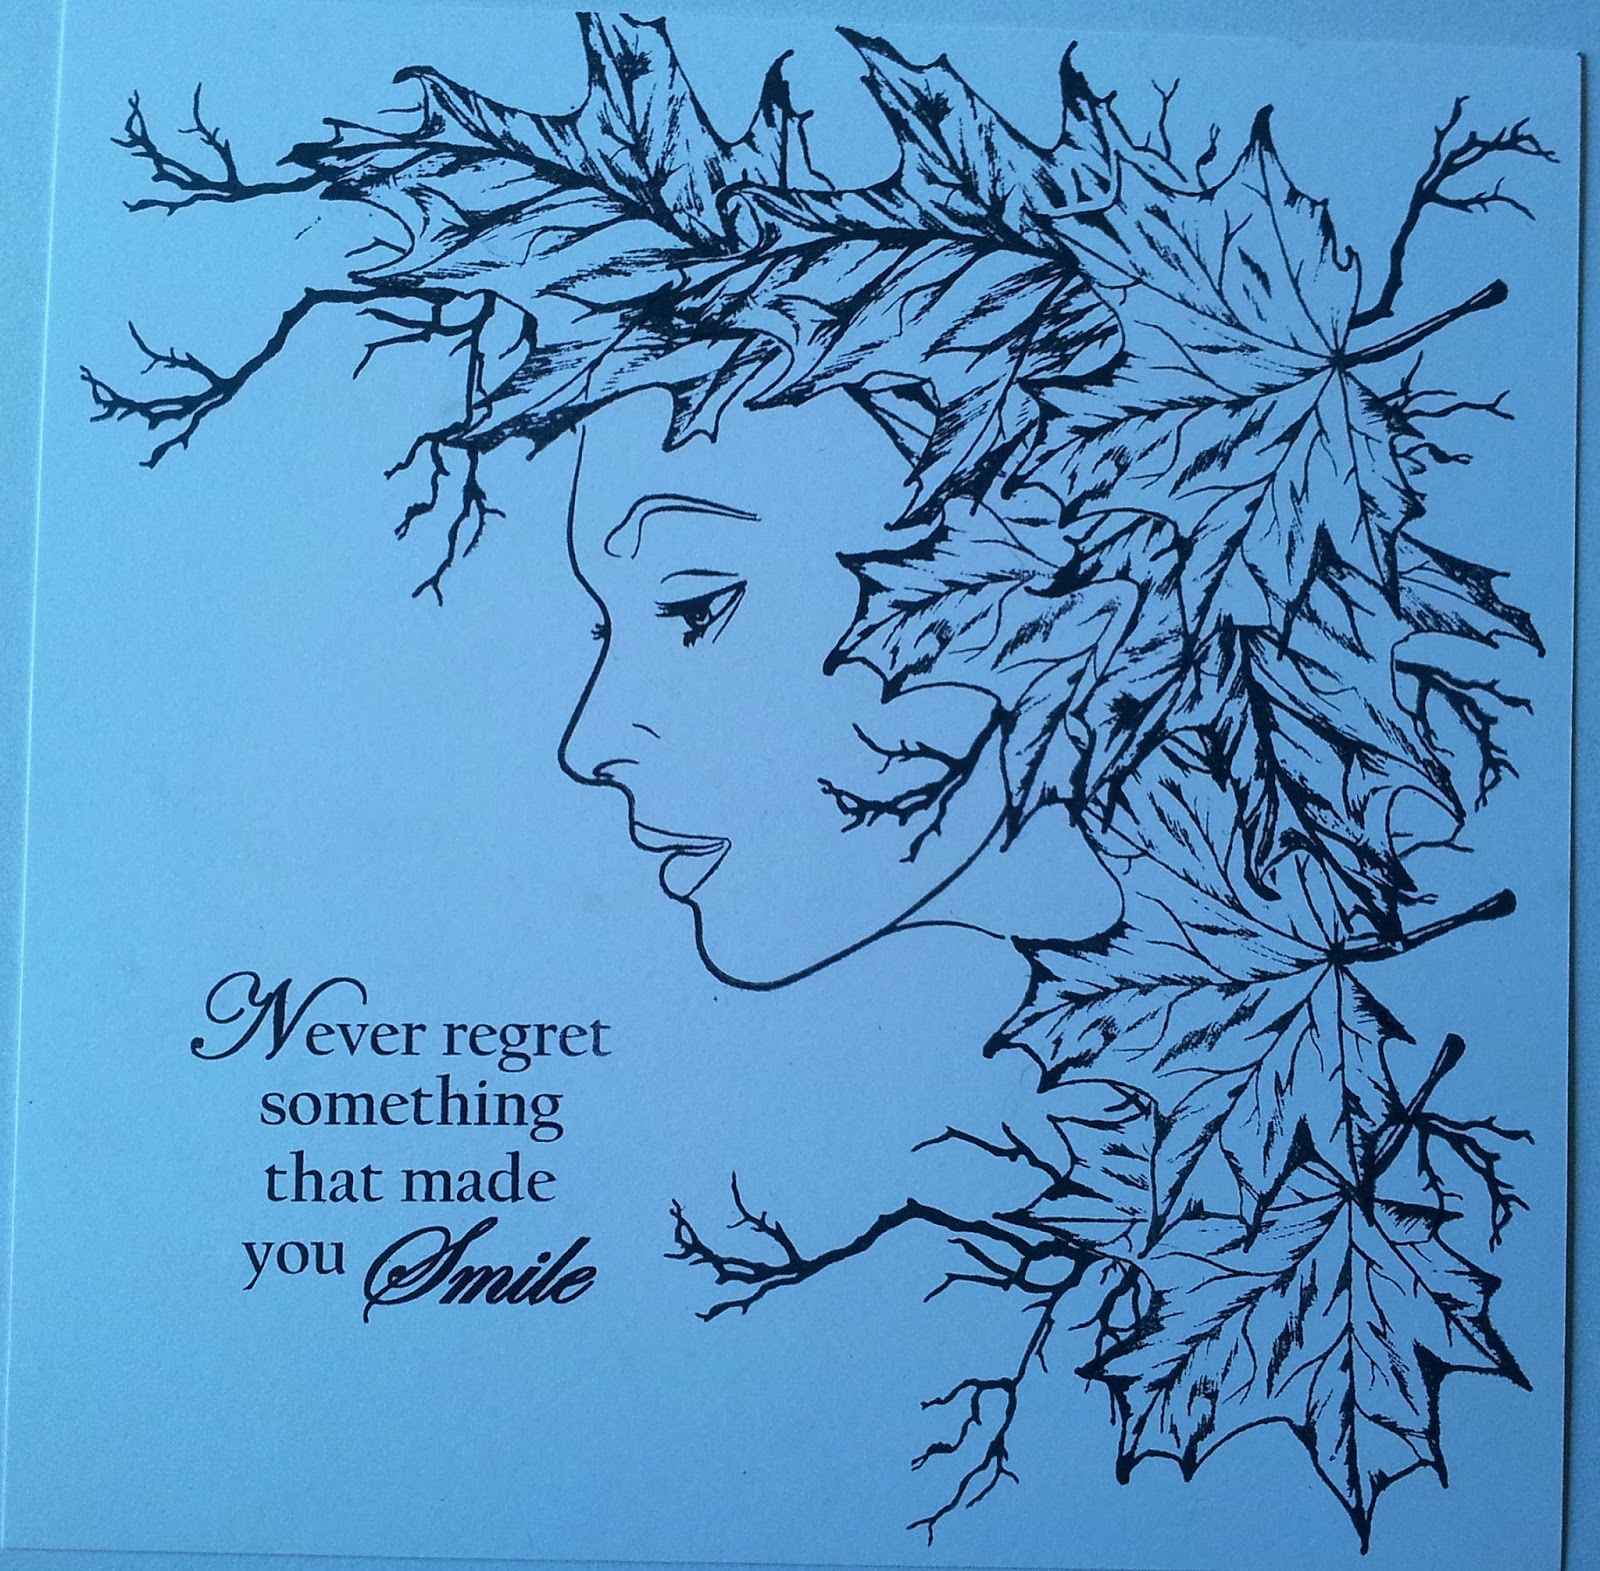
Autumn Lady

Morning. I am very excited to share this with you today. I have thoroughly enjoyed designing with these lovely stamps from Bee Crafty, hand drawn by Sam. The shows will be on Hochanda on Friday 24th June, Please tune in Bev's shows are always great and well worth watching.

I started by stamping the face onto my card using Memento Black Ink. My card measured 8 1/4 '' square.

I then started planning where to stamp the Maple and Oak leaves to complete my design. To do this I used masks made by stamping the stamps onto copier paper, I used 2 of each.


I arranged the leaves to compliment the face and features, then added branches to complete the look. I worked from the back forward to add interest.

Next I added my sentiment, also on the show. There really are some smashing ones to choose from.

Taking a selection of browns, reds, oranges and yellow alcohol markers, I coloured the leaves. Then the neck and face with skin tones.


I left the rest of the card uncoloured, completely white. Normally I would never leave the background plain, but for this project I felt it was the right thing to do. To finish the card I backed it onto brown cardstock. 


Thank you so much for joining me today, I hope you have enjoyed the step by step I have shared as well as the finished card and hope you will join me again very soon. Take care xx

Monday, 20 June 2016

Oscar Owl

Morning. When I first got Leonie's new Dies, I cut them all out to look at what I could make that would be a little different. I always look to see if there is anything unusual that springs to mind. This little project sprung to mind as soon as I saw the die cut's and how they were arranged. Please do take a look at the Launch shows on Hochanda, you can find them via the TV Schedule and they are available for a couple of weeks, you might just catch them if you hurry.


For this project, I started by making my background. I took a piece of Watercolour Board and sprinkled some Paperartsy Infusions onto my piece. I used Blacknight and Violet Storms. The Infusions are pigment powders and give some wonderful effects, they are brilliant for backgrounds. I then spritzed with plenty of water to get the effect I was looking for.


Taking a sheet of double sided pearl black card, I die cut the Folk Heart 'Sensational Swirl'. The die cut formed the main body of 'Oscar' and I used the waste to create the eyes, eyebrows and talons. I used Cosmic Shimmer Gilding Paste from Creative Expressions to add colour to these extra pieces, Ocean Teal for the eyes and Purple Twilight for the eyebrows.


I found a really aged piece of twig to form the branch for him to sit on. I added some extra texture to it using some white gesso mixed with a little sand and glued it to my background board with Cosmic Shimmer Glue. Then I assembled my finished piece also using Cosmic Shimmer from Creative Expressions.


Another fun piece made with Leonie's wonderful Dies. I really hope you have enjoyed today's project and the step by step I have shared. Thank you so much for visiting today and I hope that you will be back again soon. Take care and have a good day.xxx

Sunday, 19 June 2016

Flowery Heart Shield

Morning, This morning I am using dies and stamps that Leonie Launched on Hochanda earlier this month.

My card is on a 8'' square piece of Super Smooth card (300gsm). Using Black Memento Ink, I stamped the Flowery Branch, Joining it together to make a corner. I did this in opposite corners of my card.

I then took one of the leafy strip stamps and joined the design together to form a frame around the card, approximately 1 cm from the edge to allow a nice space inside.

For the centre I planned to use a die along with the stamped banner and sentiment. To work out exactly where to position the banner i used a dies cut of the 'Folk Heart Base'


I then stamped the banner and chose the sentiment to go inside.

Using Pebeo Drawing gum I then masked of all of the stamped images, It's a lot less than you think as it's only the white parts.

Then I took, Shaded Lilac, Blueprint Sketch, Chipped Sapphire and Dusty Concorde. First I sponged across the whole surface of my card with the shaded Lilac.  Then I placed the 'Folk Heart Base' die cut to act as a mask while I added the other colours in the same way. I continued building up the colour slowly, until I had the desired effect.

I removed the drawing Gum and coloured the flowers and leaves with a selection of alcohol markers.


I cut out the 'Butterfly Border Die' and 2 of the butterflies out of black cardstock. Then using Pebeo gilding wax, I gilded them using the Silver, Empire Gold and Renaissance Gold. The using a craft knife, I cut along the edge of the banner above and below, wide enough for me to slide the heart behind it.


Finally I secured the butterflies in place with 3D glue gel and backed my project onto Purple Centura Pearl cardstock from the bright collection.


Thank you for visiting today, I hope that you have enjoyed the step by step I have shared as well as the finished card. I really hope that you will pop by again very soon. Take care xx

Saturday, 18 June 2016

Crystal Hearts and Gilded Butterflies

Follow my blog with Bloglovin

Morning, Here is a card I made with the lovely dies that Leonie Launched on Hochanda. I have had a lot more time to craft with them now and I am really enjoying coming up with some new ideas.

To make the background for the hearts and aperture of this project, I took a sheet of acetate along with a selection of alcohol inks in Blues,Purples and red. I also used some blending solution, 3D Crystal Lacquer and a sheet of tissue paper.

All over the acetate, I added a few drops of the alcohol inks, using more of the blues and purples with just a little of the red. I then added some blending solution to allow the colour to move. I sprinkled some silver mica and at the same time added a generous amount of 3D Lacquer. I then placed tissue paper over the top and manipulated the mica and colours until I was happy. I made sure all the tissue was coated and left it to dry overnight.

I made a card base measuring 8'' Square from black card and cut out the 'Folk Heart' die from Leonie's collection in the centre.


Then I cut the same heart again to give me two of the fine fame hearts.


I used the outside of the die to draw around onto the acetate to allow me enough extra to adhere it to the back of the aperture. I stuck the fine frame hearts to my acetate and trimmed away the excess with scissors.

I cut two butterflies and the word 'Love' from dies in the collection.


Then I covered these in flitter glue and used gilding flakes to cover them, then set aside.


I secured the hearts to my card using 3D glue gel to raise them up, either side of the aperture heart, 


Using a damp sea sponge, I sponged flitter glue spots around the black card and covered with gilding flakes. This was my project finished.


Thank you so much for your continued support. I am hoping that you are enjoying my blog, the things I share and the step by steps. Thanks so much for your lovely comments, I do read every one of them. Hope you will visit again very soon. More tomorrow. Take care xxx