Showing posts with label A5 Media Stencil. Show all posts

Tuesday, 27 November 2018

Media Canvas

Morning Friends and Crafters, I will be sharing a few more posts with you this week and then I will be having a break for a little while. So today I m sharing a media canvas that I made using one of my A5 Media Stencils,here I have used 'Bailey'. I hope you enjoy the tutorial.

You will need:
Selection of Daler Rowney System 3 Acrylics
Amsterdam Acrylics (They go a long way)
Canvas Board 8 x 8
White Gesso
Black Fine Liner 1.0
HB Pencil
Selection of Acrylic Brushes
Palette Knife

Step 1: Mix some of the Blue Acrylic with some white Gesso to thin it, use this to prime your canvas board. Use the fine liner and stencil to add the face to your canvas. This is just a guide at the moment. (dont forget you only need one edge to make the face no the full shape) choosing either the inside, outside or mixture of the lines with give you a different look. Stat building up your colours and textures, This project is all about layering, which will show through to give you the depth.

Step 2: Next start adding you lighter blues, whites and more of the warmer tones for the face. Maybe add some splatters as well, I find these are easiest with a fan brush, always wash it out straight away. Leave this to dry before replacing the stencil and roughly adding the details with an HB pencil. Again this is mainly a guide for you.

Step 3:  Continue adding more depth and texture to the background, start adding shadowing and shaping the face, you might prefer to use a finger or brush for this. Use a small brush to add some definition to the features. The lips are best not so defined as it can make them look unnatural but we can subdue them later.

Step 4: Now add more dimension to the face, bringing in even more of the warmer tones to add the illusion of the facial curves. Use deeper tones of the cooler colours to add shadows under the jawline and chin.

Step 5: Now it's just a case of fine tuning until you re happy with the result, Start dulling won the lips to blend them in more. Oncce again, dont forget it's not finished until you are happy with it. You can always add more to it, it's your artwork and creation, this is not a portrait, but your expression of one.

I hope you have enjoyed the tutorial I have shared with you today, along with the finished project. I do hope you will have  ago yourself, especially if it's something you've not tried before, it's all about having fun, dont forget.

Please take a look at my Etsy shop, the link is at the top of my blog. If you do want anything I will only be sending out until the end of  the week unless I can arrange something, if not the shop will close until my return. For now Take care and Happy Crafting.xxx


Sunday, 25 November 2018

Mixed Media Acrylic Portrait

Morning Friends and Crafter, Im back today with another mixed media project for you, There are lots of extra photos to go with this tutorial, making it very easy to follow. It's one of those pieces that really does look better in real life the camera just hasn't picked up the colour as much as I would have liked. With Cyber Weekend in full swing it's really a good time to get all of your essentials and while your at it why not treat yourself to something new.

You will need:
Craftascope A5 Media Stencil 'Bailey' (Only available at my Etsy Shop or via Hochanda)
8 x 8 Board, Here I have used Zutter but any board will be perfect.
Pebeo Studio Acrylics Modeling Paste
Indigoblu 'Townhouse Teal Acrylic Paint
Pebeo Deco Paint (81) Mango
Dylusions 'Squeezed Orange'
Eco Green 'White' Acrylic Paint
Black Gesso

Step 1: Add a couple of inches of the modelling paste to your board.

Step 2: With a palette knife, spread over the surface unevenly.  

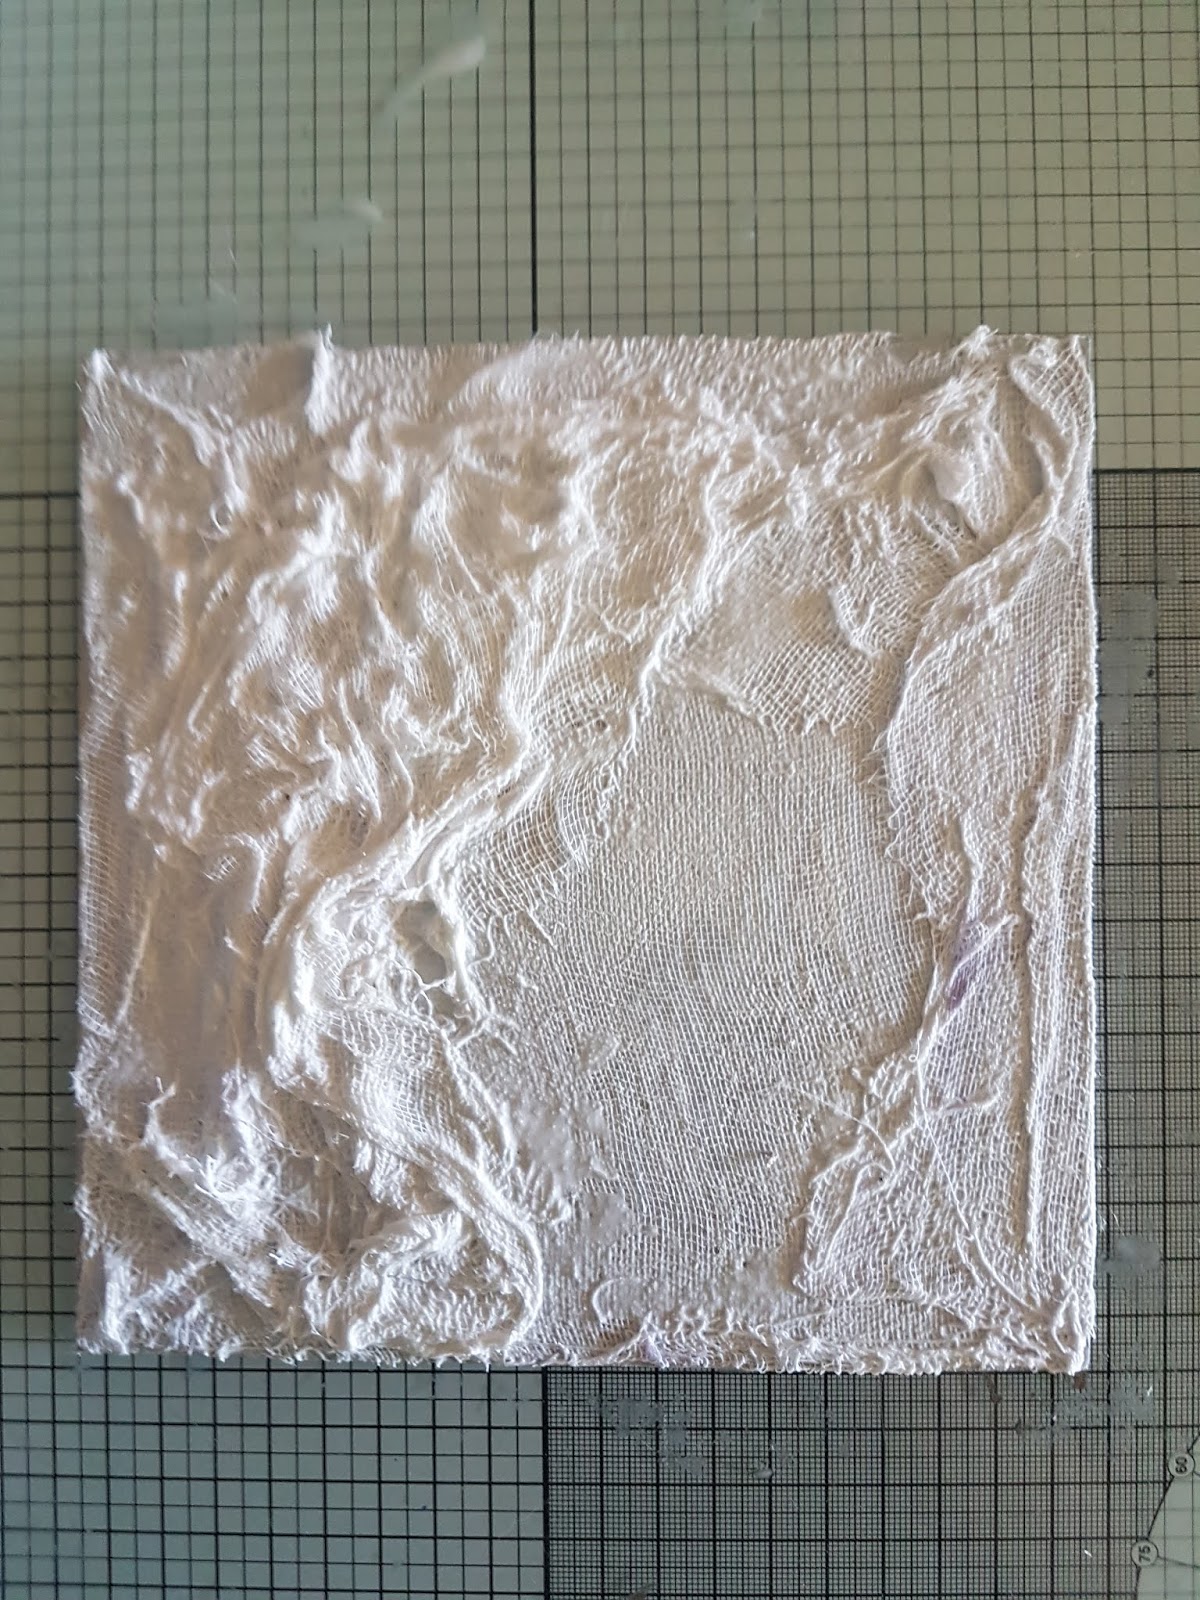
Step 3: Cover with a sheet of medical gauze, making sure it makes contact with the paste, especially around the edges.

Step 4: Start building texture around the board, making sure you leave an area for your portrait. Coat each layer with the paste before adding and molding to your project.

Step 5: Repeat step 4.

Step 6: Keep building layers as before to create as much texture and dimension as you like. Leave this to dry thoroughly before continuing.

Step 7: Start adding your background colours. Have lots of fun and dont think about it at all!!!

Step 8: Add a little white Gesso where the face will go, again dont be careful with it, keep away from heavy lines. Add the Gesso roughly. If you add to much you can always add more colour.

Step 9: Lightly trace your 'Bailey' Stencil, use only one set of lines, either the inside, outside or a mixture of both, you dont want to draw around all of them or you will get a thick line. each choice will give you a different look.

Step 10: Use a graphite pencil to deepen the lines of your face, roughly.

Step 11: Start building up more colour to you piece, darker around the edges by adding the smallest amount of black Gesso with your finger. Next use the mango, again with your finger to start building up the features, nose round the chin and cheeks. Use the colours first then to deepen use the smallest amount of black and only if needed, as the colours mix they will give you the depth.

Step 12, 13 & 14: Continue building your layers of colour, until you are happy. Don't worry if you go through stages, when you dont like it, carry on. I went through a lot with this piece. Remember it's not finished till you decide and white Gesso is a very good friends sometimes.


My Etsy shop 'Craftascope' is now open and fully stocked, I have joined in the Cyber Weekend by adding a 20% discount on all orders over 30 pounds (or equivalent) with free postage and packing, until tomorrow, or while the stock lasts. There is a link at the top of each blog page or CLICK HERE.

I do hope you have enjoyed the Tutorial along with the finished project. Maybe try it especially if it's something you have never done before, It's always fun to try something new, It's always fun and there's never a dull moment in crafting, more inspiration to come so do pop back. Take care and Happy Crafting.xxx