Wednesday, 5 October 2016

Leonie Pujol Launch Sneak Peak

Finally, The day we have all been waiting for. Leonie will be launching a very exciting One Day Special tonight on Hochanda. I don't know about you, but it seems like such a long time since her last launch. I am sharing my launch sample tonight at launch but thought I would give you another sneak peak this morning.

I hope you all get to see the show tonight at 8 pm and throughout the day tomorrow on Hochanda. Just a short post this morning so hope you will come back later to see the finished samples. Take care and Happy Crafting.xx

Tuesday, 4 October 2016

Cold Outside

Your SEO optimized title page contents
For this card I wanted to use the distressed half of the beautiful Snowflake Centrepiece from the Snowflake Flurry collection that Bev launched on Hochanda recently. It's so beautiful as a whole but so versatile enabling you to get a variety of looks depending on how you use it. I also used one of the Bee Crafty sentiments, they are so unique and suit all sorts of cards for so many occasions too.

My card for this was 8''square, I stamped onto each of the sides of my card, being careful to position it to form a frame for the sentiment I had chosen.

For the background I used the Glitter Pens by Leonie, blending Cobalt, Arctic and Lavender from the top down. When this was dry I stamped the 'Baby It's Cold Outside'  stamp. All of the stamping was done with Black Versafine ink.

I then cut out a heart from Mountboard using on of Leonie's Mixed Media Dies, from the 'Lots of Love' set. I then coloured this with a Pebeo 4 Artist Marker in silver before stamping over the same sentiment. I carefully secured it in place with Collall 3D glue gel to blend with the sentiment underneath which finished my project.

Something exciting tomorrow night, Leonie has a brand new launch on Hochanda at 8 pm, I hope you will be watching. Thank you so much for joining me again today, I hope you like what I have shared along with the step by step. Take care and Happy Crafting.xx

Monday, 3 October 2016

Snow Baby MDF Tag

Morning, For this project I used a large MDF tag from Bee Crafty along with the wonderful Snowflake Flurry Collection that Bev launched on Hochanda last Monday. The shows are well worth watching, so if you missed any  they will be available via the Catch Up section of Hochanda's website. In addition to the Bee Crafty stamps and MDF, I used papers from the 8 x 8 paper pad from Justin and Gordon at Be Creative.

To start with I took the large tag and covered it with a sheet of paper from the Be Creative 8x8 pads, the pad I used here was 'Summer Hues', I thought it would work really well with this project along with some other designs from the same pad. I used the Christmas 'Type' stamp first. Using it in my hand, I randomly stamped around the tag, first with Chipped Sapphire Distress ink and then with Versamark and embossed it with 'Snow White' fine embossing Crystals from Be Creative.

From the same paper pad, I chose another 2 sheets, they all coordinate really well together. I cut and embossed these using 2 sizes of the 'Snowman' dies from Crafters Companion. I then inked through the dies to highlight the areas using Shaded Lilac Distress Ink.

I stamped the 'Snow' and the 'Baby' stamps using Blueprint Sketch Distress ink, masking off the words I didn't want. Before I secured the snowmen using Cosmic Shimmer glue, I stamped them using the smaller snowflakes from the border stamp. I also added some of the snowflakes around the tag to give more texture and depth. The inks I used for this were Shaded Lilac, Blueprint Sketch and Iced Spruce. I finished by adding the burgundy satin ribbon through the tag.

Thank you so much for joining me today, I hope you enjoyed the step by step I have shared with you today and the finished tag. I hope you will pop by again tomorrow. Leonie has a Brand New One Day Special launch on Wednesday  at 8 pm on Hochanda, I hope you dont miss it. Take care and Happy Crafting.xx

Sunday, 2 October 2016

Happy Christmas

What a great new launch from Bev at Bee Crafty on Hochanda last Monday. I hope you got to see her shows, however if you missed them they are still available on the Hochanda website via Catch Up. The snowflakes are really stunning, with such amazing detail and lets face it, you can never have too many snowflakes. They are wonderful for any winter cards whatever the occasion and make amazing backgrounds too.

For today's card I wanted to make a clean crisp card to show off the snowflakes and make them the focal point along with the sentiment. I started with the back, for this I used an embossing folder, I've used 'Snowflake Lattice' by Sue Wilson on crisp white card.

For the front I took the same cardstock and stamped the lovely 'Happy Christmas' sentiment using Cobalt Blue Archival. I wanted to use the small individual parts of the border from the set, so masked off with washi tape the unwanted parts before inking up with Blueprint Sketch to stamp them.

I backed the embossed card with Blue Centura Pearl card from Crafters Companion which I had gutted to use later.

I then used a die from 'Sue Wilson' to give a lovely background, this one is the Australian Background die. I used the blue card that I had gutted to go behind this and secured with Cosmic Shimmer Glue.

I used foam tape to secure the front to the embossed background. I then added a Navy satin bow to the corner before securing the whole piece to a white pearl base card.

Lastly just a little btit of exciting news, Leonie has a new One Day Special launch on Hochanda this Wednesday on Hochanda at 8pm. Thank you for joining me today, Hopefully you have enjoyed looking at the step by step I have shared and the finished card. Enjoy the rest of your weekend. Take care and Happy Crafting.xx

Saturday, 1 October 2016

Make a Wish

Morning, This is one of the projects I made for Bev's Bee Crafty launch show on Hochanda live from Alexandra Palace. I wanted to add a frame to this large MDF piece and to create and almost 3D look with real depth, like the layered glass images you sometimes see. I used the beautiful Dandelion set for this, it's such a wonderful set of stamps with such great detail.

To start with, I took a piece of cardboard and cut it to the same size as the MDF. Then using a square die I cut an aperture that would give a large enough window for the design while still keeping enough of the frame for the support needed.

Next I cut some thick wadding to the same size as the frame I had cut from the cardboard.

I coloured the back section of my MDF with Black Soot Distress Ink, the MDF has such a super smooth finish and takes inks extremely well, without any need for an undercoat. I wanted to keep the smooth surface for this piece.

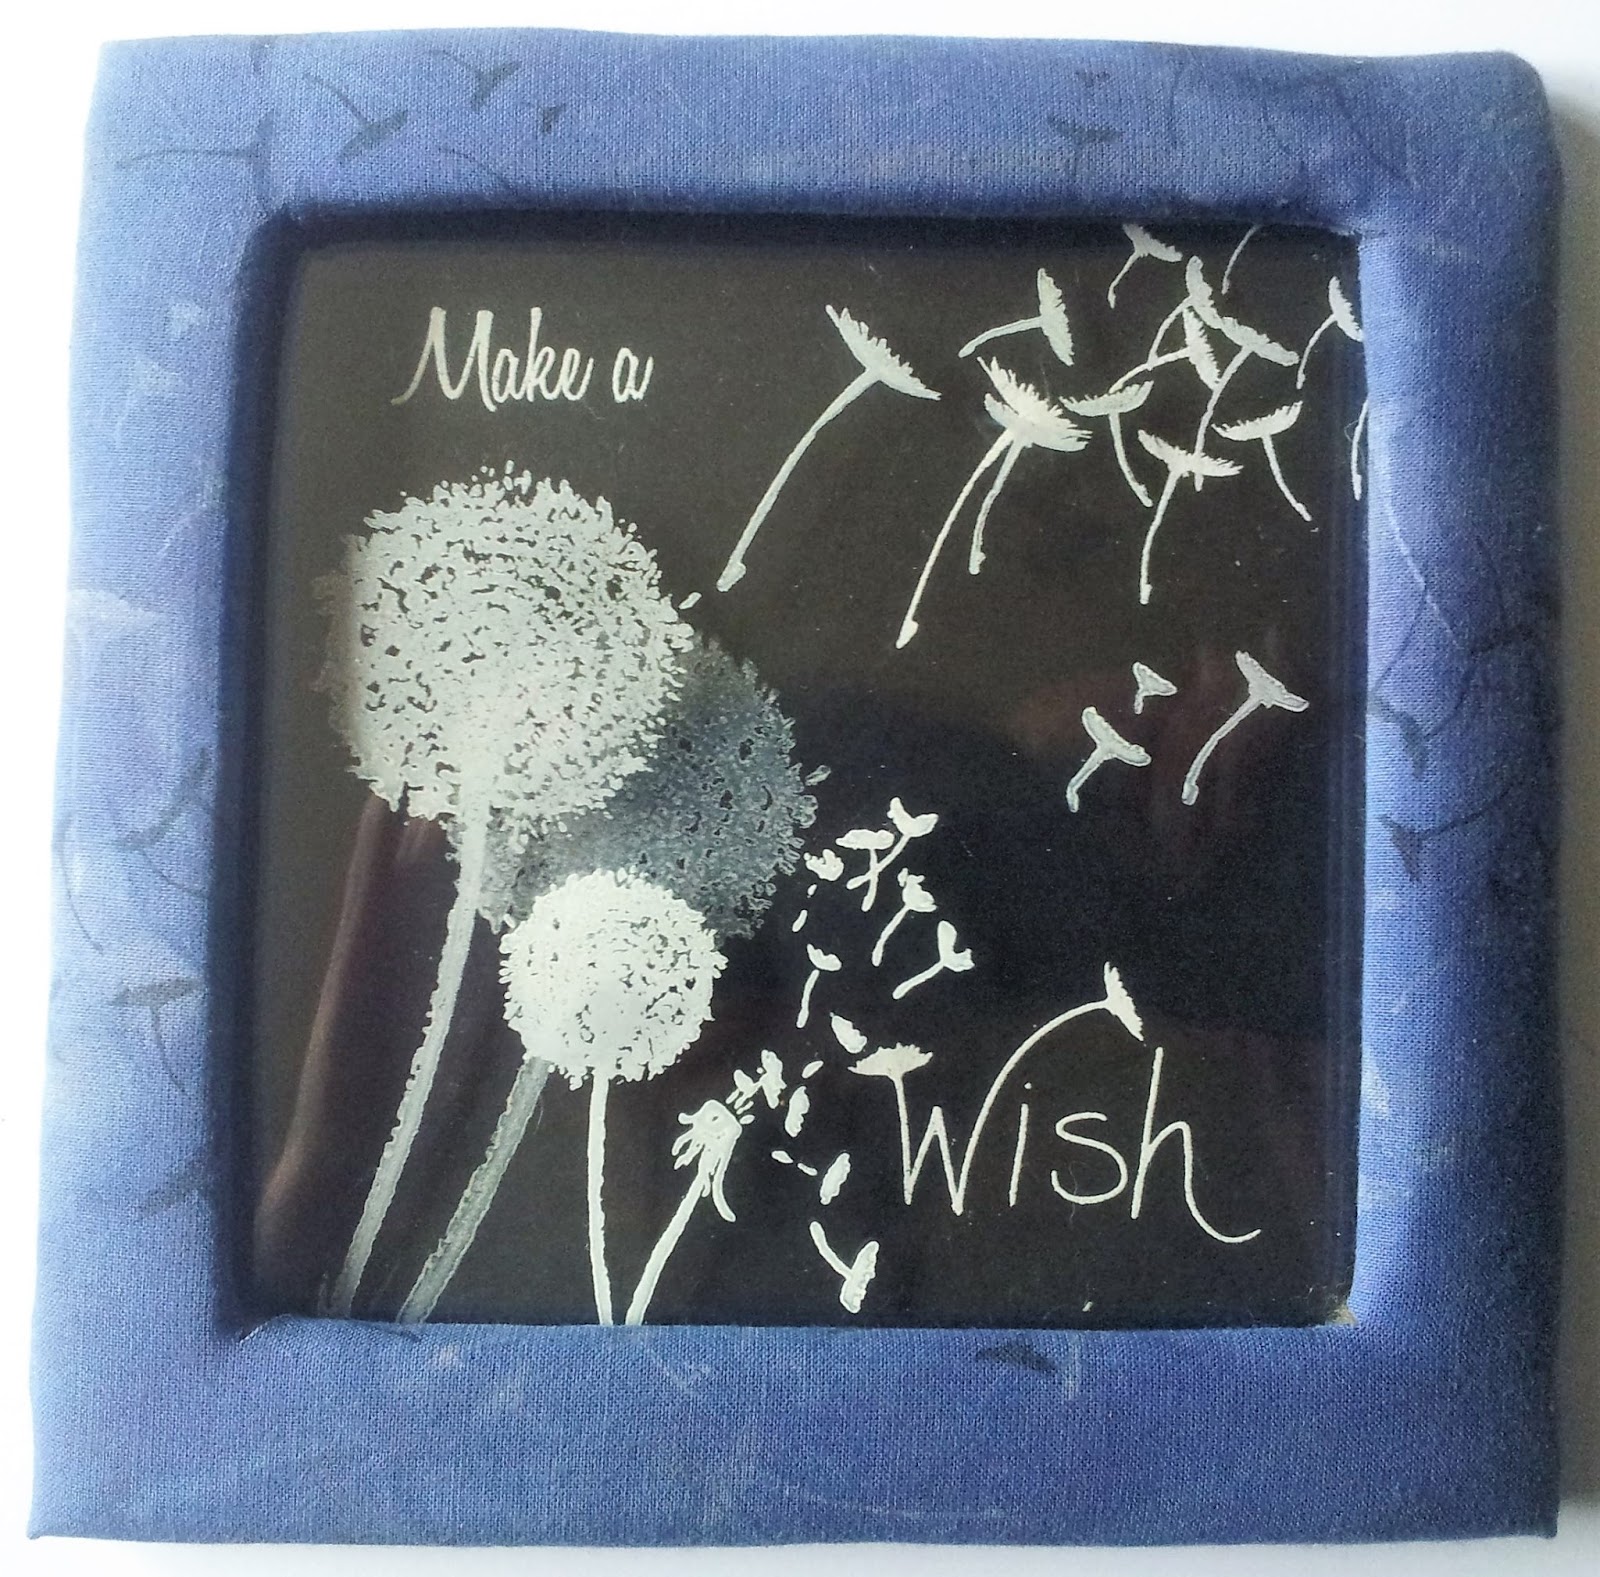
On this back section I used Versamark to stamp the Sentiment, Dandelion and Seed Heads, then embossed with White detail embossing powder, making sure that the design fitted within the frame. To add the other layers I used squares of acetate large enough to fit behind the frame. Taking the first sheet I overlaid it onto the MDF stamped image to allow me to position the next layer of stamping, for these I used white Stayzon Ink. I repeated this for my next layer. When these were both dry, I secured them in turn using foam tape to give the distance between layers.

I took a square of cream calico  and stamped the dandelion seed heads around the area where the frame would be. I stamped them in both Black Versafine Ink and Versamark to act as a resist. Then I dyed the fabric using a blue denim fabric dye.

Once dry, I cut the centre so I could cover the frame.

I stretched and secured around the inner frame using Cosmic Shimmer glue. Because of the tab at the bottom I just folded this edge and secured above the tab. The other 3 sides were secured with Wonder Tape and Cosmic Shimmer glue.

I covered the base/stand with the same fabric I had used for the frame and cut out the slit.

To finish I secured the frame to my base with Cosmic Shimmer glue.

I hope you like this project and the step by step I have shared with you today, I thoroughly enjoyed making it and sad that I had to send it for the show. Hope to see you again tomorrow, Take care and Happy Crafting.xx

Friday, 30 September 2016

Pop Goes The Teasel.

Morning, Another beautiful day, I always like September here in Bulgaria when the weather turns cooler, it's always so pleasant to be able to have a drink outside without cooking. Today I am sharing a project I made using the wonderful MDF set that Bev from Bee Crafty launched on Hochanda 'Live' from Alexandra Palace. I do hope you managed to get hold of them, they were so popular that they sold out twice during the show.

After coating my card with Acrylic Paint, (here I used Vanilla from Pebeo). I sprinkled purple Brusho's over the surface and dragged over the surface with a painting knife. 

I then decided to add some subtle colour down the mid section, so I sprinkled some Orange Brusho's onto the acrylic paint I had on my mat, placed the card face down onto it to transfer some of the colour.

When this was dry I stamped the 'Teasel' using Royal Purple Versafine. I then used Blue Lagoon to Stamp my sentiment and Birds.

To finish this project I secured it onto my MDF with Cosmic Shimmer glue from Creative Expressions and painted the base with Grandma's Teacup Acrylic paint from Indigo Blu and assembled.

I am so pleased that you have visited today. I hope you have enjoyed me step by step and the finished piece. I hope to see you very soon. Take care and Happy Crafting.xx

Thursday, 29 September 2016

Clock Works

Morning, I thought it best to share this with you as a separate project. I actually used it for the back of the Dandelion  clock that I shared yesterday as the working arrived damaged and wanted to make the most of the MDF surface. The MDF was launched on Hochanda by Bev from Bee Crafty, during the show from Alexandra Palace, It was so popular and sold out (twice) incredibly quickly during the show. I have to say the quality is excellent, with such a smooth surface to work on, I didn't even need to prime it for this.

To start this project I used a clock/cog stencil. I smoothed Decoart Sand Texture Paste through it and removed the mask. While it was till wet I secured an old watch part to it using Collall 3D glue gel. The I linked some wooden cogs from Indigo Blu and secured them with Cosmic Shimmer Glue.

Once this was dry, I painted it all over with acrylic paint, the one I chose was 'Sleeping Beauty' from Indigo Blu. It is a beautiful metallic colour and gives a marvellous sheen. I set this aside to dry completely.

On my glass mat I put a small amount of Townhouse Teal acrylic paint and separately another amount of Grandmas Teacup, both of these colours are from the English Cottage Acrylic paint collection from Indigo Blu. To both of these I mixed some Kroma Crackle thoroughly  before randomly applying to my project

I left this for the rest of the day and overnight to dry thoroughly and crack before applying gilding wax, I used Pebeo Silver and Empire Gold to highlight some areas. To finish, I secured it to the base.

It's such a great piece of MDF, I am almost pleased that the clockworks were damaged to allow me to decorate the back as well. Thank you for taking the time to visit today, I hope you have enjoyed the step by step I have shared and the finished piece. Would be great to have your comments. Hope to see you soon, Take care and Happy Crafting.xx