Showing posts with label gesso. Show all posts

Thursday, 18 July 2019

Copper Tree

Hi Everyone. Today I am sharing a little piece of home decor, that I made with the Retro Leaves dies from the Craftascope Retro Collection. I brought it to Hochanda last month for a One Day Special. I have a full tutorial and lots of additional photos for you today, I hope you enjoy it. There's also a little 'Thank You' Gift for you all from me for your amazing support. It's made me so happy, I can't quite believe it, A little overwhelming, but I am so touched, I really am, it means an awful lot to me so Thank you. xx

You will Need:

Leonie Pujol Creativity Stamp
Pebeo Metallic Copper Marker
Florists Wire
Copper Wire
Old Drinks Cans
Craft copper Metal
White Gesso
Distress Inks Mowed Lawn & Mermaid Lagoon
Heat Gun
Blow Torch
Large Board or Canvas

Step 1:  Use the metallic marker to colour the florist wire and set aside to dry.

Step 2: On a small piece of copper sheet and stamp the creativity stamp using the black Stayzon.

Step 3: Paint you board with the white Gesso.

Step 4: Mix some of the white Gesso with a little distress ink to add colour to the sky, then repeat with the green for the grass.

Step 5: Take about 10-12 lengths of copper wire, Tightly wrap another length around the branch.

Step 6: Continue wrapping the wire, after about 5 inches, start to split into branches to form a tree.

Step 7: Cut a selection of the leaves, use a blow torch to heat some of them gently, this gives wonderful colours to the metal. Leave some of them plain, then  emboss some of them as well.


Step 8: Wire them onto the florists wire with a hot glue gun.

Step 9: Make some holes in your backing board. Position the tree onto the board, thread wire through from the front and secure at the back of the piece.

Step 10: Position you leaves, once you are happy, wrap a little of the wire around and secure with 3D Glue Gel or a hot glue gun.

This makes a great piece of home decor and would look great on the wall, obviously you wouldn't have to make it this size, a smaller one would be just as stunning.

As a thank you for all of your support here is a 20% discount code  (THANKS20) to use on my Etsy Store for any purchase over 20 pounds, the link to the store is at the top of the page. It was so nice to find out that I have been nominated for the Crafts Beautiful 'Best Of' Craft Awards this year. I was totally speechless when they contacted me. I have to admit that I thought it was a joke at first, after that I have to say there were some tears of joy, so I thought it would be nice to share the joy with you all. I am so touched and it means a great deal to me. Take care and Happy Crafting.xx


Monday, 1 October 2018

Butterfly

Morning Friends and Crafters, I am sharing one of the cards I made for the launch of the Spectrum Noir Metallic Markers on Hochanda. I have kept the card fairly simple using the markers to colour the butterfly. Just take a look at just how well the markers stamp, I used them to stamp the sentiment.

You Will Need:
Spectrum Noir Metallic Markers (Antique Elements)
A Butterfly From the Sheena Collection
Sentiment from 'A little Bit Scenic' ''Flying Colours'
Dandelion Stamp
Black and White Embossing Powder
Anti Static Bag
Versamark Ink Pad
White Gesso
Centura Pearl Purple (Darks Collection)
Black Card Base
Black Card

Step 1: Wipe over your card with an Anti Static Bag.

Step 2: Stamp the butterfly and the dandelion clock with Versamark ink. Cover the Butterfly with Black Powder and the dandelion with the White. Then heat to melt the embossing powder.

Step 3: Colour the Butterfly with Antique Pearl and Vintage Satin Metallic Markers.

Step 4: Mask the butterfly, Then add a very small amount of water to some white Gesso, add quite a lot of fine white splats, I find the easiest way is to use a fan brush.

Step 5: Mount a piece of the purple Centura Pearl onto your Black Card Base, Stamp your sentiment onto a piece of black card with the Rose Gold Metallic Marker, mount onto a piece of purple.

Step 6; Secure your finished image to the base using Tacky glue.

Step 7: Add your layered sentiment onto the card with 3D Glue Gel.

Here is the finished card: Another thing, here is a 30% off voucher to use on your first order from Hochanda, use code FEY5JBP7.

Thank you ever so much for joining me again today, it's been great having the company. I hope you have enjoyed the tutorial along with the finished card. Please do pop by again very soon as I always have something to share with you. For now Take care and Happy Crafting.xxx

Tuesday, 2 August 2016

Ghetto Rat Wall Hanging

Morning Today I would like to share a wall hanging project that I made using the New Banksy XL stamps that Bev launched on Hochanda recently. They really are excellent stamps and the detail is superb. 

I stamped Ghetto Rat onto tissue paper to start with, using a 'Blue Lagoon' Versafine ink pad.

The substrate I used was a watercolour board, measuring approximately 5 x 7''.

To add texture and interest I added some white gesso to my canvas using a palette knife.


Whilst this was still wet I placed the stamped tissue paper into place on my board. I then sprinkled on some Prussian Blue Brusho in different areas and spritzed with water to achieve the look I wanted.

Thank you so much for taking the time to visit today. I really hope you have enjoyed this step by step and the wall hanging I have created. I hope you will visit again very soon, more from Leonie's new Launch tomorrow. Take care and Happy Crafting.xx

Thursday, 23 June 2016

Abstract Wooden Wall Hanging

Morning, Today's project is using the New Stamp Collection from Leonie, That was launched on Hochanda on June 8th. They are wonderful stamps and suit so many styles. They also mix really well with all of the other goodies from Leonie's range as well as others. 


I created this with a piece of reclaimed timber, It had some lovely markings on it, as well as some really wonderful blue tones which was just what I wanted. It had to be sanded quite a lot to smooth all the edges and enhance the shape. It still retained some of the blue which would look rather like sky. I added some white gesso to the areas where the flower and stem would be to help the stamp show through.

I stamped the large flower onto tissue paper and then manipulated one of the word strips to form the stem and stamped onto the paper. Then stuck this to the wood using Matt Gel Medium.

Whilst this was drying, I tore some paper and a page from an old dictionary and stamped these using some other border stamps from the collection and the distressed sentiment circle stamp. I then adhered these to my project using the Matt Gel Medium.

On a small square of glass, I scribbled where I wanted the colour to be with a Pebeo Paint pen and glued into position over the flower.


This is a very different project and I hope you have enjoyed seeing it. It's such a shame that the picture doesn't do it justice. It would look lovely on a chain hung in a hallway. Thank you so much for taking the time to visit today, I hope you will pop by again very soon. Take care xxx

Sunday, 15 May 2016

Decoupaged Ink Pad Holder

Morning, I have to admit that I am hopelessly addicted to Graphic 45. It started a few years ago and I have a lovely selection. But the biggest pitfall is that I am loathed to used it. Like a lot of crafters out there, I do like to look at it every now and again.


After assembling my MDF project, I decided to use a selection from the Le Cirque Collection, here a variety from the borders and tags. I did get a few of them so I don't think they will be missed too much.


Firstly I gave two coats of black Gesso, leaving the first coat to dry in between. Normally I would have given just the one coat, but because the unit will be in use most days I wanted it to be hard-wearing.


I popped out the tags and borders from the sheets and removed any pips remaining. Then using Tacky glue, which I had let down with a little water I applied my decoration. Wherever possible trying not to overlap, where pieces joined I used my nail to mark and trim. In some areas I decoupaged the figures to add a little more interest. I trimmed around the edges and finished with a sanding block.


I left this to dry overnight and then applied  a coat of Vintage Crackle Basecoat (Tonic) in one direction. When this was completely dry I applied another coat in the opposite direction. When this had dried, I applied a coat of Crackle Top Coat and again left overnight.


The effect was great, but to make it more obvious I used brown shoe polish and a soft cloth to rub it into the cracks.Hopefully you can see from the photos. I didn't seal the project as I think the crackle medium and polish were sufficient.


Thank you so much for popping by and looking at this project.


I do love reading your comments and try to answer everyone of them if possible. I am so happy that you are enjoying my blog and what I share on here.

I am thinking of  adding a little about life here and stuff like that, maybe once a week. What do you think?


Monday, 9 May 2016

Time Collides Mixed Media Project

Morning,This is another project that I am very excited to share. Mixed Media is something that I have always wanted to try, but didn't quite have the confidence to do. It was only after watching Let Leonie Loose on Hochanda, that I finally made the decision to have a go.


Well, that was way back in March, Since then I have been collecting and making things to use and include. So here goes, My first try along with a step by step of how I went about it.

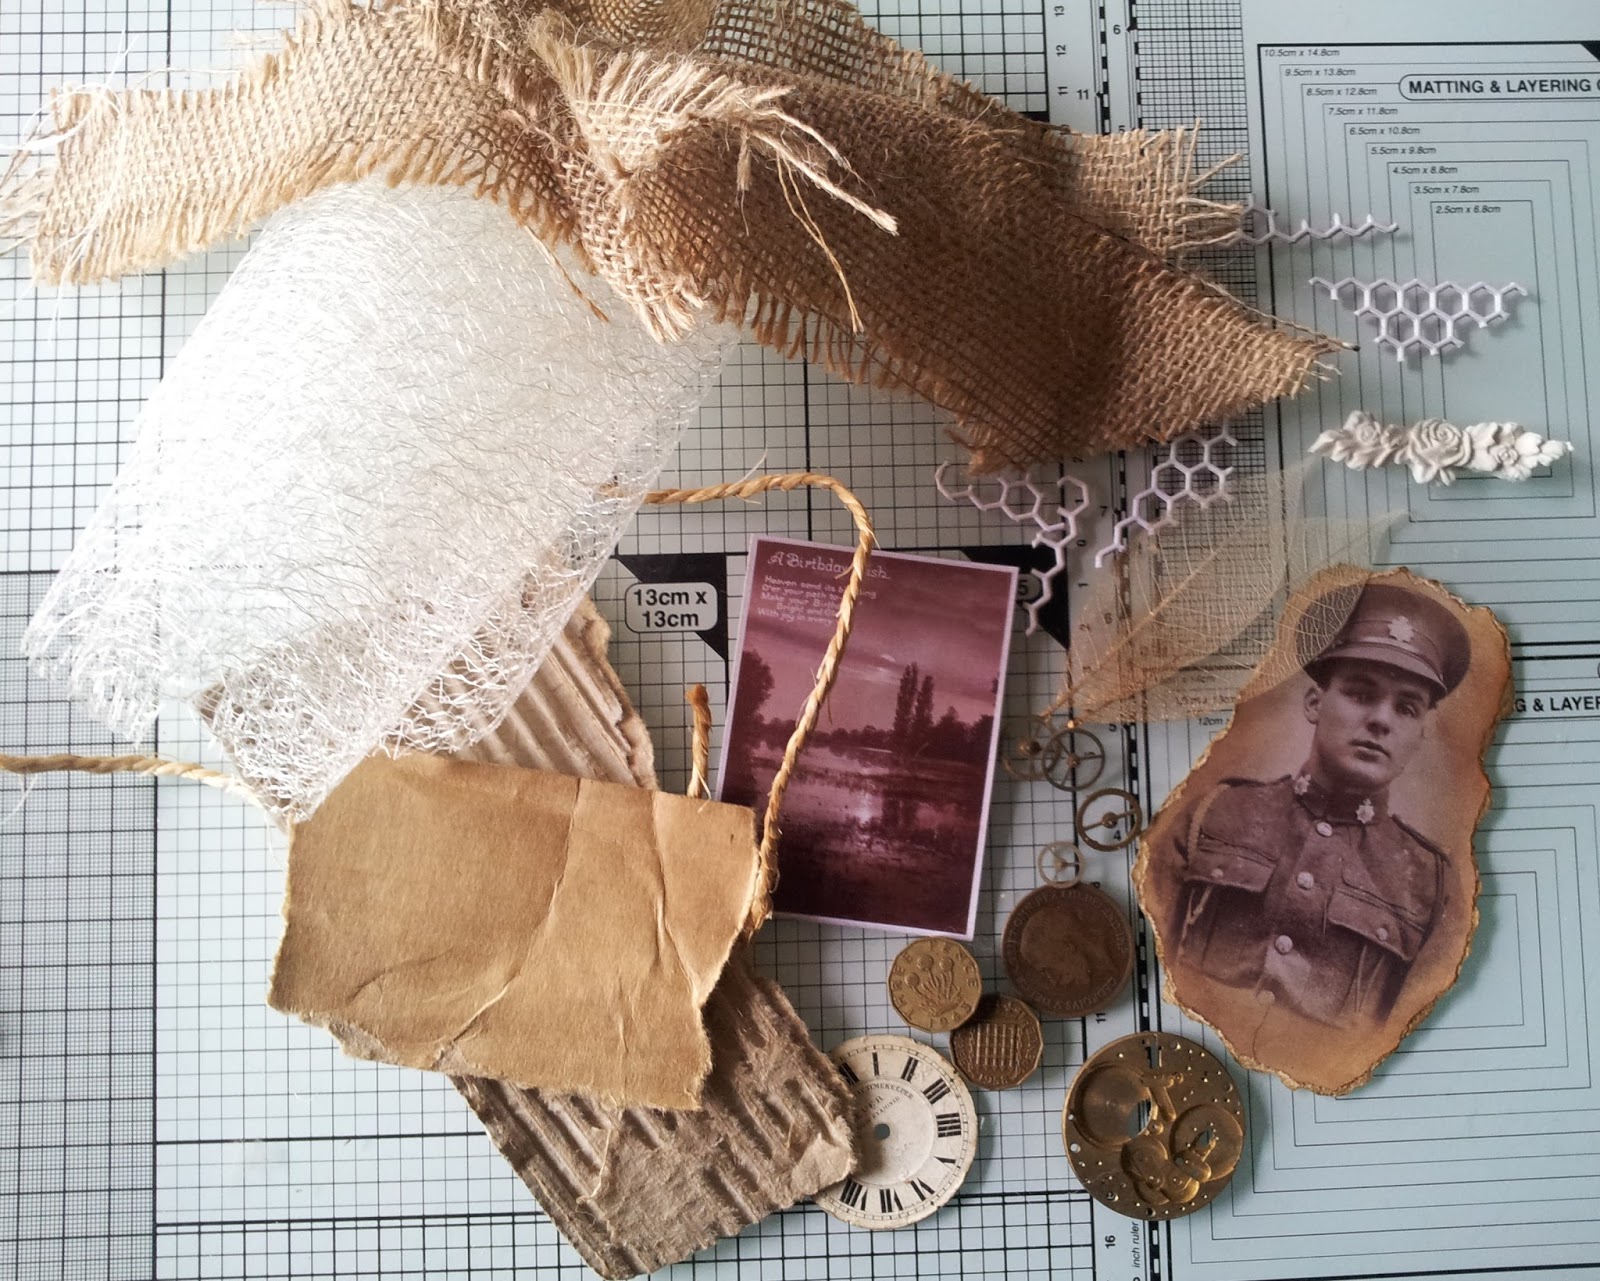
I started by getting all of the items together along with my board.


Taking a Clarity Stamp 7x7 stencil and some white texture paste (I coloured it so it's easier for you to see on screen). I spread this through the stencil and left it to completely dry.

Then I positioned the items. This is the bit that takes quite a lot of time and thought, working out what you want and you would like your finished project to look.. I would definitely suggest taking a photo when you are happy with your arrangement to refer to when securing them to your board.

Here are close up photos of a couple of areas on my project.


Using mainly Cosmic Shimmer Glue but a little 3D glue gel I assembled my piece. When this was dry I painted the whole project with Black Gesso, I had to make it different. When this was dry, I added a second coat of Gesso. It was quite surprising to see what I had missed. Leave this to dry overnight.

The rose, photo and stencils were to be my main focus, so I decided to leave the rest of the background black. I used Red Bauble Iridescent watercolour paint by Creative Expressions for the roses. For the Hessian,cardboard and surrounding area I used Purple Mist and Mediterranean Blue Gilding Polish, again by Creative Expressions.

Lastly I added highlights throughout my project with Pebeo Gilding wax in 3 colours: Silver, Empire Gold and Renaissance Gold from Crafters Companion. When this was dry, I polished the wax to a shine.

I thoroughly enjoyed making my first mixed media project, I will definitely be making more in the future. Thank you so much for stopping by, I really hope you are liking the projects I share. I really appreciate your comments, they mean a lot to me and keep me going too. Take care xx 

 I am going to enter this into the Country View Crafts monthly Challenge, this month it's 'Use a Stencil'