This is a project I was really excited about so I am really pleased to be sharing it with you today. The base is made from the large 8' circle MDF that Bev from Bee Crafty launched at Alexandra Palace live on Hochanda. I used the dandelion set of stamps, it's a really wonderful set and I am sure I will be using them in a lot of different project, I am sure you will too.
To start with I took a sheet of tissue paper, slightly bigger than the MDF and stamped the dandelion seeds with Versamark to act as a resist. I wanted to get as many layers as possible to add interest to the finished piece.
Having spritzed the tissue thoroughly I sprinkled Brusho's over the surface, I used Emerald Green and Cobalt Blue.
I then saturated the tissue with water to blend and make pools of colour, then put it outside in the sun to dry.
I took my clock stencil and drew around it onto copier paper, cut out and set aside. I would use this later to protect the work, it makes it a lot easier.
Next I mixed some white Gesso with a coupe of teaspoons of plaster, I find this gives a much nicer surface for stamping onto than Gesso on it's own and the results are much nicer. I painted this onto the base and left to dry.
Using Black Versamark, I stamped some of the dandelions and seed heads from the collection onto the MDF base.
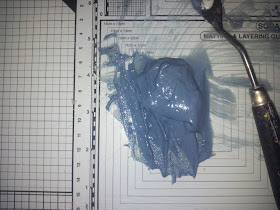
I left this to dry before applying the tissue to the base using Cosmic Shimmer Matt Glue, Seal & Glaze from Creative Expressions. When this had dried overnight, I stamped more dandelions on top using Versamark and embossed with white fine detail powder to add another layer. Next I took some Decoart sand Texture Paste and coloured it using some black Brusho's
I left this to dry before applying the tissue to the base using Cosmic Shimmer Matt Glue, Seal & Glaze from Creative Expressions. When this had dried overnight, I stamped more dandelions on top using Versamark and embossed with white fine detail powder to add another layer. Next I took some Decoart sand Texture Paste and coloured it using some black Brusho's
I placed my clock stencil in place and then added my copier paper to protect the other areas. Using a painting knife I spread the Sand Texture Paste onto my project and removed the stencil and paper.
I added my sentiment using Black Versafine and added some Pebeo Gilding wax to the clock and edges.
To finish I added the clock hands and my project was finished.
Thank you for visiting today, I hope you have enjoyed this step by step and like the finished article. Hope to see you again soon. Take care and Happy Crafting.xx


A gorgeous clock,love these colours that you have used for it.
ReplyDeleteThank you for sharing. Nicola x
absolutely brilliant Nick
ReplyDelete